AWS’ Relational Database Service (RDS) is a superior alternative to running MySQL locally on your Open edX platform. This simple how-to guide shows you how to migrate the service.

Summary
If you’re looking for a general overview of how to scale the Open edX platform then you should read this first, “Scaling Open edX“. Also, bear in mind that this article presents a luxury alternative to the best practice that I outline in my article, “Scaling MySQL for Open edX” which you should definitely read if you haven’t already done so.
AWS provides an excellent managed relational database service named RDS that provides extremely high up-time and also takes care of all Linux and MySQL database administration activities for you. It costs roughly double the alternative of hosting your own Ubuntu EC2 instance with the MySQL service installed, but it’s a great alternative if you can afford it. Aside from taking care of all data backups and server snapshots for you, which is a true luxury, it also provides you with a console where you can dial up processing capacity literally with the click of a button. But having said all of that, very few of my clients actually use AWS RDS because MySQL for Open edX tends to be a low-maintenance service once it’s been migrated to a standalone server. But, if you can afford RDS you definitely will not be disappointed with it.
There are a couple of technical challenges to creating a MySQL database environment from scratch for use with Open edX. First, you’ll need to restore a backup of the “mysql” database in the existing local MySQL service of your Open edX platform. This database contains the usernames, passwords and permissions for the many MySQL accounts that are created by the Open edX native installation process. I provide exact instructions below on how to do this. And second, once migrated, you might need to upgrade this database depending on the precise MySQL version and release that runs on AWS’ RDS service. The exact nature and complexity of this upgrade(s) can vary depending on the version that is currently running on your existing Open edX platform, the version on your new AWS RDS service, and the number of major MySQL releases in between these two. However, beyond those two issues this article looks quite similar to my other article on migrating MySQL.
Regarding horizontal Vs vertical scaling strategies: note that you probably only need to focus on vertical scaling for MySQL on Open edX. Even though MySQL implements a publisher-subscriber model, I’ve found this to be complete overkill for all edX platforms on which I’ve ever worked. You can reasonably begin to scale MySQL using AWS’s default RDS service as further described below, increasing the processing capacity over time as-needed.
Note that OpenCraft also provides technical instructions for this operation in their Open edX Deployment ReadTheDocs pages.
AWS RDS Migration Procedure
- Snapshot Your Open edX Instance
- Backup the MySQL databases on your Open edX Instance
- Create a New AWS RDS instance of MySQL Server
- Restore your Open edX databases to the New RDS Instance
- Reconfigure Open edX
- Test The Migration
- Disable the Local MySQL Service and Data Backup
- Reconfigure MySQL Data Backup
I. Snapshot Your Open edX Server
1. Create an AMI from your Open edX instance
Follow the instructions in the AWS official documentation to create a clone (aka an “Amazon Machine Image, AMI”) of your existing Open edX instance, “Create an AMI from an Amazon EC2 Instance“. Keep in mind that you’re going to initialize your MySQL database from this AMI, so you need to ensure that no learners are interacting with your Open edX instance during the time that are migrating your MySQL data. You should conservatively estimate a 4-hour maintenance window for this activity. I generally perform this work during off hours.
II. Backup Your Existing Open edX MySQL Databases
IMPORTANT! Configure Your MySQL User Accounts To Allow Remote MySQL Connections
Prior to backing up your databases you first need to reconfigure the MySQL user accounts to allow remote connections. Otherwise, you’ll be unable to login to your new AWS RDS instance after migrating your databases. To allow your Open edX instance to be able to connect to the new RDS MySQL service remotely via port 3306 you’ll need to enable remote connections on the local mysql service on your Open edX server. The native installation limits the scope/visibility of all MySQL users to ‘localhost’, and so you’ll need to update the database table mysql.user to expand the allowed hosts from ‘localhosts’ to ‘%’ (which means ‘any’ host).
# Note: beginning with Koa, the root mysql password is preset
# and as of this writing i have not located where this password is set. As a workaround,
# you can alternatively use the command
#            mysql -u admin -p
# where the password value for 'admin' is stored in /home/ubuntu/my-passwords.yml
# under the yml key tag, "COMMON_MYSQL_ADMIN_PASS" on or around row 22.
mysql -u root -p
mysql> UPDATE mysql.user SET host = '%';
mysql> FLUSH PRIVILEGES;

# NOTE: (February 2021) I had an isolated case where I lost all of the
# user-level permissions after running this UPDATE query. If this happens
# then you have two choices:
# a.) use the mysql command line in your original EC2 instance to generate
#     a script of the user-level permissions, or
# b.) start the entire process from the beginning, and then use a tool like
#     MySQL Workbench (https://www.mysql.com/products/workbench/) to
#     manually update the host setting for each user.
# results should look like the following:
mysql> select host, user from mysql.user;
+------+------------------+
| host | user             |
+------+------------------+
| %    | admin            |
| %    | api001           |
| %    | debian-sys-maint |
| %    | discov001        |
| %    | ecomm001         |
| %    | edxapp001        |
| %    | edxapp_cmsh001   |
| %    | migrate          |
| %    | read_only        |
| %    | reports001       |
| %    | root             |
| %    | rosencrantz      |
| %    | xqueue001        |
+------+------------------+
13 rows in set (0.01 sec)
mysql> exit
More detailed instructions are available here, “MySQL: How to allow remote connection to mysql”
Create The Backup File
My blog article, “Open edX Complete Backup Solution“, explains most of what you need. Additionally however, you’ll need to include the “mysql” system database in your backup file. The “mysql” database contains the the user records and permissions for the many MySQL users that Open edX creates during the native installation process. You can accomplish this by making a minor edit to one line of the bash script that I provide here, https://github.com/lpm0073/edx.scripts/blob/master/edx.backup.sh, as follows.
# Find this line on or around row 62
mysql -uadmin -p"$MYSQL_PWD" -ANe "SELECT schema_name FROM information_schema.schemata WHERE schema_name NOT IN ('mysql','sys','information_schema','performance_schema')" > /tmp/db.txt

# Remove mysql from the list of excluded databases, as follows.
mysql -uadmin -p"$MYSQL_PWD" -ANe "SELECT schema_name FROM information_schema.schemata WHERE schema_name NOT IN ('sys','information_schema','performance_schema')" > /tmp/db.txt
This minor edit to the bash script has the effect of causing your “mysql” system database, along with all mysql users, passwords and permissions to be included in your backup file.
III. Create A New AWS RDS Instance of MySQL
1. Launch a new AWS RDS Instance from the AWS Console
First, check the distribution and version of the mysql service that is running locally on your Open edX instance by issuing the following command
mysql --version
mysql  Ver 14.14 Distrib 5.6.32, for debian-linux-gnu (x86_64) using  EditLine wrapper
In this example, the value “5.6.32” is the most important piece of information. Ideally, you’ll create an AWS RDS instance that exactly matches this version number but if that isn’t possible then get as close as you can, selecting a version that is equal to or greater than the version installed locally on your Open edX instance. In my example case above the best I could do was version 5.6.34

2. Important: Create a new EC2 Security Group for MySQL
You should create a separate EC2 Security Group for your new AWS RDS MySQL instance, as follows:
This firewall configuration limits remote access of the server to MySQL, regardless of whatever other services might still be installed and running internally on the server. Note that on the first row, SSH, you should try to limit access to your bastion server, if you use one.
Other AWS RDS Settings
I’m going to skip past other settings, but, I will share a few observations with you. First and most importantly, you probably do not need anything greater than t2.medium (2-CPU, 4Gb RAM) in terms of underlying processing power for your AWS RDS instance. Open edX runs on Django, and most of the queries that Django generates rely on a primary key and are therefore highly efficient. There is very little in the way of SQL aggregation queries in Open edX applications. Therefore, the mysql service itself requires minimal processing power. Second, You can mostly follow the suggested defaults for other settings with the one exception of “Availability” — you probably do not need a redundant instance operating in a different data center. This doubles your cost, and you’ll probably never need it.
3. Take Note of The AWS RDS Instance Host Name That Was Automatically Created
You’ll access your new AWS RDS MySQL service via the hostname, which is automatically assigned by AWS when you create the new RDS instance. Take note of this value, which will be titled, “Endpoint”

IV. Restore Your Databases To Your New AWS RDS Instance
Test Remote Connectivity to AWS RDS
You can use this step to test connectivity from your Open edX Ubuntu instance to your new AWS RDS instance. From a terminal window, you should be able to establish a mysql client connection to your new AWS RDS instance using commands of the following form:
# execute this in the SSH terminal window of your Open edX instance,
# substituting “xxxxxxx.us-west-2.rds.amazonaws.com” with the host name of your new RDS MySQL service.
mysql -h xxxxxxx.us-west-2.rds.amazonaws.com -u root -p
If you can login then you have successfully confirmed that your new AWS RDS is up and running, and that it is accessible remotely using your root MySQL account and password. Woo hoo!!!!
Restore Your MySQL Databases to AWS RDS
If you followed the guidelines in my article, “Open edX Complete Backup Solution” then you’ll find your MySQL backup data in the Ubuntu folder, ~/backups with filenames similar to the following:

The commands to restore all of your MySQL data from one of these backup files takes the form:
tar xvzf openedx-mysql-20210128T080001.tgz
mysql -h xxxxxxxx.us-west-2.rds.amazonaws.com -u root -p < openedx-mysql-20210128T080001.sql
You’ll find more detailed instructions in this article, “Restore Open edX From a Backup”
Verify the “mysql” Database and AWS RDS MySQL Service Startup Configuration
Noting that you just replaced the original AWS RDS mysql database with that from the local service on your Open edX instance, you might have to deal with a couple of low-level mysql service issues depending on how your AWS RDS instance launches. You should establish a base case of the expected mysql service startup behavior by restarting the local mysql service on your Open edX instance:
sudo service mysql restart
sudo service mysql status

# Note that you can see additional log information by tailing the mysql log
sudo tail -n 50 /var/log/mysql/error.log
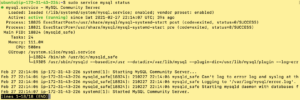
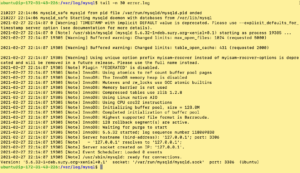
Here are examples of your expected output:


Now, do the same on your AWS RDS instance: restart the service, and then review the logs. If you see error messages then keep reading in this section.
Trouble Shooting mysql service startup on AWS RDS:
The local mysql service on Open edX uses a system account to execute scheduled maintenance scripts and to run occasional auto-update scripts. You should take note of the username and password for this system user, which you’ll find referenced in the mysql service configuration files on your Open edX instance located in /etc/mysql/debian.cnf. Here’s an example of the file contents:
# Automatically generated for Debian scripts. DO NOT TOUCH!
[client]
host     = localhost
user     = debian-sys-maint
password = z9m7rQwS0WtvB5n9
socket   = /var/run/mysqld/mysqld.sock
[mysql_upgrade]
host     = localhost
user     = debian-sys-maint
password = z9m7rQwS0WtvB5n9
socket   = /var/run/mysqld/mysqld.sock
basedir  = /usr
You MIGHT need to modify the password of this user on your AWS RDS instance.
It is very important the mysql service on AWS RDS starts up without errors. Keep in mind that it is possible for startup errors to exist even though the service ultimately does startup successfully, and that your Open edX platform appears to work as expected. You STILL need to resolve any mysql service startup errors that you encounter in the logs in AWS RDS.
V. Reconfigure Open edX to Connect to Your Remote MySQL Server
To identify which yml files require modification you can use the Linux command, ‘grep’ to search for the Linux port number corresponding to the service you are scaling. For example, MySQL is assigned to Linux port number 3306, thus we can execute the the following command to identify all Open edX configuration files that contain MySQL configuration parameters:
sudo grep -rn '3306' /edx/etc/
We can see that in total there are seven yml files containing MySQL configuration parameters, and furthermore that some of these yml files contain multiple references to MySQL, as follows:
/edx/etc/insights.yml:26:        PORT: 3306
/edx/etc/discovery.yml:26:        PORT: 3306
/edx/etc/discovery.yml:38:        PORT: 3306
/edx/etc/lms.yml:209:        PORT: '3306'
/edx/etc/lms.yml:218:        PORT: '3306'
/edx/etc/lms.yml:227:        PORT: '3306'
/edx/etc/studio.yml:167:        PORT: '3306'
/edx/etc/studio.yml:176:        PORT: '3306'
/edx/etc/studio.yml:185:        PORT: '3306'
/edx/etc/xqueue.yml:16:        PORT: '3306'
/edx/etc/analytics_api.yml:24:        PORT: '3306'
/edx/etc/analytics_api.yml:34:        PORT: '3306'
/edx/etc/ecommerce.yml:36:        PORT: 3306
For example, the MySQL configuration for lms.yml looks like the following:
DATABASES:
    default:
        ATOMIC_REQUESTS: true
        CONN_MAX_AGE: 0
        ENGINE: django.db.backends.mysql
        HOST: localhost
        NAME: edxapp
        OPTIONS: {}
        PASSWORD: vU2MEmYcj7cSp79hZGUCWav6FbQT3W1v6kS
        PORT: '3306'
        USER: edxapp001
    read_replica:
        CONN_MAX_AGE: 0
        ENGINE: django.db.backends.mysql
        HOST: localhost
        NAME: edxapp
        OPTIONS: {}
        PASSWORD: vU2MEmYcj7cSp79hZGUCWav6FbQT3W1v6kS
        PORT: '3306'
        USER: edxapp001
    student_module_history:
        CONN_MAX_AGE: 0
        ENGINE: django.db.backends.mysql
        HOST: localhost
        NAME: edxapp_csmh
        OPTIONS: {}
        PASSWORD: igSQb0Wxfrnf6FYXso9NuEfj9y7eNgtzpOK
        PORT: '3306'
        USER: edxapp_cmsh001
To reconfigure the LMS to use a remote MySQL server we would modify the ‘HOST’ parameter from ‘localhost’ to the Internal IP address of the newly-created remote MySQL server. Note that we MUST address remote servers using internal IP addresses because otherwise our network traffic would leave and re-enter our Virtual Private Cloud which would not only be inefficient from a performance point of view but also insecure.
Do a full reboot of your Ubuntu server when you finish.
sudo reboot
Ok, that’s it for MySQL. If you can login to your Open edX instance as a normal user, and also login to the Django admin console then your migration was successful.
VI. Test Your Open edX Platform
Testing your platform is easier than it might seem.
- If you can login to the LMS then the remote mysql service is correctly configured for this application.
- If you can navigate to the Course Management Studio, and you can see the course list on the home page then the remote mysql service is correctly configured for this application.
- If you can see course cards in the “Explore New Courses” page of the LMS then the remote mysql service is correctly configured for the Discovery service.
- If you can navigate to Course Management Studio and browse the course list on the home page then the mysql service is correctly configured for this application
- If you use the E-commerce service and you can browse the page https://[yourdomain.com]:18130/courses/ then the remote mysql service is correctly configured for this subsystem.
VII. Disable the Local MySQL Service and Data Backup
On the original Open edX we’re only going to shut down the mysql service and prevent it from launching after reboots. We’ll leave the system files and the legacy data in place since these (probably) do not consume significant file system storage space.
# Execute these commands on your Open edX instance.
# terminate the mysql service.
sudo service mysql stop
# prevent mysql from automatically starting after reboot.
sudo systemctl disable mysql
# reboot the server
sudo reboot
If you have a cron job for scheduled data backups then disable this on your Open edX instance via the following command.
cron -e
Run the following command if you’re curious and want to know the exact size of the legacy mysql data files that remain on your Open edX instance
sudo du -sh /var/lib/mysql
VIII. Disable Local MySQL Data Backup
If you followed my blog post, “Open edX Complete Backup Solution“, then the only thing you’ll have to do is edit the bash script edx.backup.sh to remove the MongoDB backup. The AWS CLI should work on your new remote MySQL server, assuming that you’d configured this for remote backups to AWS S3 on your original Open edX platform.


Leave A Comment