Learn how to scale your Open edX platform by migrating the Memcached service to its own remote Ubuntu server running on AWS EC2.

Summary
If you’re looking for a general overview of how to scale the Open edX platform then you should read this first, “Scaling Open edX“. You might also want to take a look at the automated tools included in Cookiecutter Open edX Devops as well as this article on Managing Your Open edX Backend With Terraform.
The Open edX platform persists data across five distinct subsystems: MySQL, MongoDB, the Ubuntu file system, Memcached, and since the Lilac release in May 2021, Redis. To scale the Open edX platform you first must physically separate the executable program code from the data that is managed by these four subsystems. This article explains how to migrate the Memcached service. By scaling, I mean migrating Open edX’s local Memcached service to its own independent Ubuntu EC2 instance.
This article describes my preferred approach, which is to use AWS EC2 console to create a new Ubuntu EC2 instance using the same version of Ubuntu on which your Open edX platform currently runs. As of this writing Open edX Lilac runs on Ubuntu 20.04 LTS. I install the latest versions of memcached and redis-server, regardless of the versions that the original Open edX server is using. When scaling Memcached and Redis I do not migrate data.
Note that you will only need to focus on vertical scaling for Memcached and Redis on Open edX. You can safely start with a t2.small or t2.medium EC2 instance size which will probably server your needs for the lifetime of your Open edX platform.
I. Create a New EC2 Instance
1. Launch a new EC2 instance from the AMI
Launch a new t2.medium EC2 instance from the AMI that you created. I re-use the existing SSH key that i used for the original Open edX EC2 instance. Note that you’d only need a different SSH key if for example, completely different teams manage the Open edX and Memcached environments.
2. Create a new EC2 Security Group for Memcached
You should create a separate EC2 Security Group for your new Memcached EC2 instance, as follows:

This firewall configuration limits remote access of the server to Memcached, regardless of whatever other services might still be installed and running internally on the server. Note that on the first row, SSH, you should try to limit access to your bastion server, if you use one.
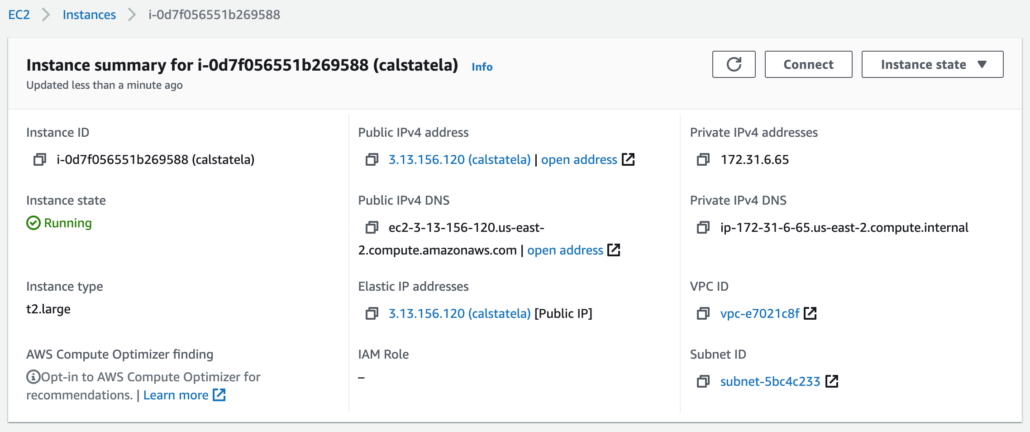
3. Take Note of The Internal IP Address That is Assigned
You’ll access your new remote Memcached server via the internal IP address, which is automatically assigned by AWS when you create the new EC2 instance. Take note of this value, which will be titled, “Private IPv4 addresses”
II. Install memcached
1. Install memcached service
# First, make sure that your local package index is updated
sudo apt update

# install the official memcached package
sudo apt install memcached

# libmemcached-tools is a library that provides several tools to work with your Memcached server.
sudo apt install libmemcached-tools
2. Configure memcached to accept remote connections
Edit the file /etc/memcached.conf on or around row 35 as follows:
# Specify which IP address to listen on. The default is to listen on all IP addresses
# This parameter is one of the only security measures that memcached has, so make sure
# it's listening on a firewalled interface.
#
# change this from from '-l 127.0.0.1' to the following
-l 0.0.0.0
You can read more about the installation procedure here, “How To Install and Secure Memcached on Ubuntu 18.04“
III. Install redis-server
1. Install redis-server service
# First, make sure that your local package index is updated
sudo apt update

# install the official memcached package
sudo apt install redis-server
# redis-tools usually is automatically installed along with redis-server,
# but you should try command just in case.
sudo apt install redis-tools
2. Configure redis-server to accept remote connections
Edit the file /etc/redis/redis.conf on or around row 69 as follows:
# Specify which IP address to listen on. The default is to listen on the loopback
# address only. Change this to 0.0.0.0 (any IP address).
#
# change from 'bind 127.0.0.1 ::1' to the following
bind 0.0.0.0 ::1
Also add the password for redis-server, which you can find either by opening the same file on your edxapp server and looking on or around row 509, or alternatively, you can find the value in /home/ubuntu/my-passwords.yml as the key REDIS_PASSWORD on or around row 45.
# Add your redis password:
requirepass "THE-STRONG-PASSWORD-FROM-MY-PASSWORDS.YML"
3. Reboot the remote Memcached/Redis server
Afterwards you should reboot your new remote Memcached/Server server
sudo reboot
4. Verify remote connectivity
Test connectivity to your new remote redis-server service by executing this command from the command line of your edxapp server:
redis-cli -a THE-STRONG-PASSWORD-FROM-MY-PASSWORDS.YML -h memcached.edx-platform.io ping
IV. Reconfigure Open edX to Connect to Your Remote Memcached Serve
1. Modify memcached host settings
To identify which yml files require modification you can use the Linux command, ‘grep’ to search for the Linux port number corresponding to the service you are scaling. For example, Memcached is assigned to Linux port number 27017, thus we can execute the the following command to identify all Open edX configuration files that contain Memcached configuration parameters:
sudo grep -r '11211' /edx/etc/*.yml
We can see that in total there are four subsystems containing Memcached configuration parameters, and furthermore that two of these yml files contain multiple references to Memcached, as follows:
/edx/etc/ecommerce.yml:        - localhost:11211
/edx/etc/insights.yml:        - 127.0.0.1:11211
/edx/etc/lms.yml:        - localhost:11211
/edx/etc/lms.yml:        - localhost:11211
/edx/etc/lms.yml:        - localhost:11211
/edx/etc/lms.yml:        - localhost:11211
/edx/etc/lms.yml:        - localhost:11211
/edx/etc/lms.yml:        - localhost:11211
/edx/etc/lms.yml:        - localhost:11211
/edx/etc/studio.yml:        - localhost:11211
/edx/etc/studio.yml:        - localhost:11211
/edx/etc/studio.yml:        - localhost:11211
/edx/etc/studio.yml:        - localhost:11211
/edx/etc/studio.yml:        - localhost:11211
/edx/etc/studio.yml:        - localhost:11211
/edx/etc/studio.yml:        - localhost:11211
For example, the first occurrence of Memcached configuration for lms.yml looks similar to the following:
CACHES:
    celery:
        BACKEND: django.core.cache.backends.memcached.MemcachedCache
        KEY_FUNCTION: util.memcache.safe_key
        KEY_PREFIX: dev.celery
        LOCATION:
        - localhost:11211
        TIMEOUT: '7200'
    configuration:
        BACKEND: django.core.cache.backends.memcached.MemcachedCache
        KEY_FUNCTION: util.memcache.safe_key
        KEY_PREFIX: dev.roverbyopenstax
        LOCATION:
        - localhost:11211
    course_structure_cache:
        BACKEND: django.core.cache.backends.memcached.MemcachedCache
        KEY_FUNCTION: util.memcache.safe_key
        KEY_PREFIX: dev.course_structure
        LOCATION:
        - localhost:11211
        TIMEOUT: '7200'
    default:
        BACKEND: django.core.cache.backends.memcached.MemcachedCache
        KEY_FUNCTION: util.memcache.safe_key
        KEY_PREFIX: dev.default
        LOCATION:
        - localhost:11211
        VERSION: '1'
    general:
        BACKEND: django.core.cache.backends.memcached.MemcachedCache
        KEY_FUNCTION: util.memcache.safe_key
        KEY_PREFIX: dev.general
        LOCATION:
        - localhost:11211
    mongo_metadata_inheritance:
        BACKEND: django.core.cache.backends.memcached.MemcachedCache
        KEY_FUNCTION: util.memcache.safe_key
        KEY_PREFIX: dev.mongo_metadata_inheritance
        LOCATION:
        - localhost:11211
        TIMEOUT: 300
    staticfiles:
        BACKEND: django.core.cache.backends.memcached.MemcachedCache
        KEY_FUNCTION: util.memcache.safe_key
        KEY_PREFIX: dev.roverbyopenstax_general
        LOCATION:
        - localhost:11211
To reconfigure the LMS to use a remote Memcached server we should modify the ‘localhost:11211’ parameter from ‘localhost’ to the Internal IP address of the newly-created remote Memcached server following the format, ‘172.x.x.x:11211’. Note that we MUST address remote servers using internal IP addresses because otherwise our network traffic would leave and re-enter our Virtual Private Cloud which would not only be inefficient from a performance point of view but also insecure.
Stop the memcached service on your edxapp server.
sudo service memcached stop
sudo systemctl disable memcached
2. Modify redis host settings
To reconfigure the LMS to use a remote Redis server we should search for the redis password in the /edx/etc/*.yml files. To be sure, you will edit these four files, replacing either “localhost” or the hard-coded internal IP address value with the IP address of your remote Memcached/Redis server:
/edx/etc/ecommerce.yml
    BROKER_URL

/edx/etc/ecomworker.yml
    BROKER_URL

/edx/etc/lms.yml
    CELERY_BROKER_HOSTNAME

/edx/etc/studio.yml
    CELERY_BROKER_HOSTNAME
Stop the redis-server service on your edxapp server.
sudo service redis-server stop
sudo systemctl disable redis-server
Do a full reboot of your Ubuntu server when you finish.
sudo reboot
Ok, that’s it for Memcached.
V. Test Your Changes
Testing your platform is easier than it might seem. If you can login to both the LMS and CMS as any valid user then your migration was successful. You can monitor activity on your new remote Memcached server with the following commands:
# check memcached status locally
echo stats | nc 127.0.0.1 11211
memcstat --servers=127.0.0.1 11211

# check memcached status remotely
echo stats | nc 172.x.x.x 11211
memcstat --servers=172.x.x.x 11211
you can restart the memcached service with this command:
sudo service memcached restart
You can read more about monitoring Memcached from this blog article written by Aurelien Navarre, “How to monitor memcached”


Leave A Comment