Learn how to setup Memcached on your Amazon Linux EC2 instance to immediately improve performance of LAMP applications like WordPress and Drupal.

Summary
Memcached is a general-purpose distributed memory caching system. It is often used to speed up dynamic database-driven websites by caching data and objects in RAM to reduce the number of times an external data source must be read. It is mature technology, meaning that in the case of Amazon Linux you’ll find a yum repository enabling you to install and configure Memcached in a matter of minutes. And, it is equally easy to uninstall.
Memcached is so omnipresent that I actually struggled to find a good product description, and so please indulge me for a moment to share a few thoughts. Installing Memcached on your Linux server poses no risk, but it does provide potential for immediate improved performance, and so if you’re trying to decide whether or not to take the plunge, then I’m here to encourage you to press ahead. It does its work at a low level. For LAMP platforms you’ll see instructions below on how to associate a memcached instance with Php so that data objects are automatically stored, providing a noticeable performance improvement. Memcached does a good job of taking care of itself, and so you won’t need to worry about cache invalidations and such. Many of the tech industry’s biggest heavyweights use Memcached including YouTube, Reddit, Facebook, Pinterest, Twitter, Wikipedia, and others.
Memcached is an object cache, not a page cache. It does its work at a low level, near the bottom of your tech stack. What gets stored inside Memcached? In the case of a LAMP server, mostly instantiated Php objects that are good candidates for recycling. Fetching an already-existing object from the Memcached store is exponentially faster than recreating it from scratch, which requires multiple requests to both Php and MySQL services. Because of this, dynamic applications like Magento and Woo Commerce sites tend to greatly benefit from Memcached. The makers of Memcached made it possible to run Memcached on standalone servers so that an entire cluster of servers can leverage the same cache instance, greatly magnifying its performance improvement potential.
You might have experimented with site-based performance solutions like say, W3 Total Cache that provide an out-of-the-box object caching solution. None of these will be capable of matching the performance benefits of Memcached simply because they’re installed inside the application layer, near the top of your server stack.
In this tutorial we’ll install Memcached locally, and, we’ll integrate Memcached with Php so that applications like WordPress, Drupal, and Magento realize immediate benefit. Let’s get started!
Implementation Steps
Assumptions
- Your LAMP server is generally configured following AWS’ guidelines: Tutorial: Install a LAMP Web Server with the Amazon Linux AMI
- Apache is running on your server. The specifics of your configuration are probably not important.
- You have SSH access to your EC2 instance and sudo capability
- You are at least an active novice at Linux commands
- You are generally familiar with installing packages using yum
1. Install Memcached on Amazon Linux
This entire process only takes a few minutes to complete. First, lets install the main Memcached package.
sudo yum install memcached
Next, we need to install the Php extension package for Memcached, the name of which will vary depending on which version of Php you’re running. So, lets a take look by using the command below:

php -v
You will install one of the following packages depending on the results from above. In my case I’m running Php 7.0.27. Note that the release number (ie twenty-seven) is not important and so my yum install command takes the form below.
| php-pecl-memcache php-pecl-memcached php54-pecl-memcache php54-pecl-memcached php55-pecl-memcache |
php55-pecl-memcached php56-pecl-memcache php56-pecl-memcached php70-pecl-memcached php71-pecl-memcached |
sudo yum install php70-pecl-memcached
2. Configuring Memcached
Memcached works well and with immediate effect using the default settings, so you very likely will not need to change anything. Nonetheless, it’s a great idea to learn more about what you just installed and what’s its going to be doing to your web content.
You’ll find a couple of new files in your /etc folder. Lets look at both. First the Memcached config file located at /etc/sysconfig/memcached

First, you’ll notice that there’s not much here. I believe that the default cache size is 16 megabytes. You should probably increase this. I’d suggest incrementally increasing the value as you benchmark performance until you begin to see diminishing returns. You can also study the Memcached statistics which you’ll see in the next section of this article.
Next, lets edit /etc/php.ini to add Memcached as a session store. Add or replace the session parameters session.save_handler and session.save_path which you’ll find around row 1180.

You need to restart Apache for these changes to take effect
sudo service httpd restart
For further reading I suggest this detailed article on Memcached configuration options: https://wiki.mikejung.biz/Memcached
Caching Application Objects
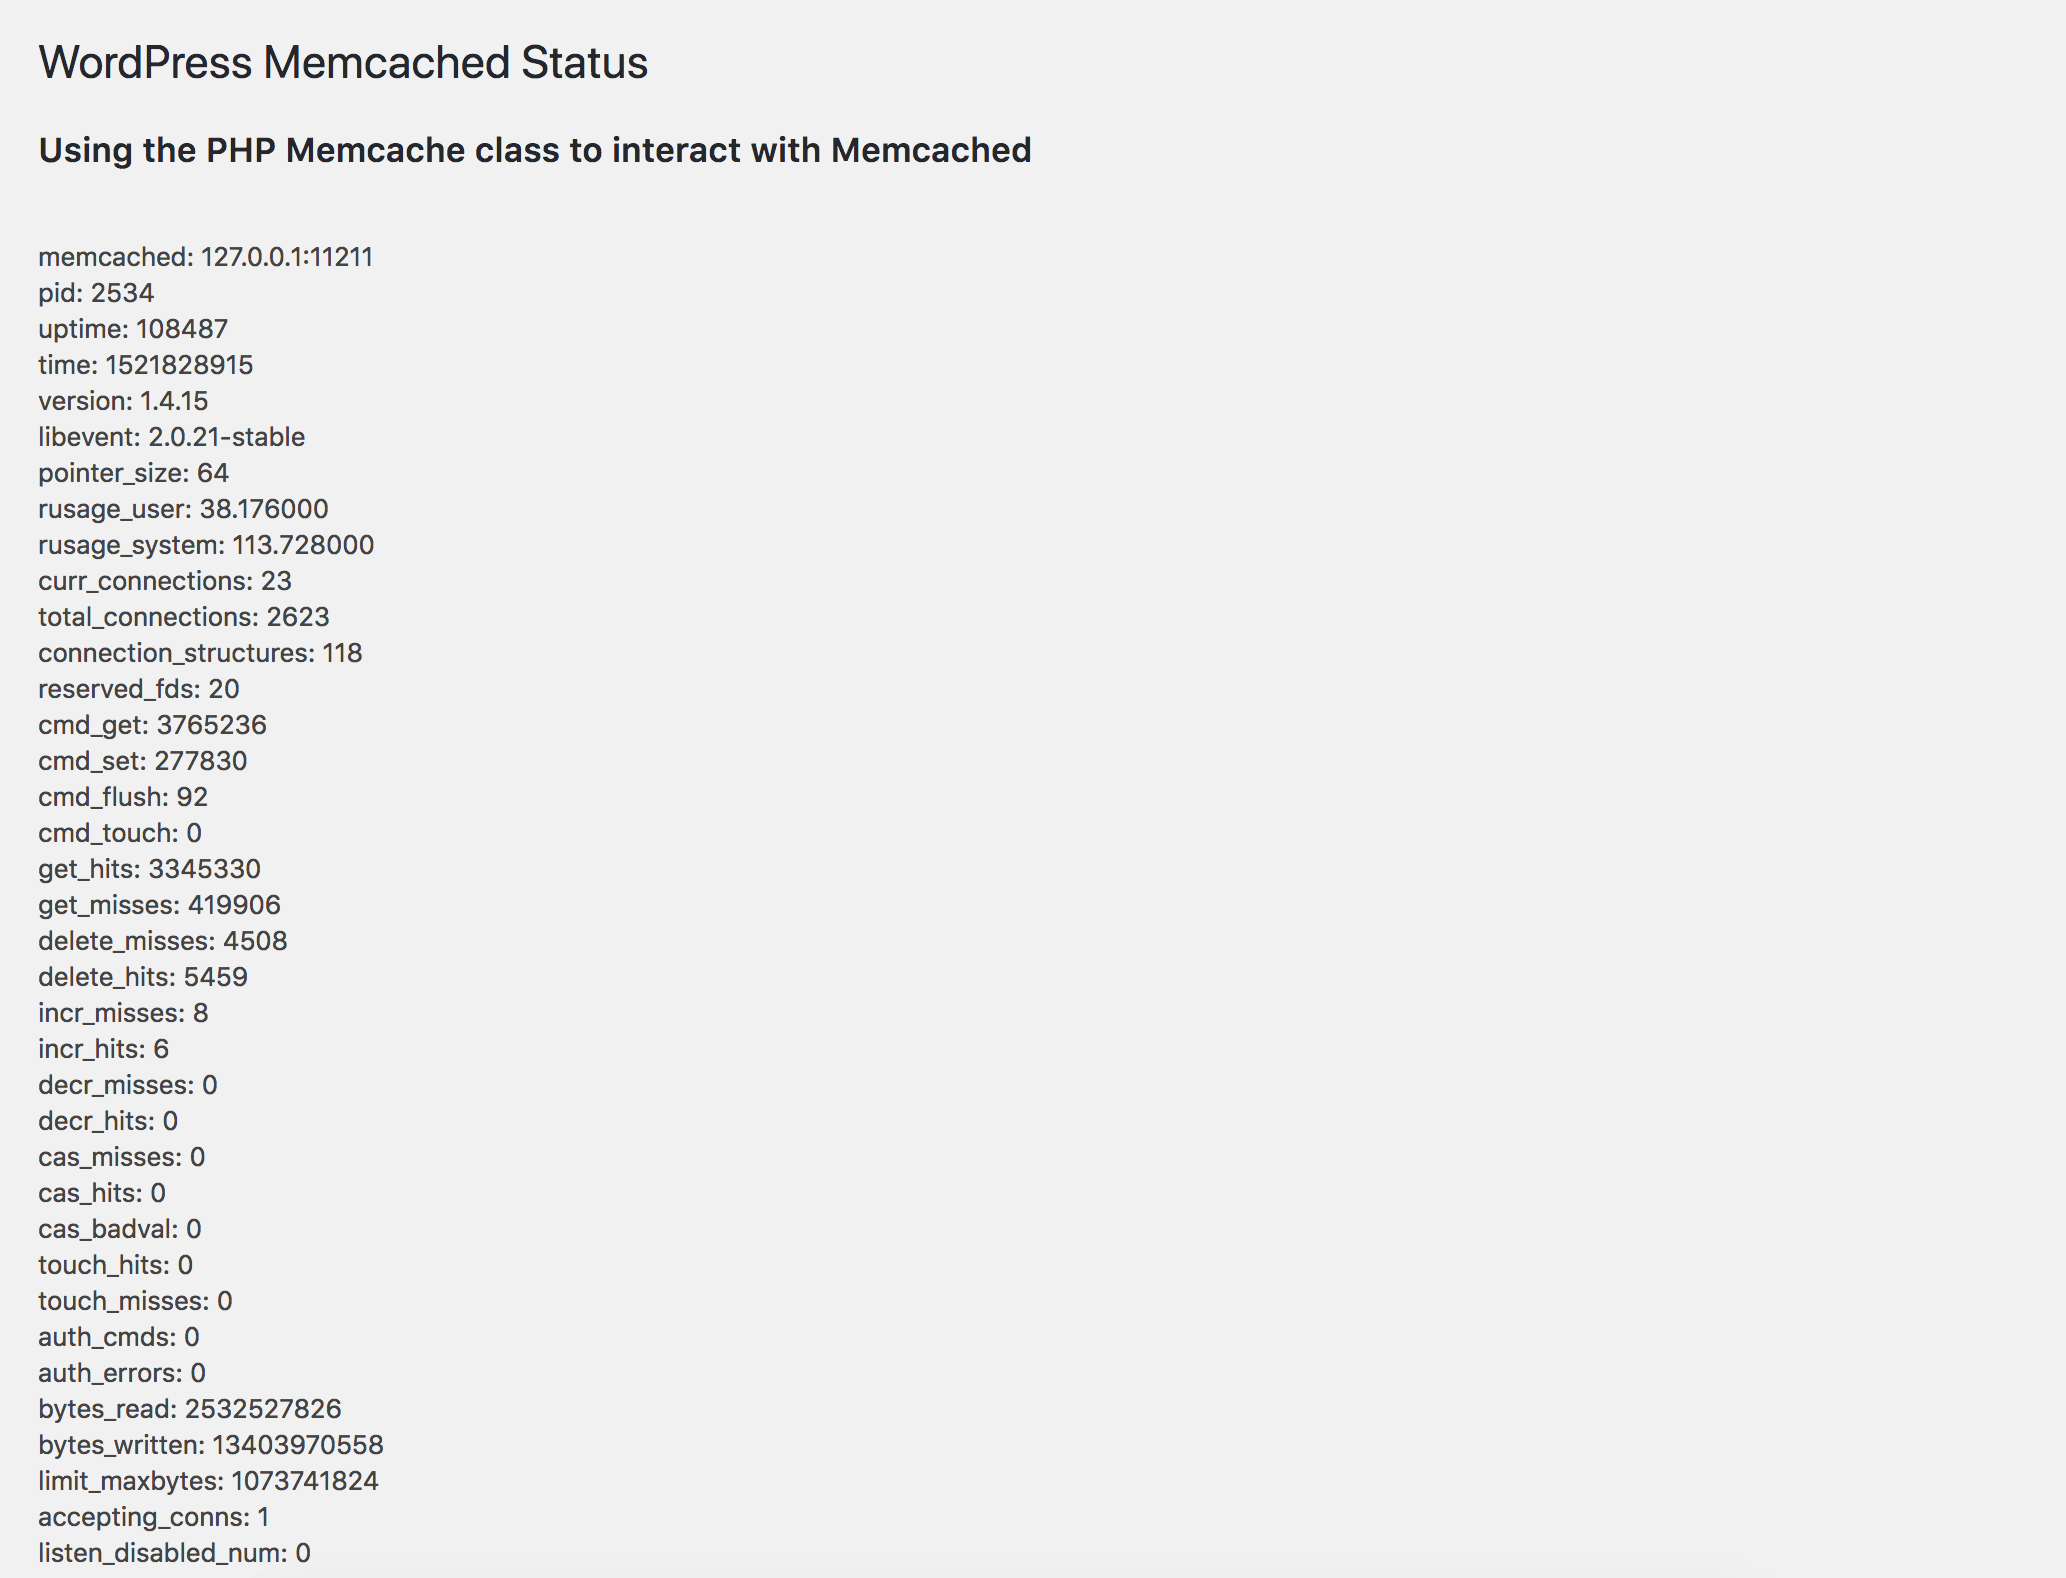
It’s important to note that thus far Php is only caching sessions, not your application objects. Next you’ll need an application-specific means of making your Php application aware of Memcached’s existence. If you’re running WordPress then you’re in luck because there’s a good (though dated) plugin named MemcacheD Is Your Friend that is simple to setup and works great. Additionally, this plugin provides an easy way for you to monitor Memcached statistics from within the console of WordPress.

3. Monitoring Your Memcached Instance
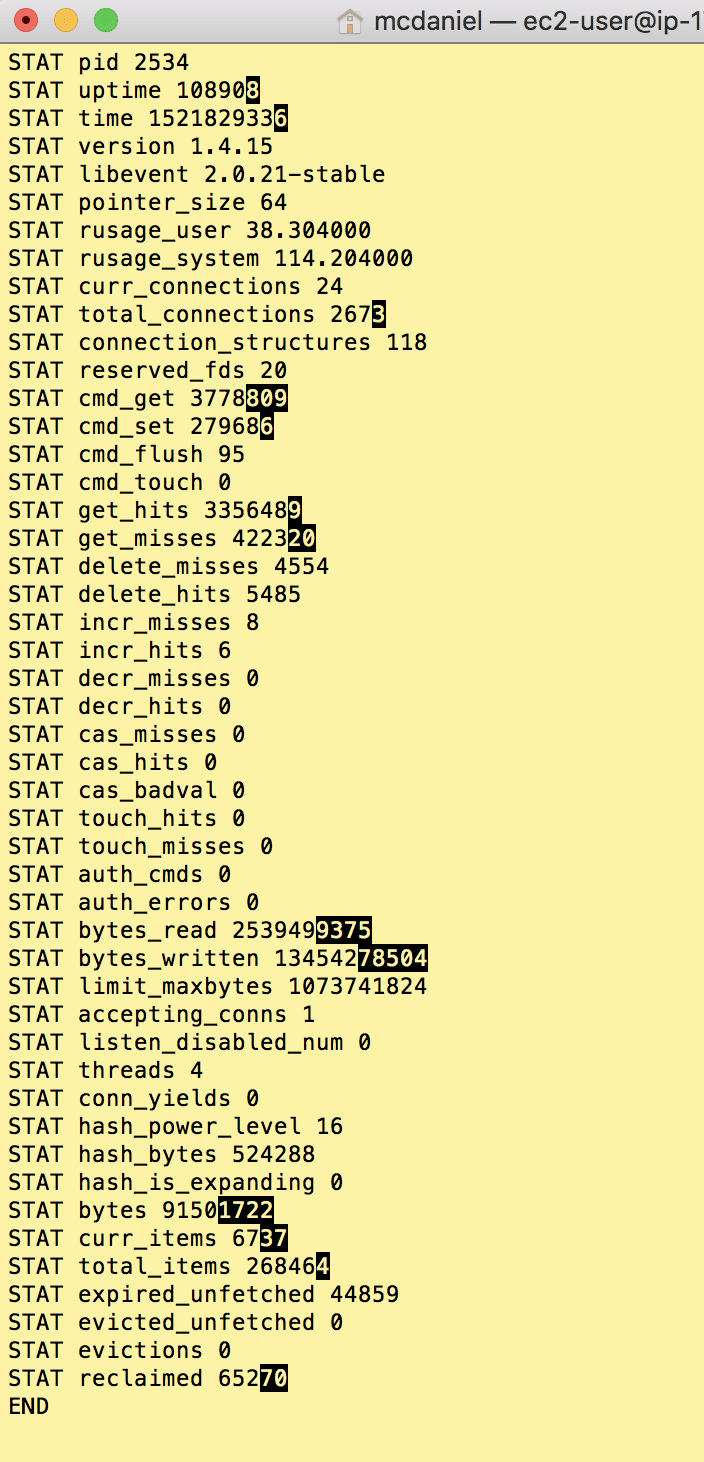
sudo watch -td '(echo stats ; echo quit) | nc 127.0.0.1 11211 '
Memcached provides a detailed set of statistics that you can view using the “stats” Linux command piped into Memcached’s listening address and port number. The example above displays Memcached stats updated on a real-time basis.

I hope you found this helpful. Please help me improve this article by leaving a comment below. Thank you!


Is it possible to do this, with extra work, on Lightsail? I tried it out on a Bitnami WordPress instance (the lowest tier) and learned I don’t have yum. Or is that asking too much of the platform?
yes, that is asking too much of Lightsail, which is built using a greatly-simplified, quick-start style of linux operating system. If you want to experiment with adding additional os services like memcached then i’d recommend that you consider migrating to a traditional EC2 instance based on a Linux distribution AMI. Incidentally, if you go that route then you might also consider biting the bullet and transitioning away from Amazon Linux to Ubuntu 20.04 LTS, for which you’ll find a lot more documentation and technical instruction in StackOverflow as well as blogs like this one.
Thanks for the guide! Very helpful and clearly explained.