Whether you’re changing hosting providers or trying to clone a WordPress site to jumpstart a new project, rest assured that you can copy, migrate or rename your site in a matter of minutes. But there are a couple of details with the inner workings of WordPress that can cause problems. The following step-by-step tutorial will guide you thru a simple, full-proof procedure that works every time.

Summary
The best-practice process is the same for migrating as well as renaming a WordPress site. You should create a full backup of your site, store your backup to a remote location, and then use the backup file to restore the site data to a new site at the new domain as per the following high-level work flow diagram. The reason that the process is identical is because the locations of the source and destination sites are arbitrary.
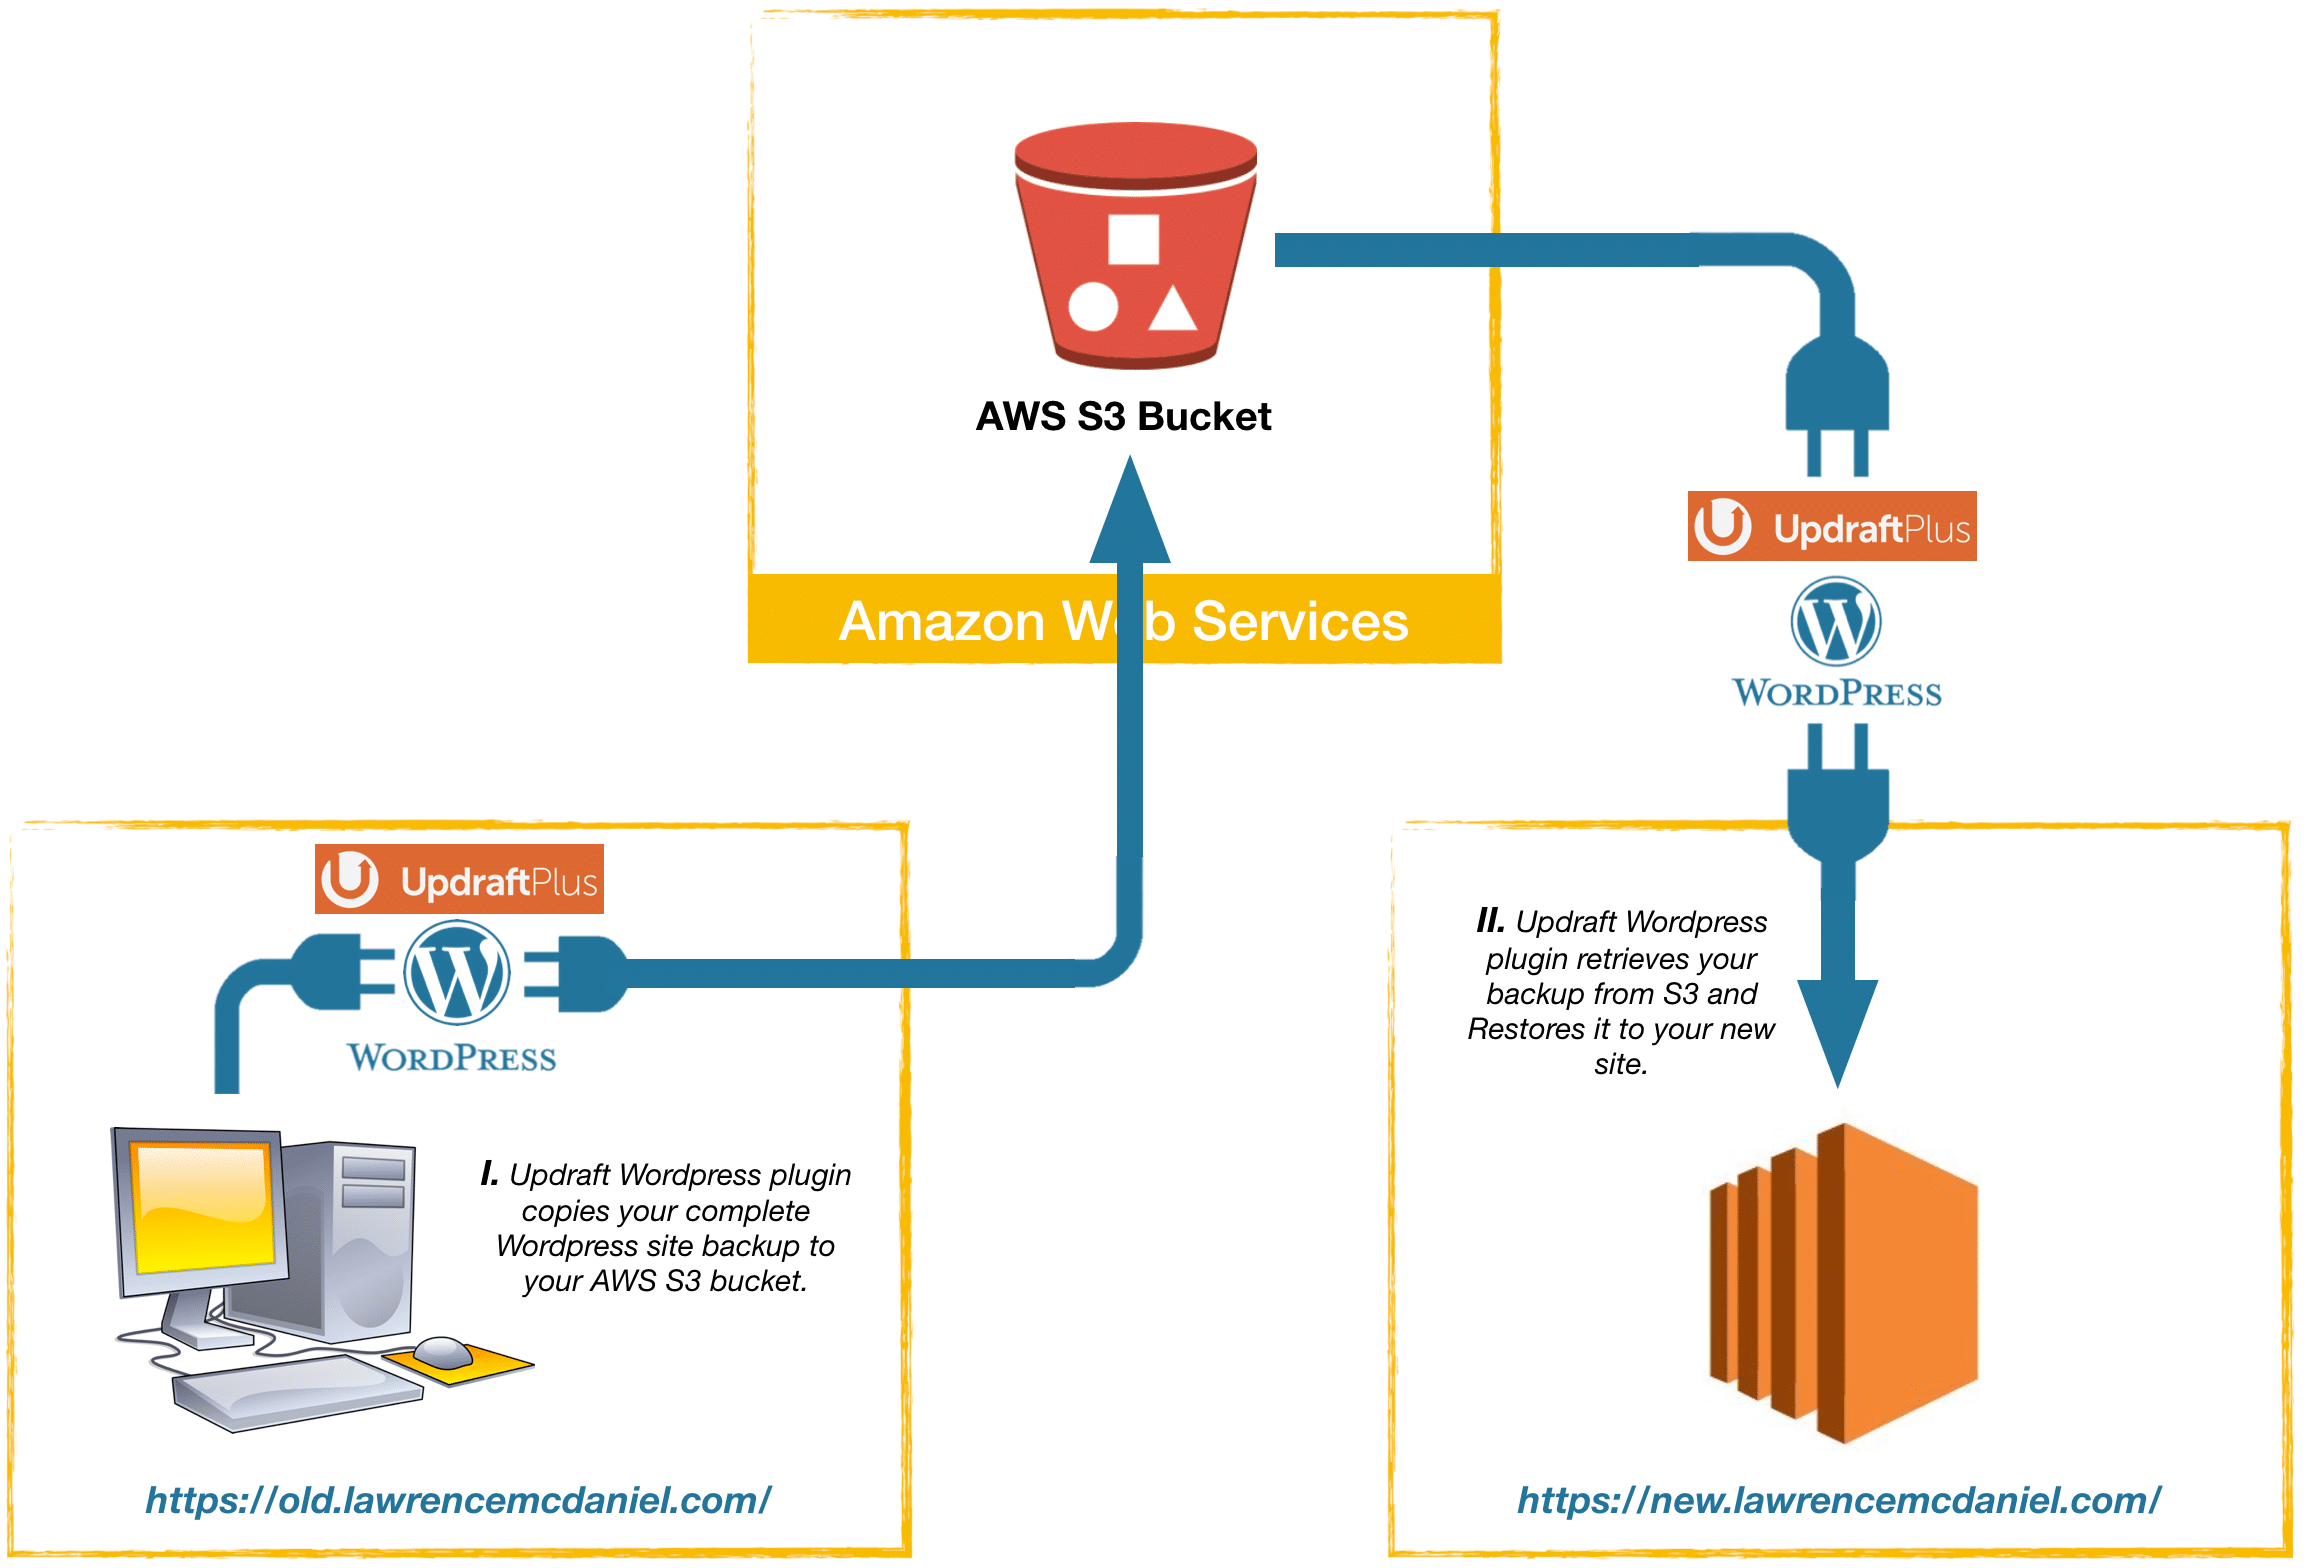
To move your WordPress site to a new location you obviously need to begin with a complete backup of your existing site. But this is complicated for a couple of reasons. First, WordPress makes use of multiple storage formats to persist the data on your site. Specifically, WordPress stores your site’s system files, uploads, plugins, and theme files on the Linux file system. But it stores the html content of your web pages as well as your site’s configuration data in MySQL. Further complicating matters, there are a variety of strategies for hosting your site’s static content (images, CSS and Javascript files) that needs to at least be taken into consideration when creating a full site backup.
Secondly, WordPress stores configuration data for your existing site that might be incompatible with the hosting environment for your destination site. For example, WordPress stores the full URL for your site in MySQL which turns out to be a conundrum as there’s no direct way to switch out the old URL with that of the destination URL. Plugins that you might have installed on your WordPress site, particularly performance caching and site security plugins, might also collect configuration data that is specific to the infrastructure of your source site and would thus potentially break your destination site. We’ll look at how to address both of these potential problem areas below.
Work Flow
1a. Install UpdraftPlus WordPress Backup Plugin On Your Source WordPress Site
 UpdraftPlus WordPress Backup Plugin is the WordPress community’s most widely-used backup solution. It is a free downloadable plugin that provides a complete backup solution with a broad range of remote backup file storage options. It is popular both because it is free and because it is highly reliable. Updraft backs up your WordPress system files, plugins, uploads, and theme data and compresses all of these into several individual archives grouped by type of data (database, plugins, theme data, uploads, other). You can use any other backup system if you want, provided that backs up all of the same data, and it provides a way to store your backup file remotely.
If you’re installing Updraft in order to follow this tutorial then you can use the plugin installation wizard’s default options, though separately, I highly recommend that you consider setting up a remote storage service like AWS S3 at some point.
1b. Note The Settings of your UpdraftPlus Plugin Configuration
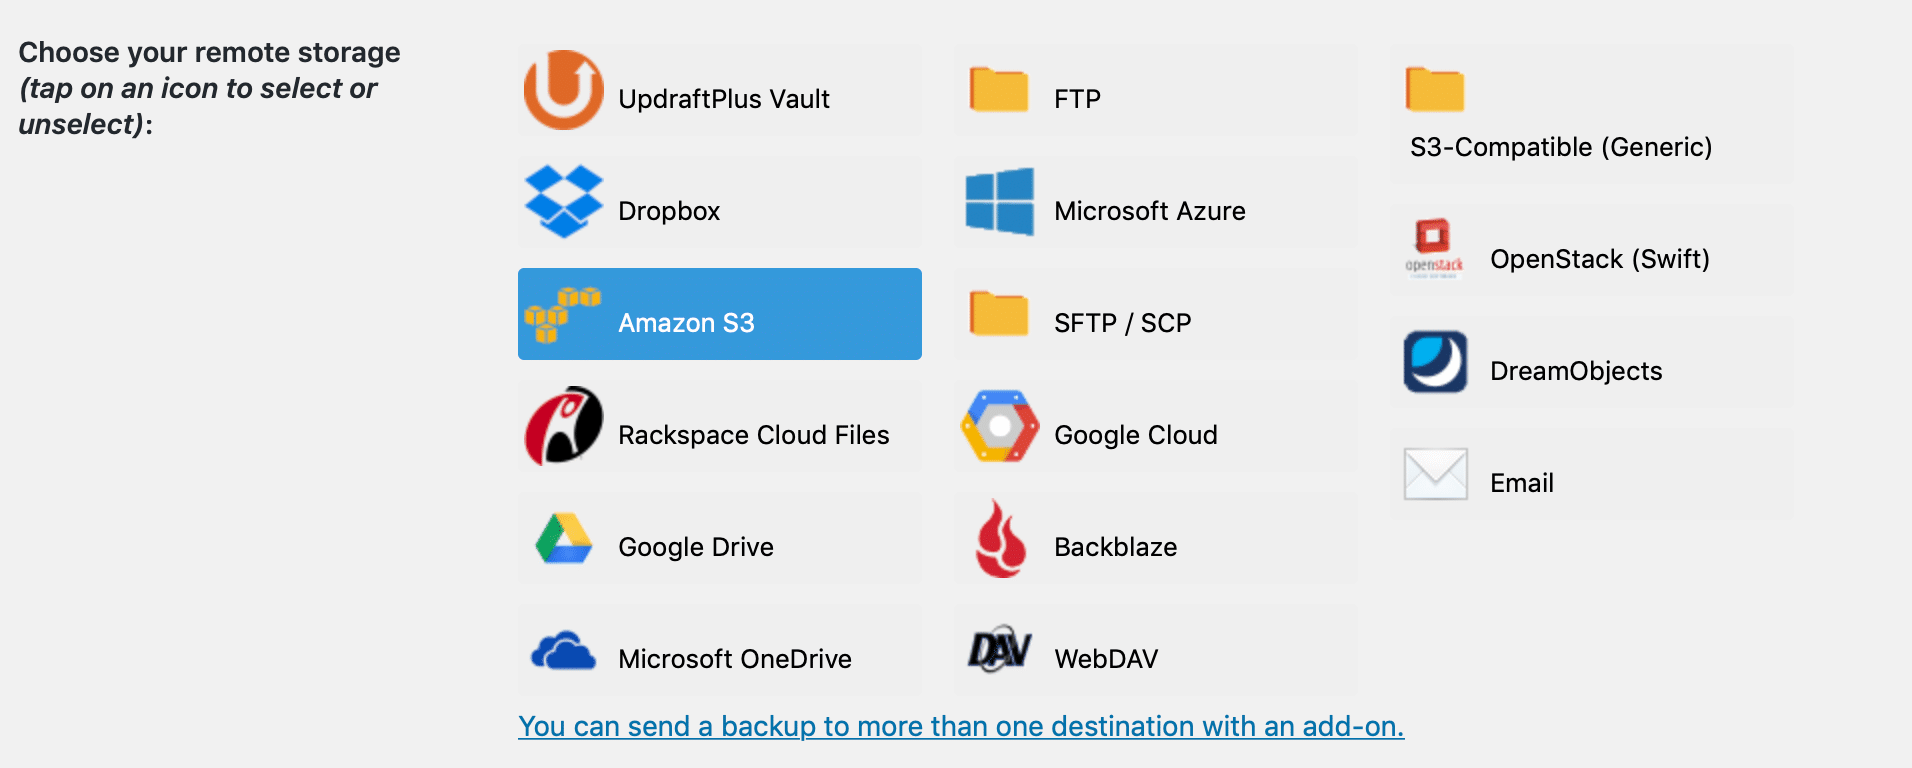
We’ll need to know the exact Updraft configuration settings for step 7, so you should either screen shot or record all of your configuration settings now. The nature of your Updraft settings will vary depending on your choice of Remote Storage (see screen shot below). Some of the available configurations, for for AWS S3 for example, include access keys and passcodes. It is important that you have these available for step 9 that follows.
2. Install Velvet Blues Update URLs WordPress Plugin On Your Source WordPress Site
One of the common challenges with migrating a WordPress site is that there are typically hundreds or even thousands of links in your current site that reference your current site using its fully-qualified domain name. Thus, after having migrated your site to a new domain name your site’s content now includes lots of bad links that incorrectly point back to your old site. If both your old and new sites are running then you might notice that your new site immediately sends you back to your old site each time you click on an internal link, and, that your images and other media are still being served by your old site. yikes!
Velvet Blues helps you fully resolve this problem in your new site. It is the WordPress Community’s leading free solution for updating URL’s in your site. It turns out that WordPress stores internal links inside your site in upwards of a half-dozen places. Velvet Blues runs a search/replace on all of these, completely updating your entire site your new fully-qualified domain name. We’ll install the plugin now so that it will be available to us immediately after the migration is completed.
3. Disable Potentially Problematic Plugins On Your Source WordPress Site
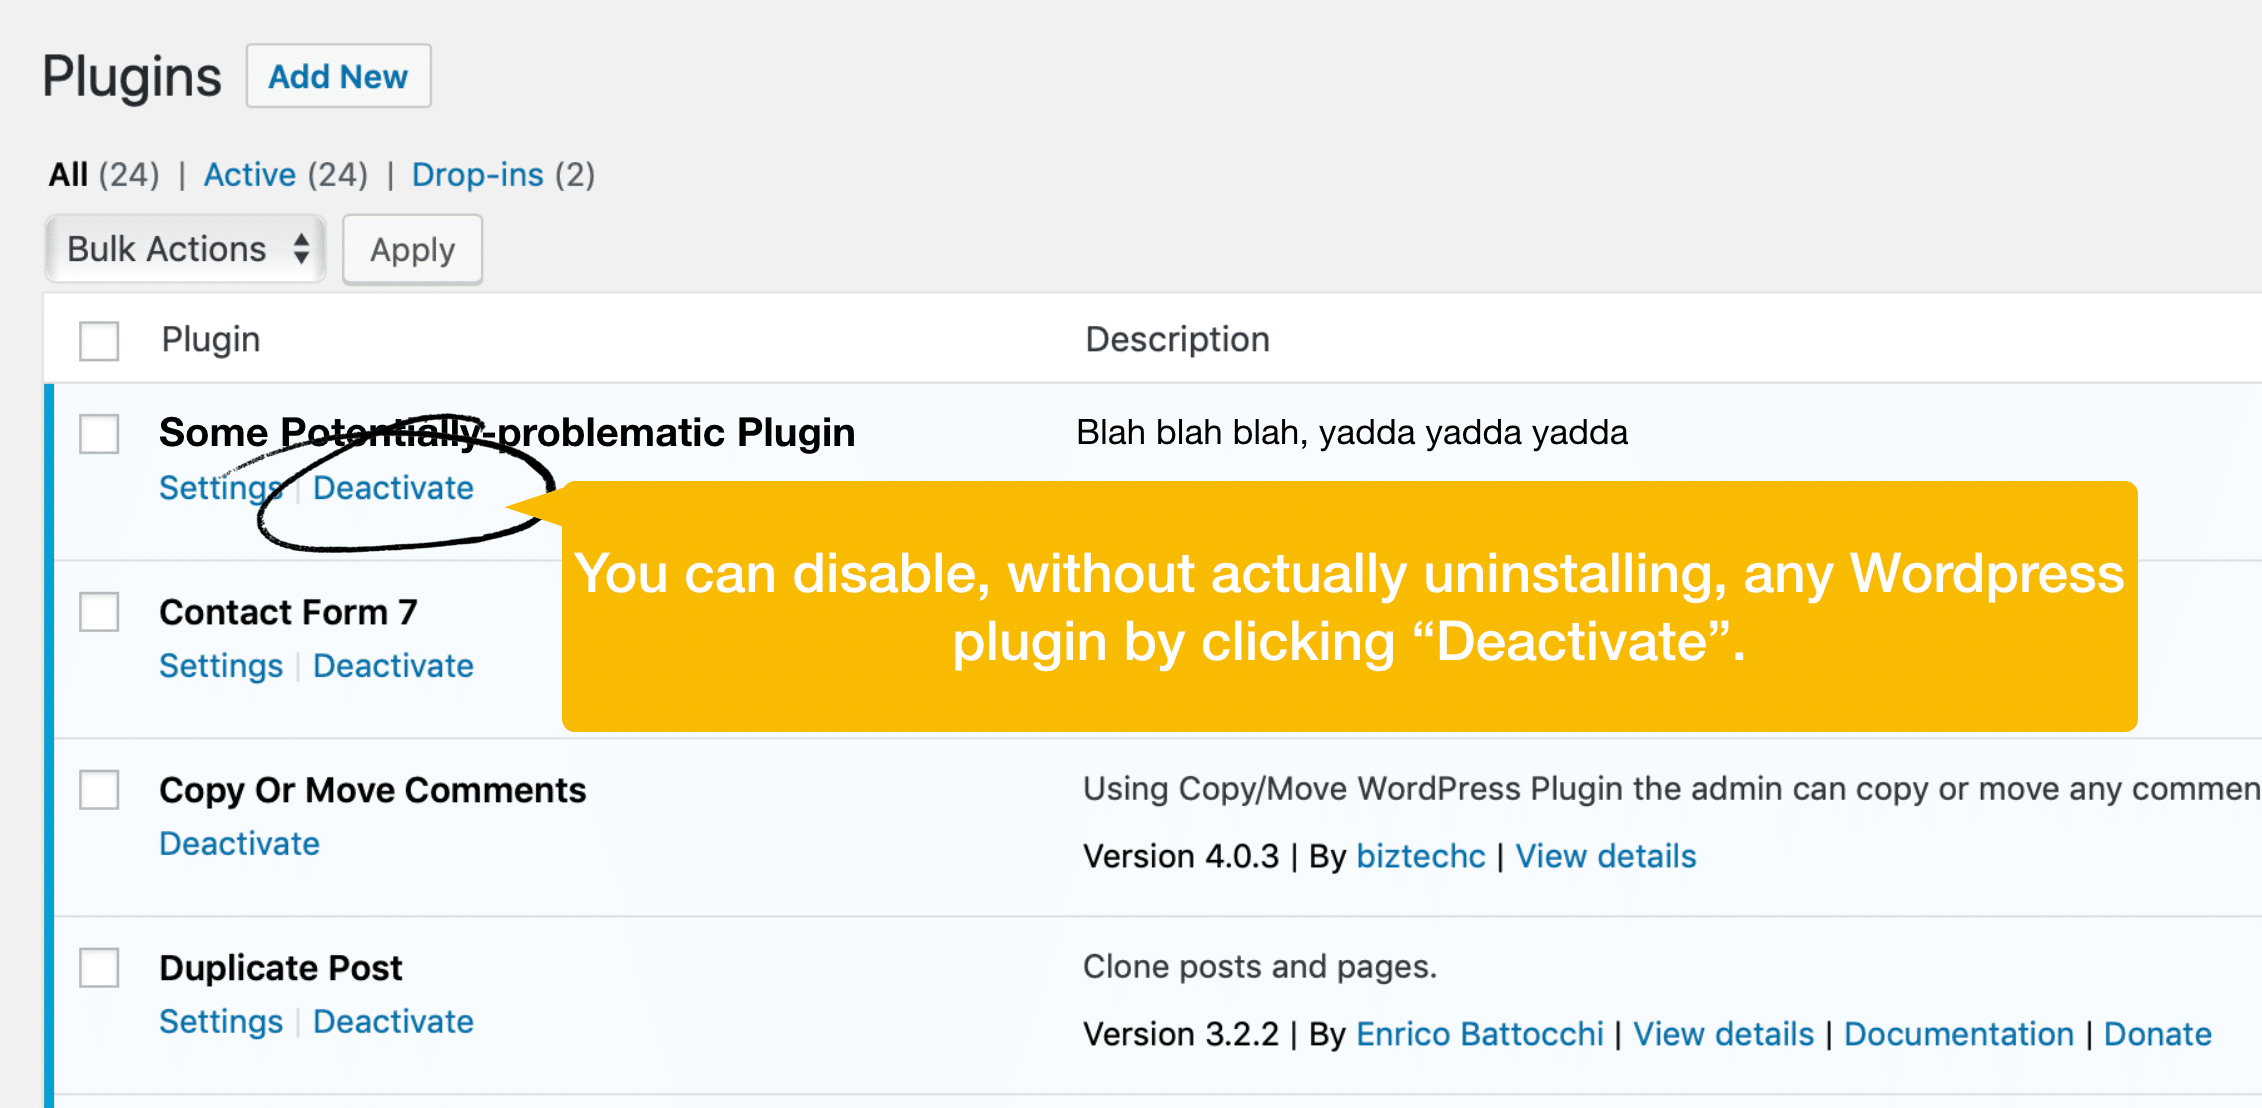
Some plugins store configuration data that is specific to the hosting infrastructure of your site, which can cause various kinds of problems when you’re migrating or renaming your site. Most commonly, performance caching as well as site security plugins tend to do this. In worst-case scenarios your new site won’t work at all because the infrastructure of your destination site varies somehow from that your source site, which would mean that you’d have no access to the WordPress console and thus, no means of resolving your problem. YIKES!
To avoid this scenario entirely, just before you begin your migration you should disable any plugins that are not critical for the proper operation of your site. To be clear, performance plugins and site security plugins are not critical plugins and should definitely be disabled prior to attempting your migration. Don’t worry, the plugins and their related configuration settings will still be included in your site backup even though they are not enabled.
4. Create A Complete Site Backup Of Your Source WordPress Site
Ok, confirming that you’ve installed Velvet Blues URL updater, and that you’ve disabled potentially problematic plugins, now it’s time to run a backup. Barring outlying cases of sites running on unusually underpowered server equipment or sites with abnormally large quantities of media data, your complete site backup should run in a matter of minutes.
5. Verify Your Backup
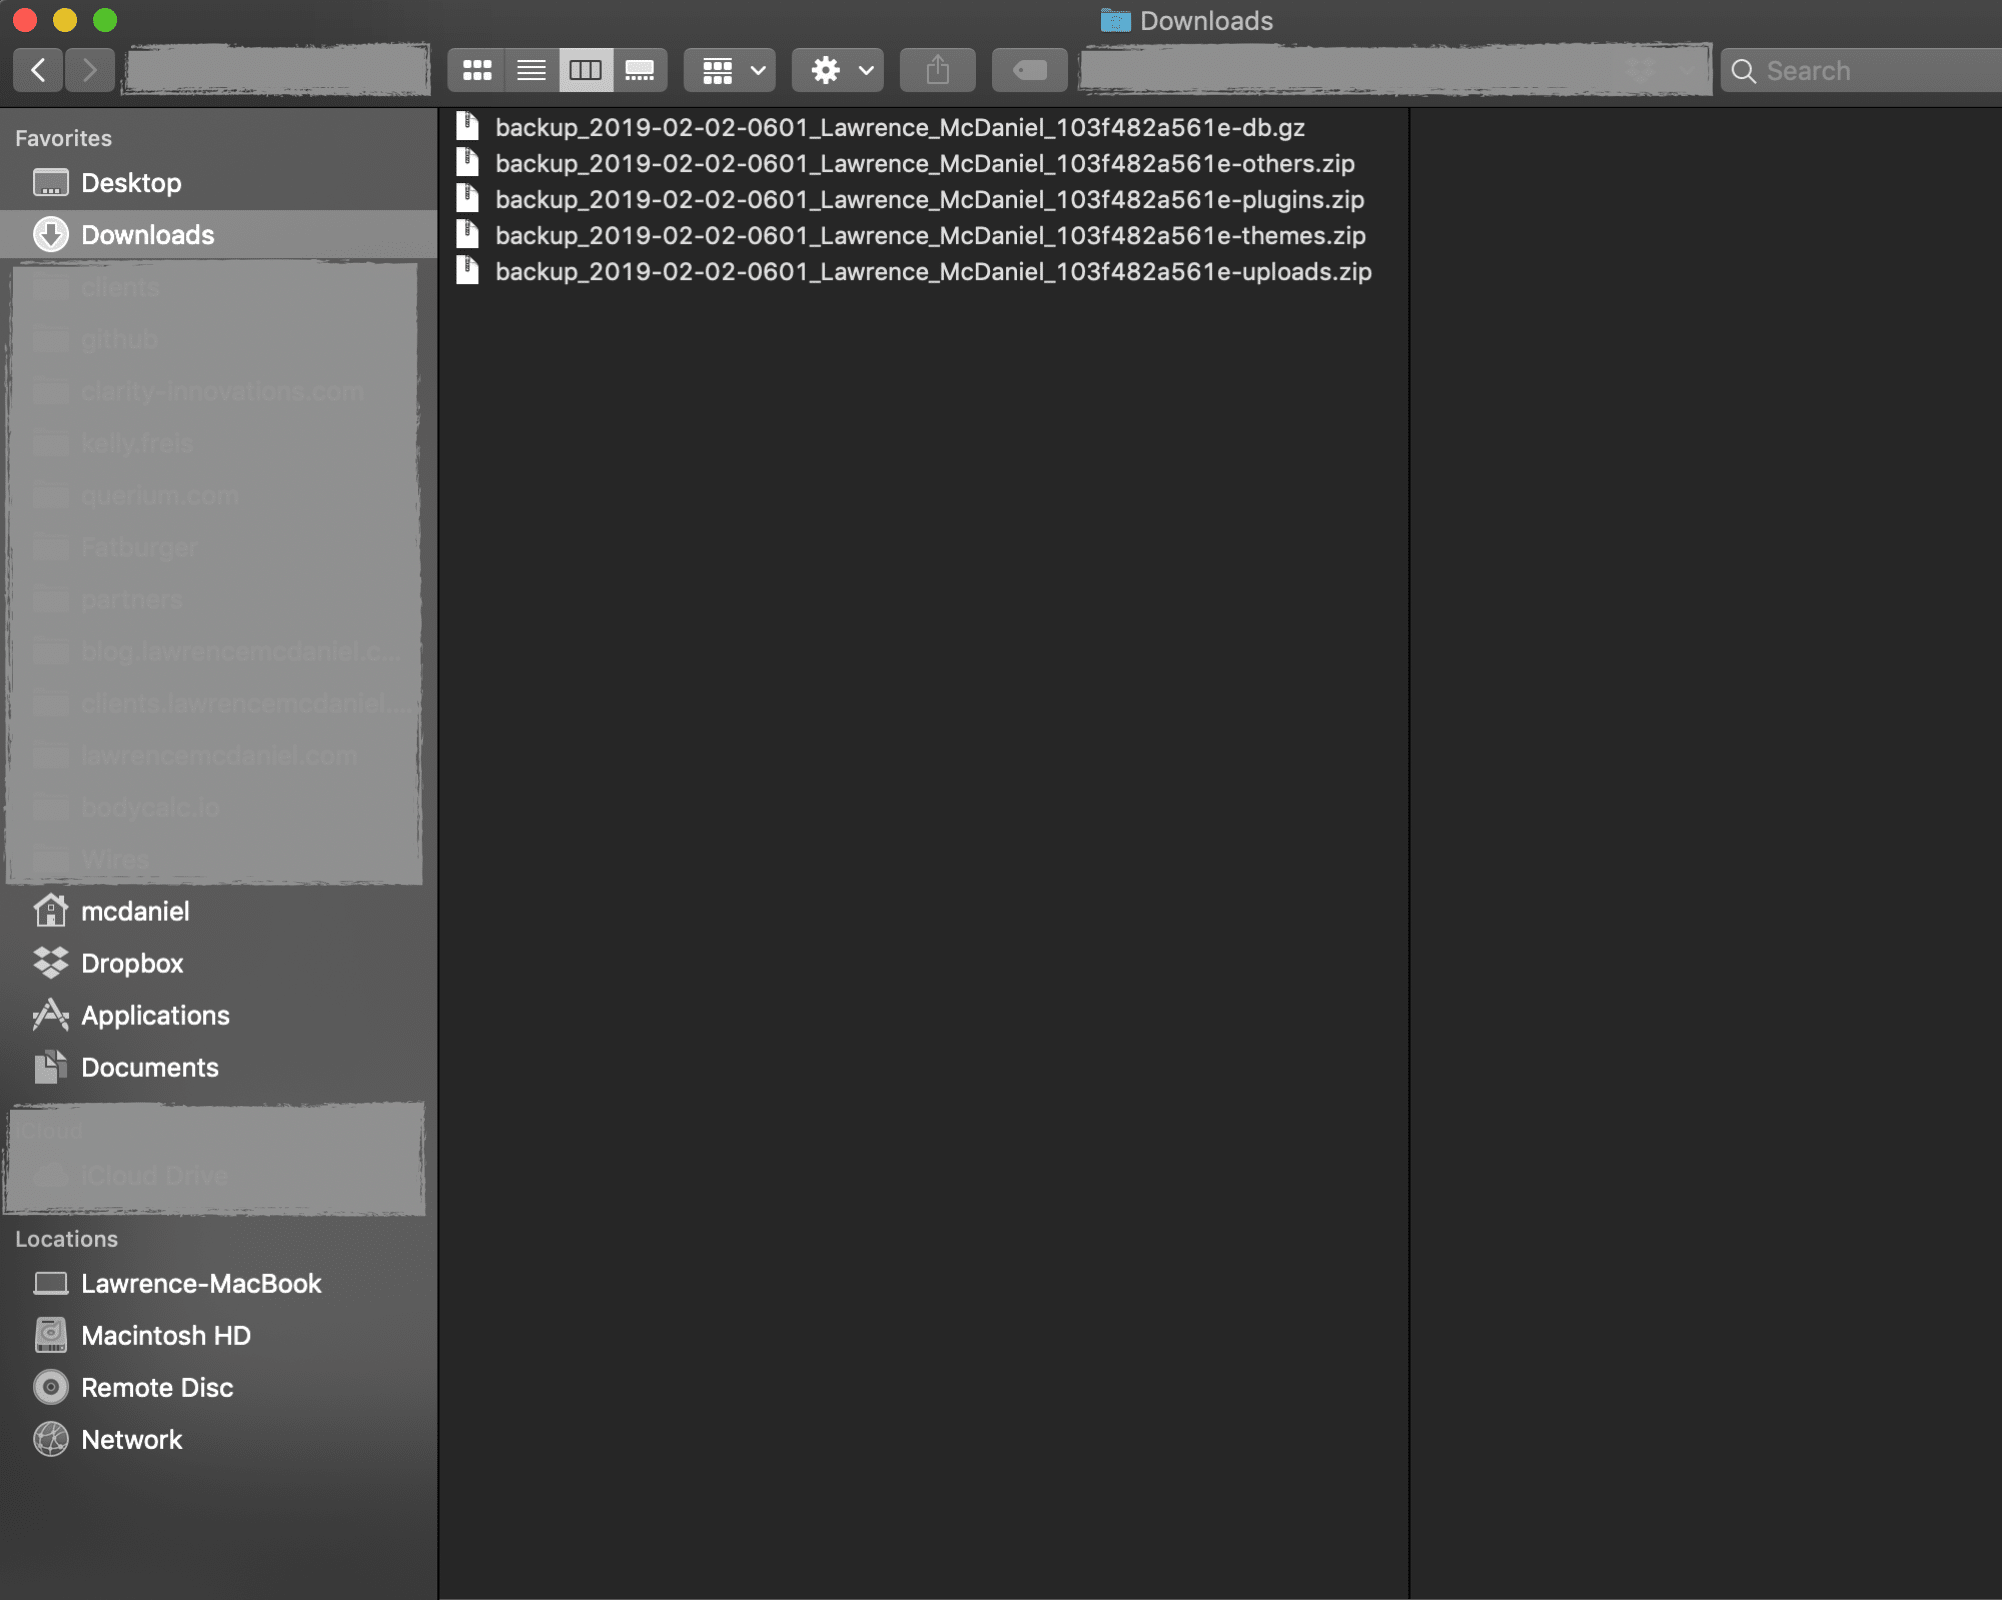
Once your backup has completed there are a couple of things that you can do as a sanity check to ensure that the backup was not only successful but also that it contains all of the data that you were expecting it to have. First, you should download your backup to your local computer. Updraft provides multiple ways to download your backup files to your local computer. If you’re new to Updraft then you can review this blog post for detailed instructions on how to download a complete backup.
Once you’ve downloaded the files, double-click a couple of them so that you can view the contents. Keep in mind that this is just a sanity check, not a technical forensic analysis. So for example, if you uncompress the “backup_xxxx…plugins.zip” file then you should reasonably expect to see a set of folders corresponding to the plugins that are actually installed on your source site. That’s good enough.
6. Create A Blank, New WordPress Site At Your Destination URL
This might be unintuitive. We’re going to create a completely new WordPress site at our destination URL which we’ll use to initiate the Updraft site restore process. Don’t waste time installing superfluous plugins nor making aesthetic adjustments to the new WordPress installation because everything you do in this step will get overwritten in subsequent steps.
7. Install UpdraftPlus WordPress Backup Plugin On Your Destination WordPress Site
The sole modification that we’re going to make in our new WordPress site is to install Install UpdraftPlus WordPress Backup Plugin again, using the same configuration settings from Updraft in your source WordPress site.
8. Update wp-config.php Of Your Destination WordPress Site
Recall at the onset of this article that we discussed how hard-coded URL’s from our source site can cause problems in our destination site? Well, there’s a similar and even more vexing problem with the WordPress settings that are stored in your Updraft backup. The backup files contain the WordPress Address (URL) and Site Address (URL) values from your previous site. Because of this, after you run the Updraft restore procedure, your destination site will contain the old URL’s, causing the destination site to redirect all traffic back to your source site. OUCH!
Fortunately there’s a way to mitigate this problem by making a small edit to the wp-config.php file in the home folder of your new WordPress site’s system files. We’ll hard-code the destination site’s WP_HOME and WP_SITEURL parameters in wp-config.php so that the original values from our Updraft backup file will be ignored.
Place the following two “Define” statements at or near the top of the wp-config.php file in the root of your WordPress installation. You’ll need ssh or shell access to your WordPress site system files to do this.
[php]/**
* The base configuration for WordPress
*
* The wp-config.php creation script uses this file during the
* installation. You don’t have to use the web site, you can
* copy this file to "wp-config.php" and fill in the values.
*
* This file contains the following configurations:
*
* * MySQL settings
* * Secret keys
* * Database table prefix
* * ABSPATH
*
* @link https://codex.wordpress.org/Editing_wp-config.php
*
* @package WordPress
*/
define(‘WP_HOME’,’https://new.lawrencemcdaniel.com’);
define(‘WP_SITEURL’,’https://new.lawrencemcdaniel.com’);[/php]
9. Restore The Backup Of Your Source Site To Your Destination Site
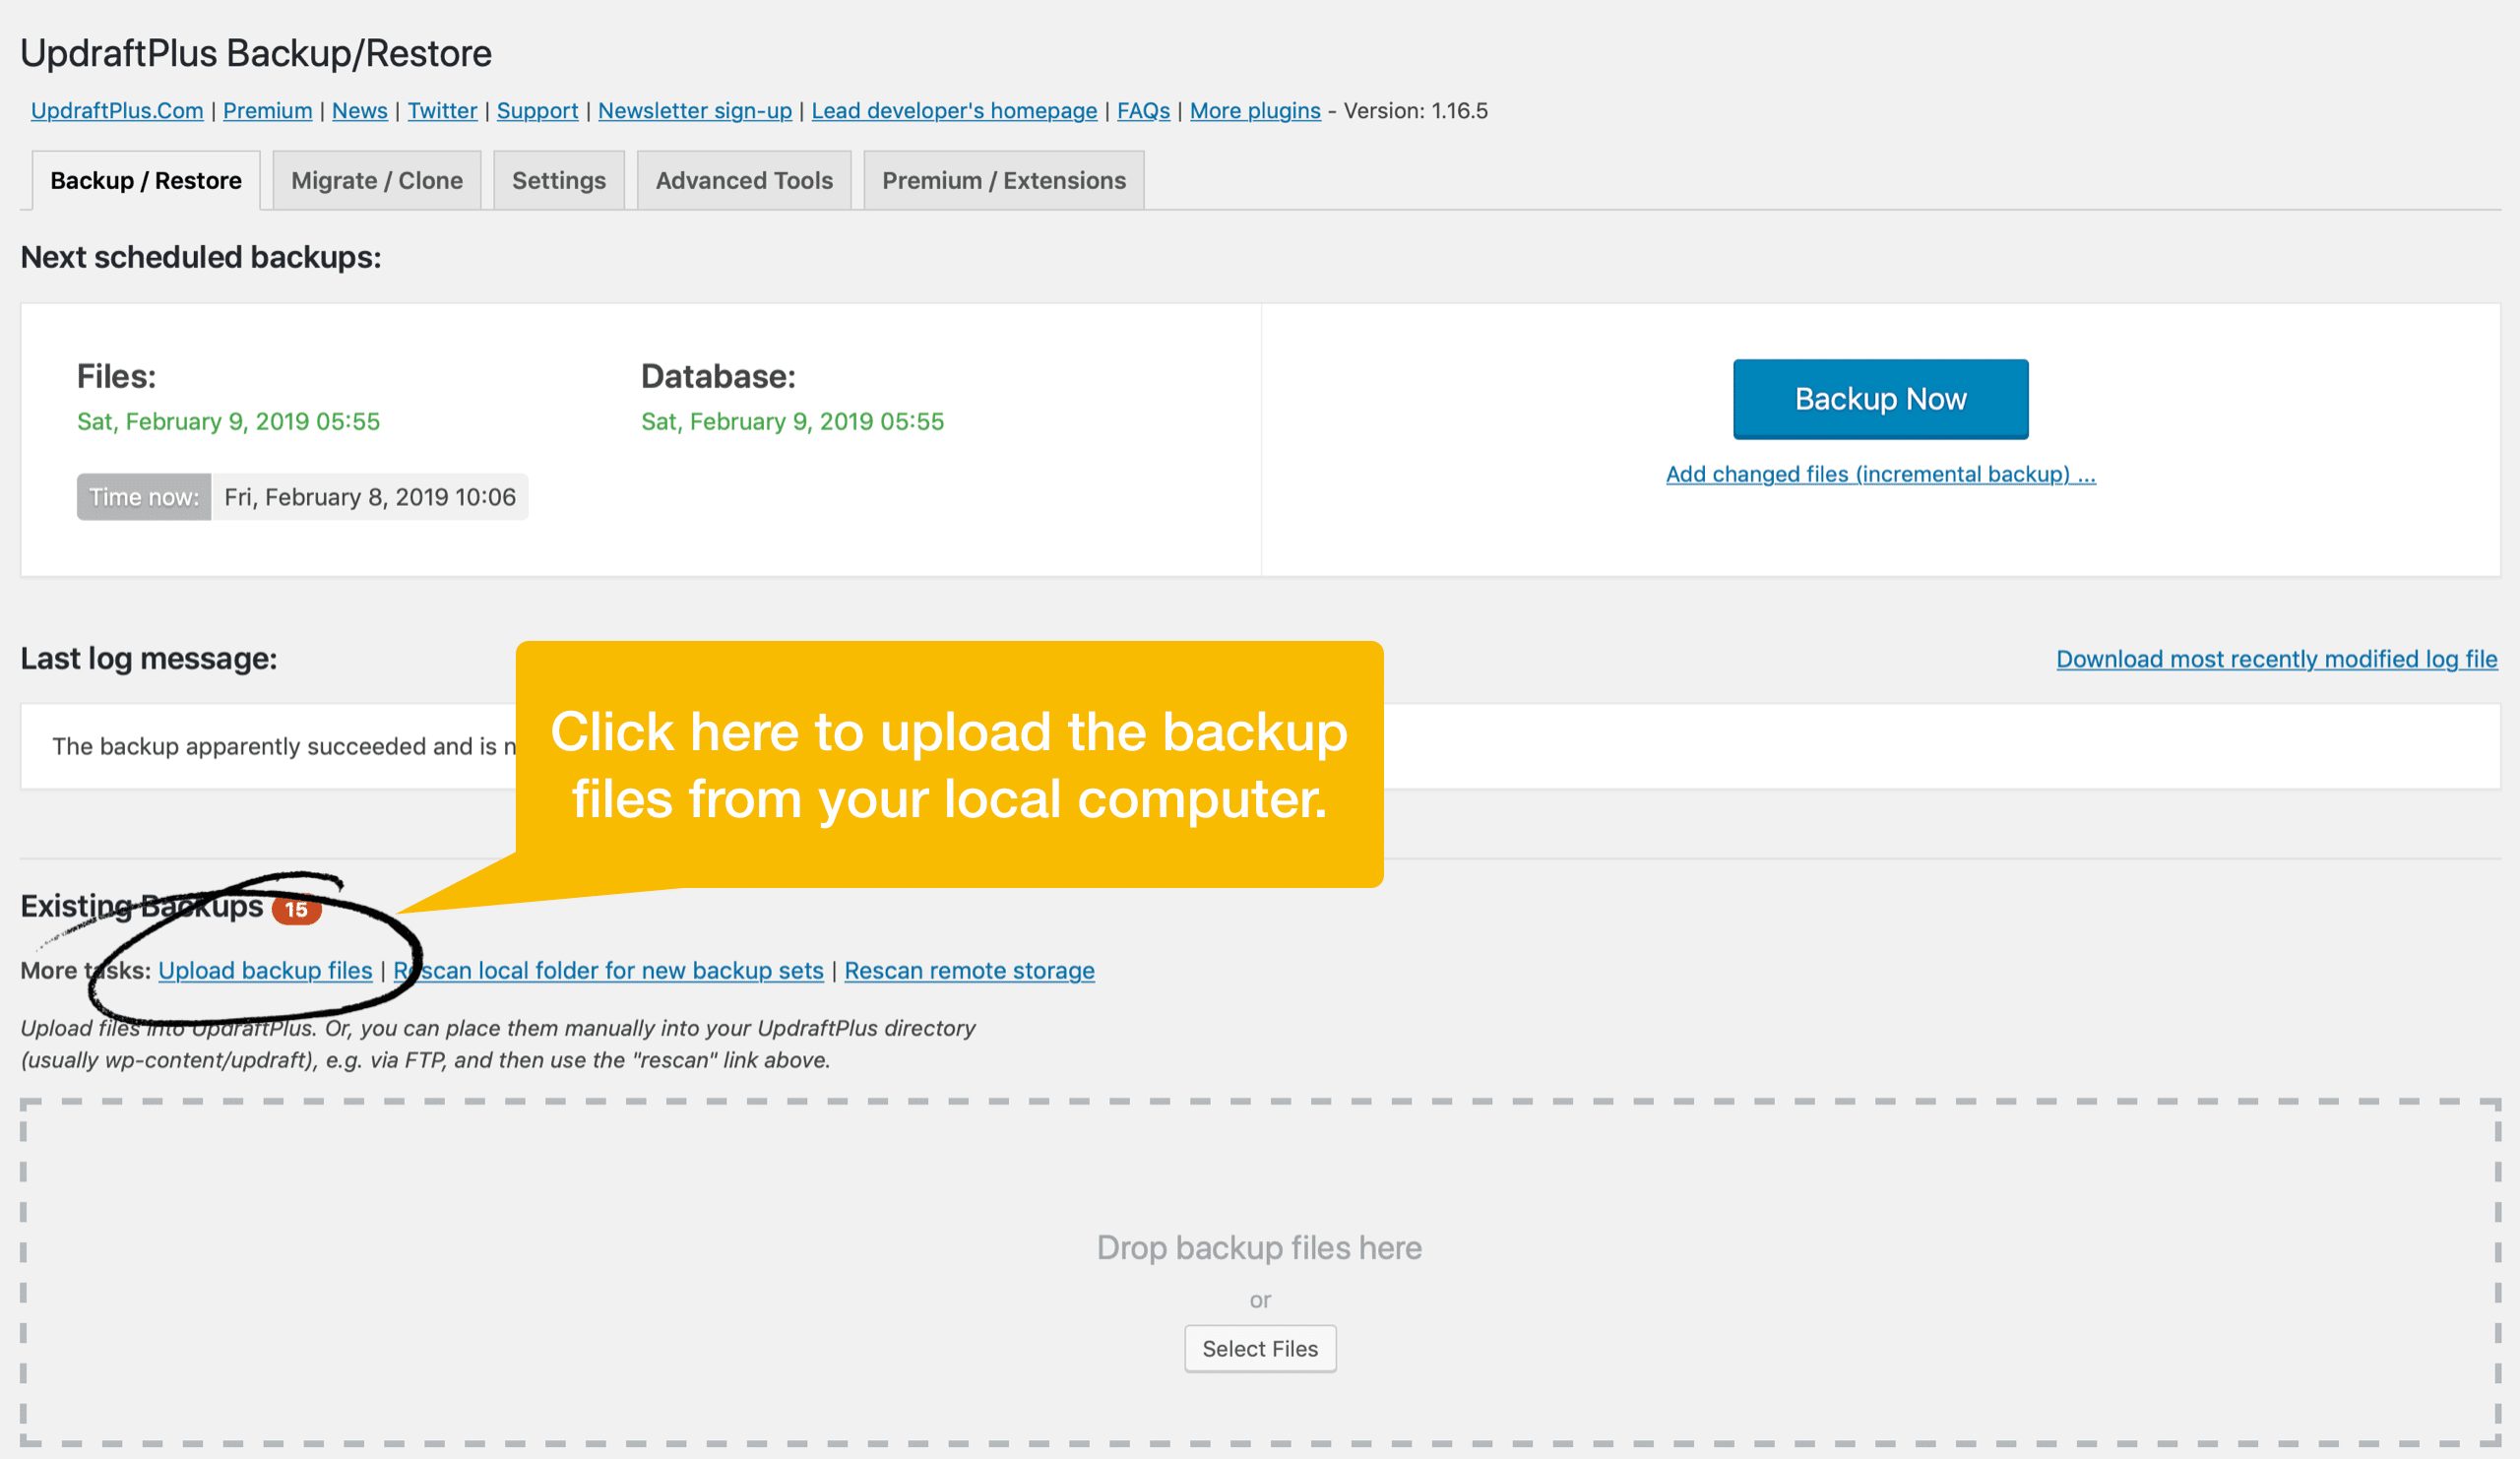
We’re ready to restore our site data onto our new destination site. As a sanity check, lets review the pertinent steps that we took which allow us to restore our old site data into our new destination site:
Ok, lets run the restoration process.
10. Run Velvet Blues URL Updates On Your Destination Site
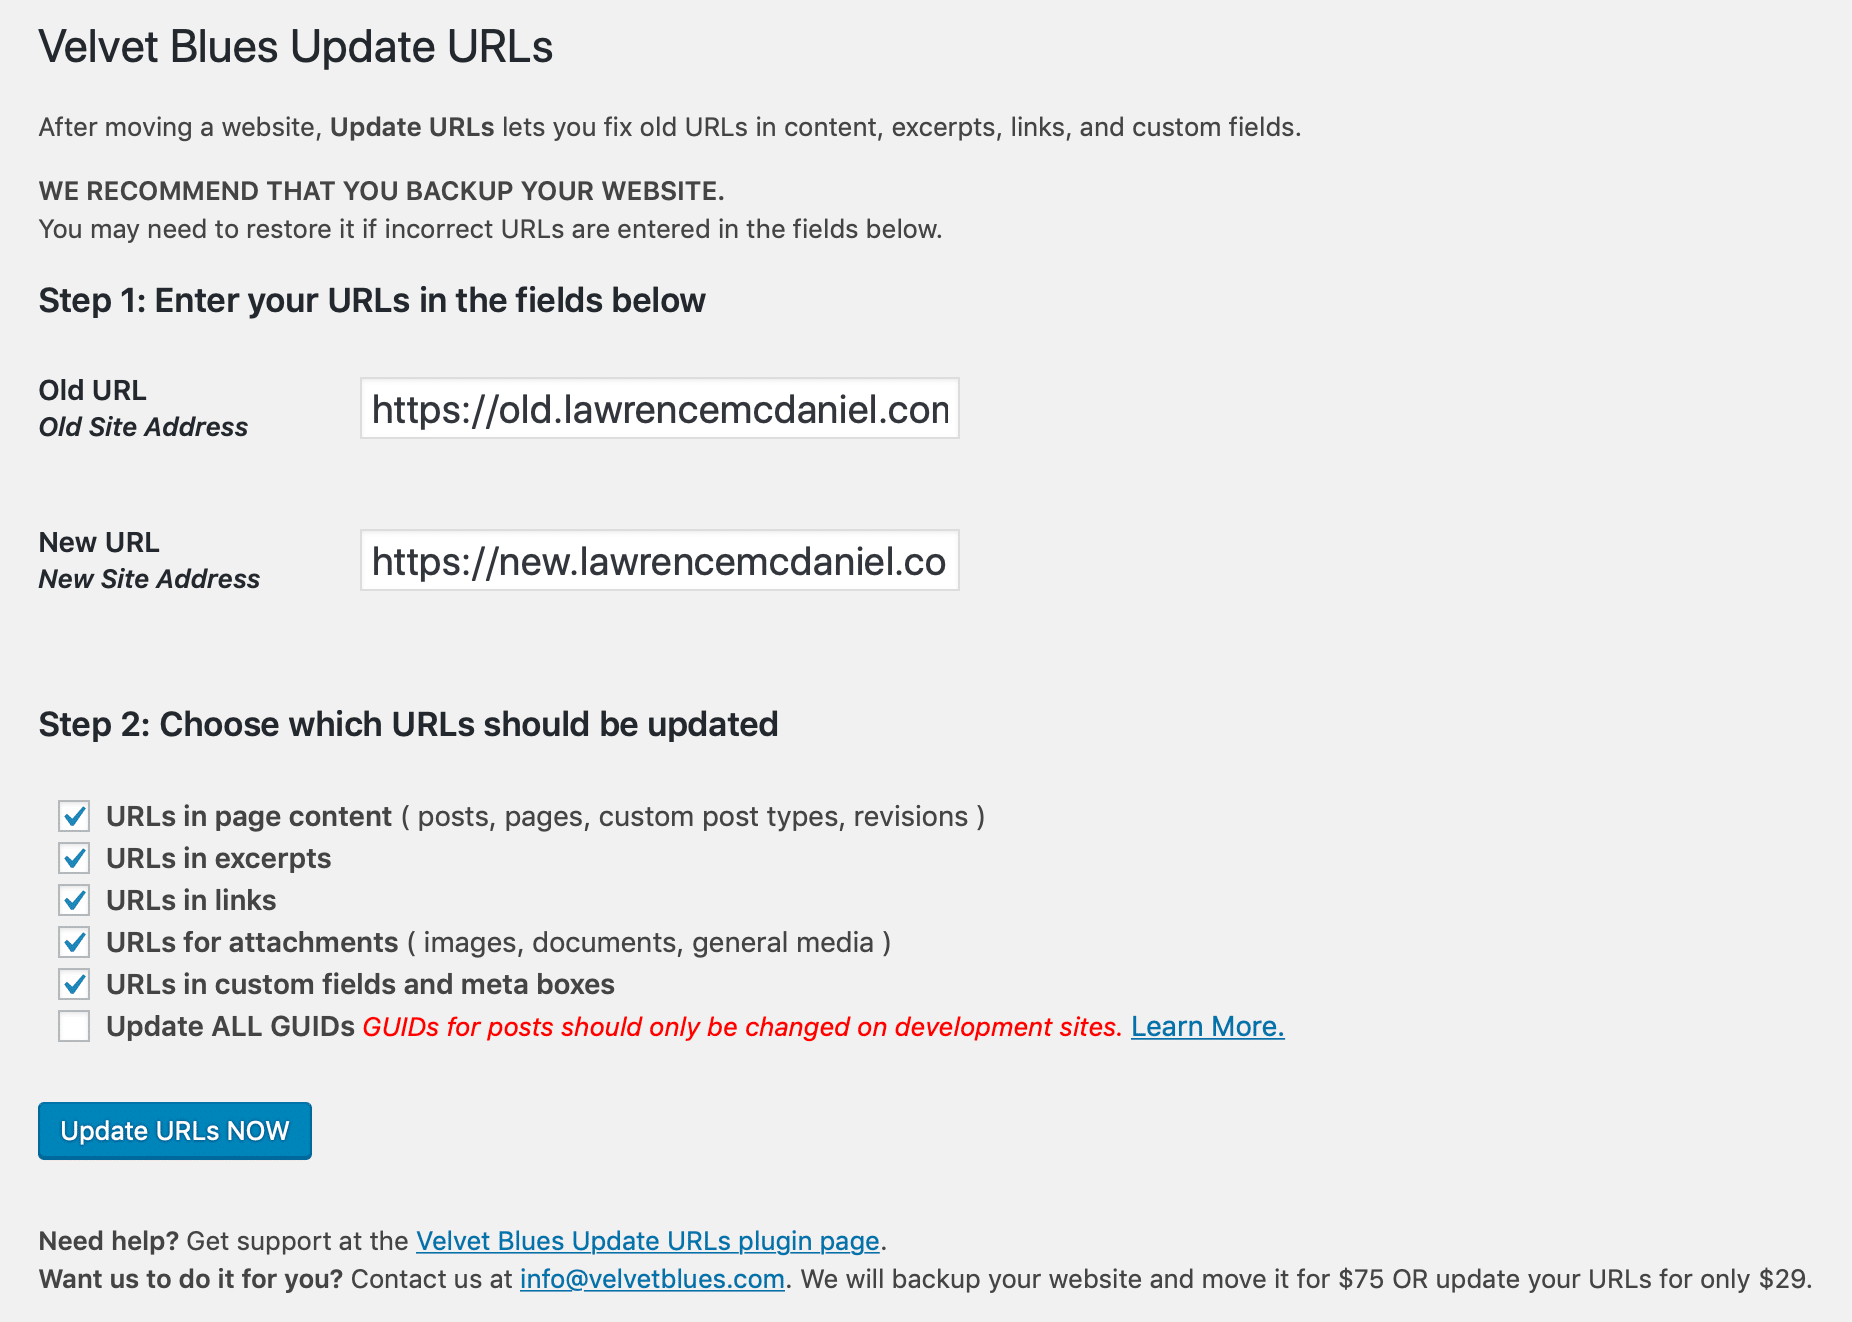
If the restoration process ran successfully then we should process immediately to the Velvet Blues utility screen to change all occurrences of our source URL to our destination URL. It’s important that you do this immediately. If you navigate to your site home page to look around on the site beforehand then you run the risk of WordPress getting confused due to the old URL’s, and then breaking.
11. Re-Enable Potentially Problematic Plugins On Your Destination Site
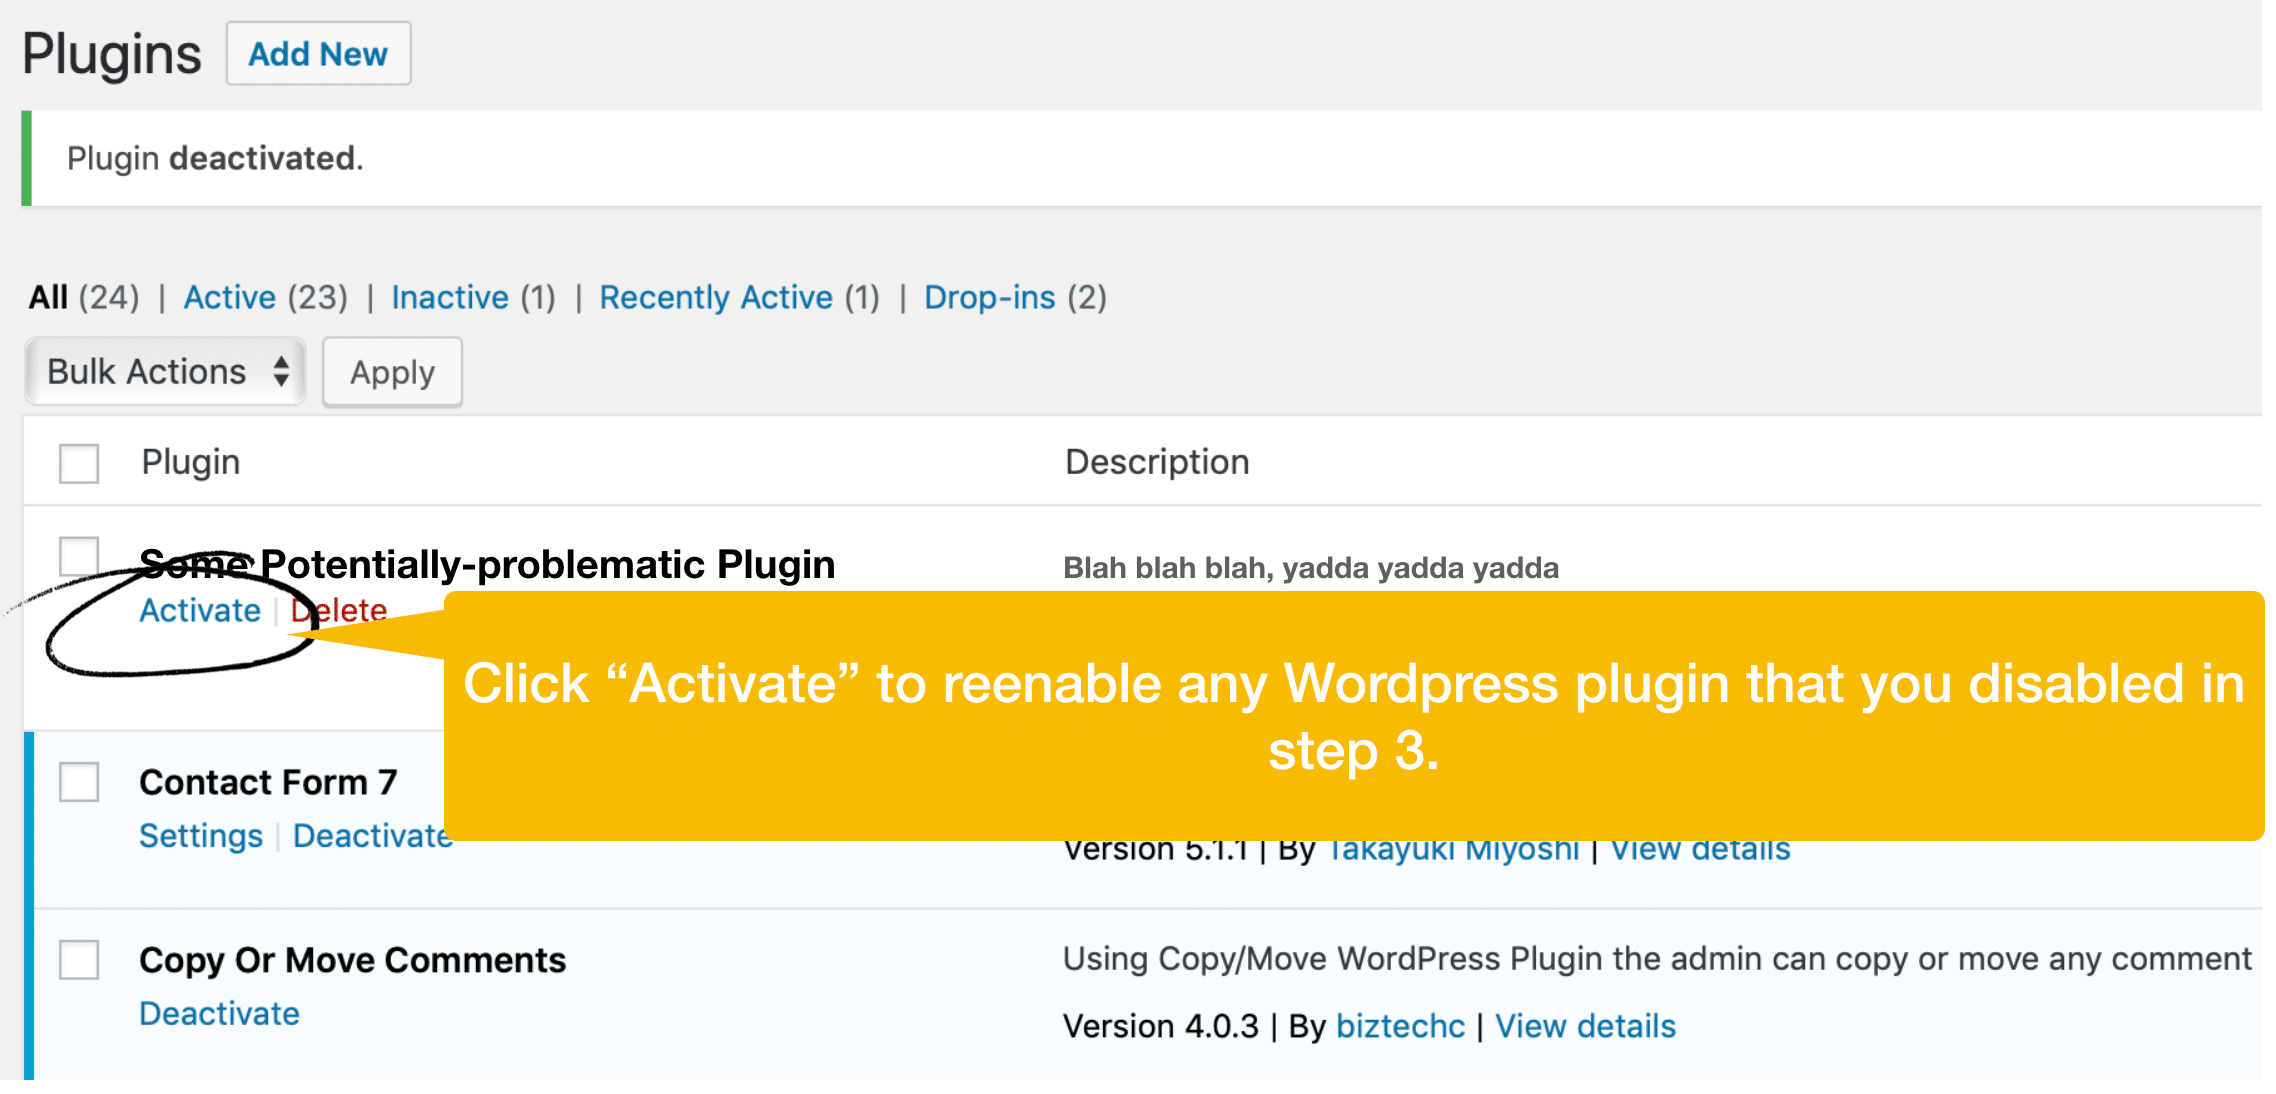
If your site appears to be working correctly then you’re ready to re-enable any plugins that you might have disabled in step 3.
12. Take Your Source WordPress Site Offline
The primary problem that you’ll run into on your new destination WordPress site is that it incorrectly navigates back to your source WordPress site. To properly test your new site it is therefore important that you take your source WordPress site offline as this will result in any such occurrences resolving as 404 errors that will be easier for you to notice.
13. Thoroughly Test Your Destination WordPress Site
You don’t need to test every single link on your site. But you do need to test every kind of link on your site. In particular, make sure you test links in the following places:
- the header and footer
- in every widget
- content produced by plugins, like for example, your contact form
- images with links
- inine page links
- menu links on your site’s primary menu
I hope you found this helpful. Please help me improve this article by leaving a comment below. Thank you!


Leave A Comment