How do you automatically deploy from Github if your repo is private? The first time I had to this it was a nightmare, simply because the Github documentation assumes that all of its users possess a knowledge base bordering on the absurd. The reality is that setting this up is easy once you’ve seen how it all works. This setup should take you around 15 minutes to complete.

Summary
Github and the git command-line program work in concert to provide a way to interact with a private repo using SSH. Github private repos include an additional page where you can add a public SSH key (a, “deployment key“) to facilitate remote connections from servers that need to download (ie “clone”) your private repo. The git command-line program understands special syntax for connecting to a private repo via SSH.
Setup Work Flow
1. Create an SSH key pair from any computer.
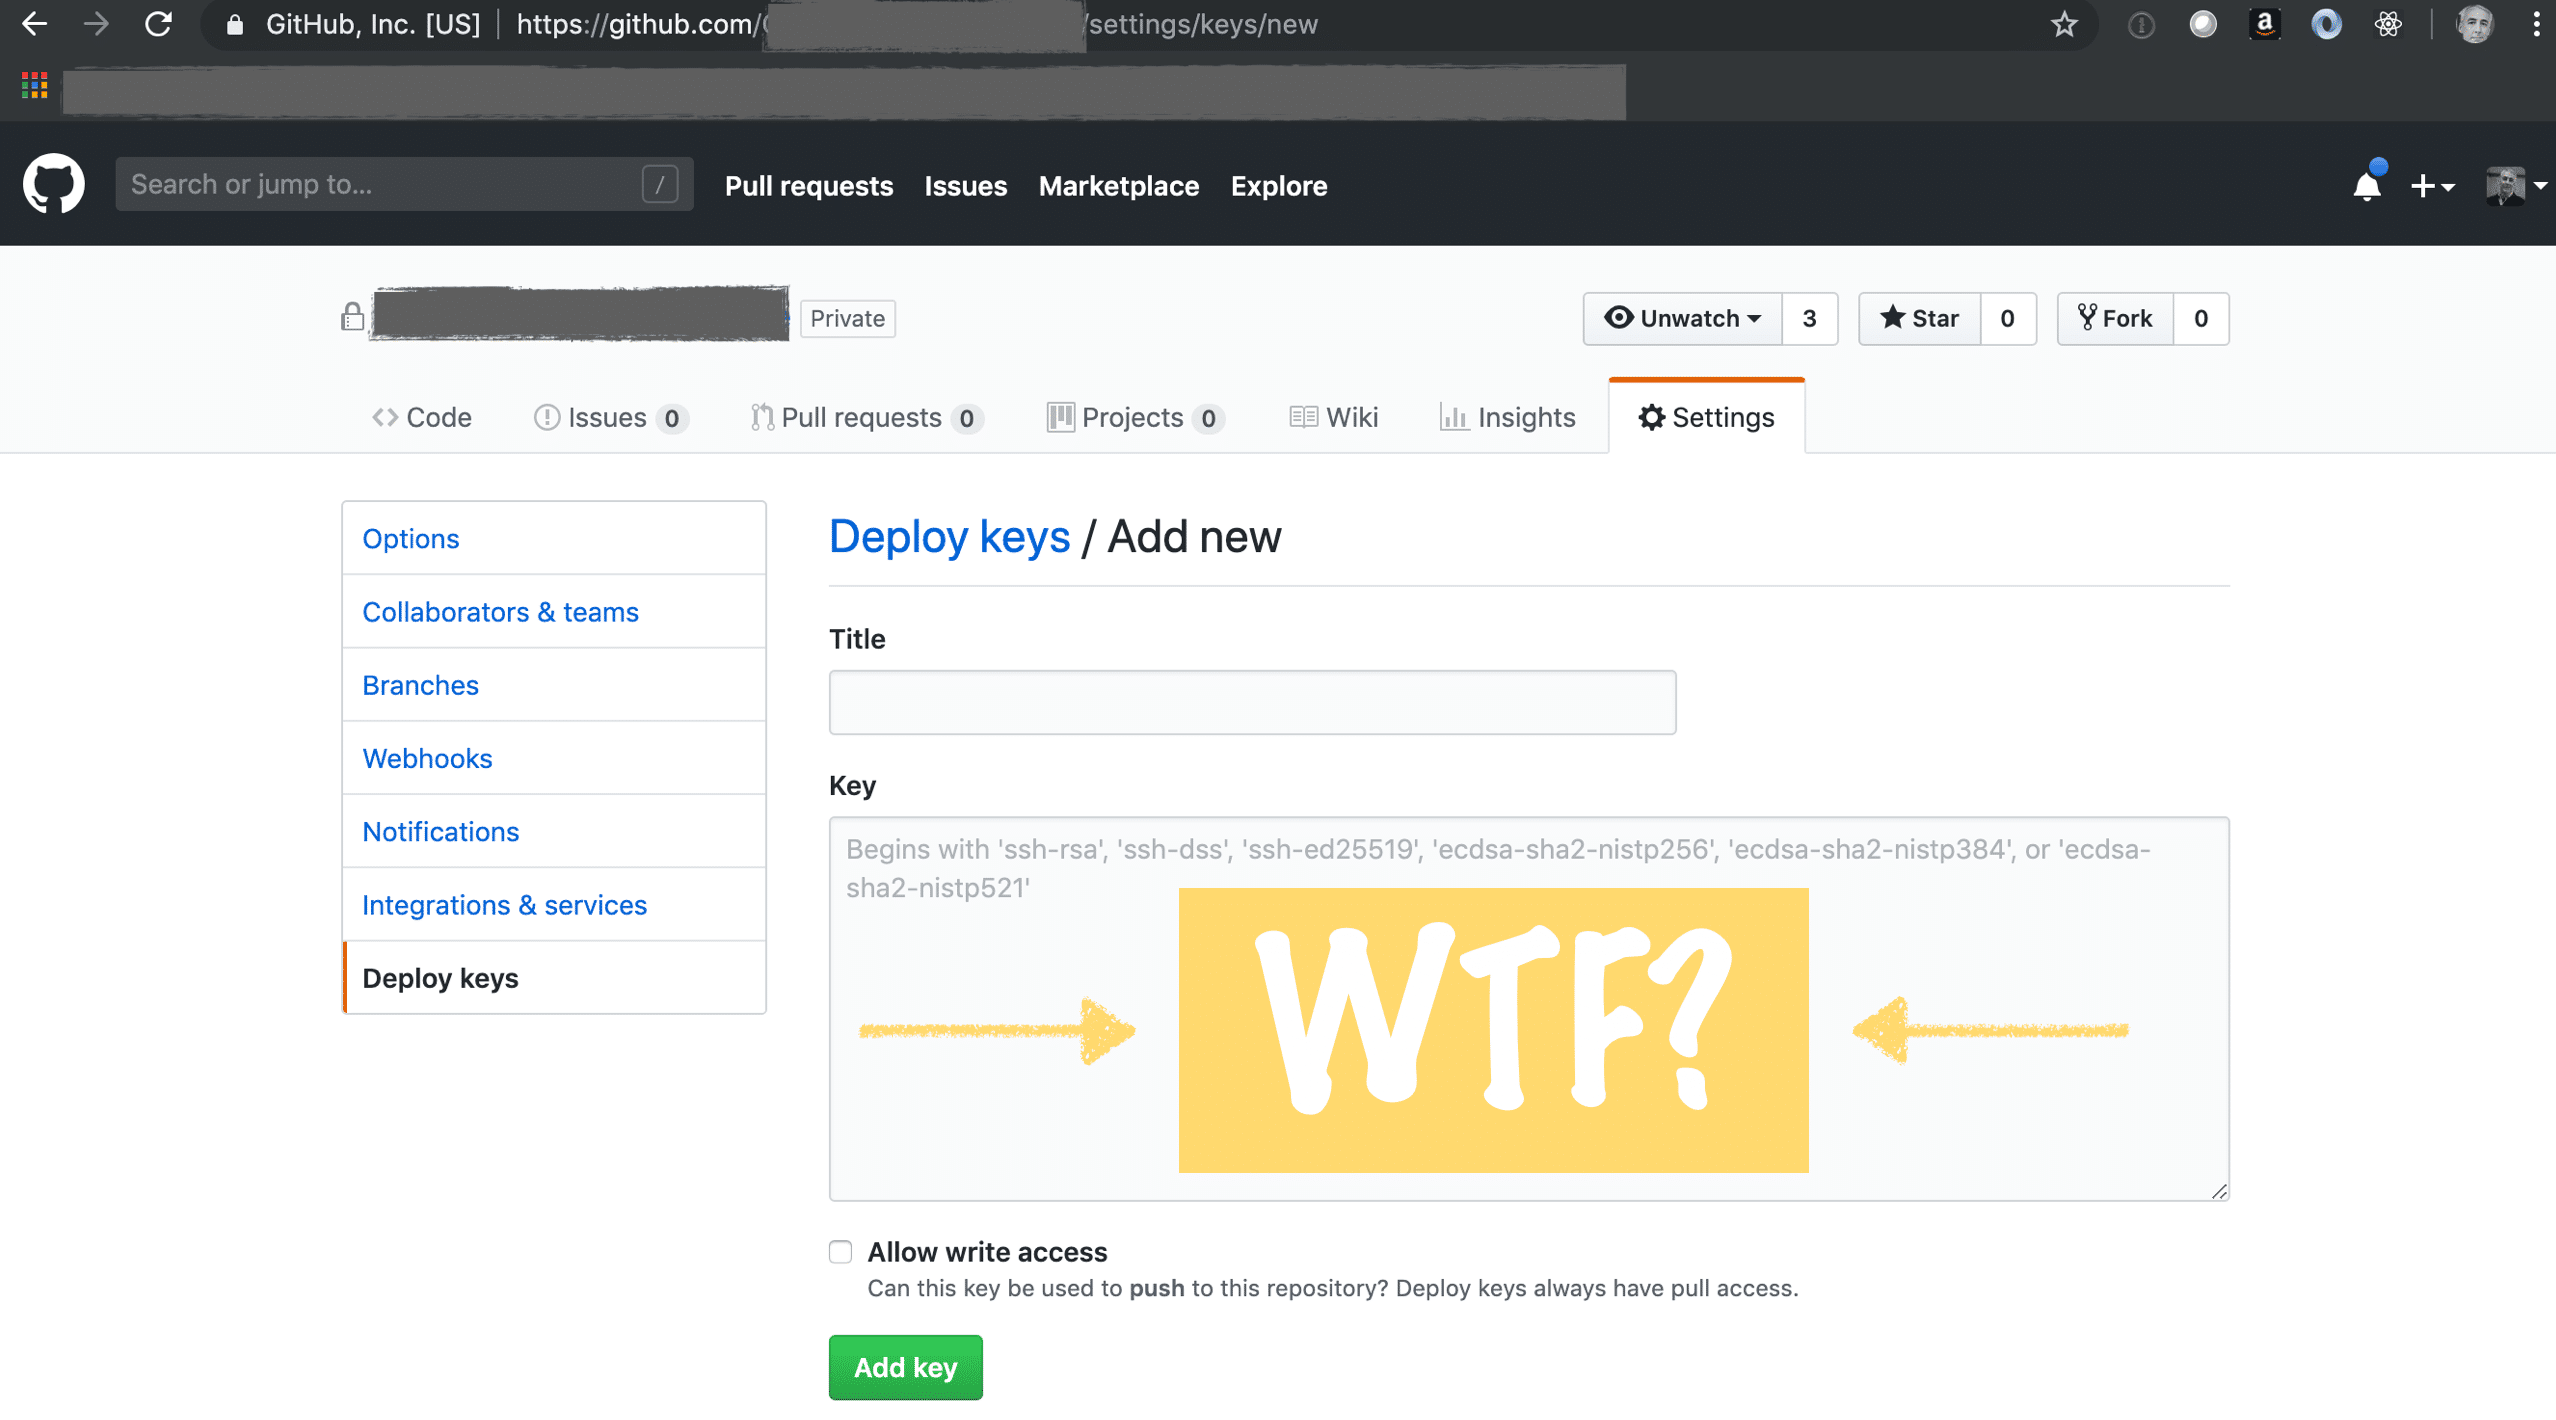 Github provides an additional configuration page for private repos where you can manage deployment keys. But strangely, GitHub doesn’t automatically generate the SSH key for you, nor do they provide any means of creating such a key from their site. The page simply contains a large, empty text field where you’re supposed to paste your public key, but there’s no explanation of where the key comes from.
You have to create a key. You can do this step on any computer with ssh-keygen installed. However, you can save some time by doing this step on your deployment server — assumed to be some kind of Linux server — and storing the files in ~/.ssh/, where the “~” means your home folder.
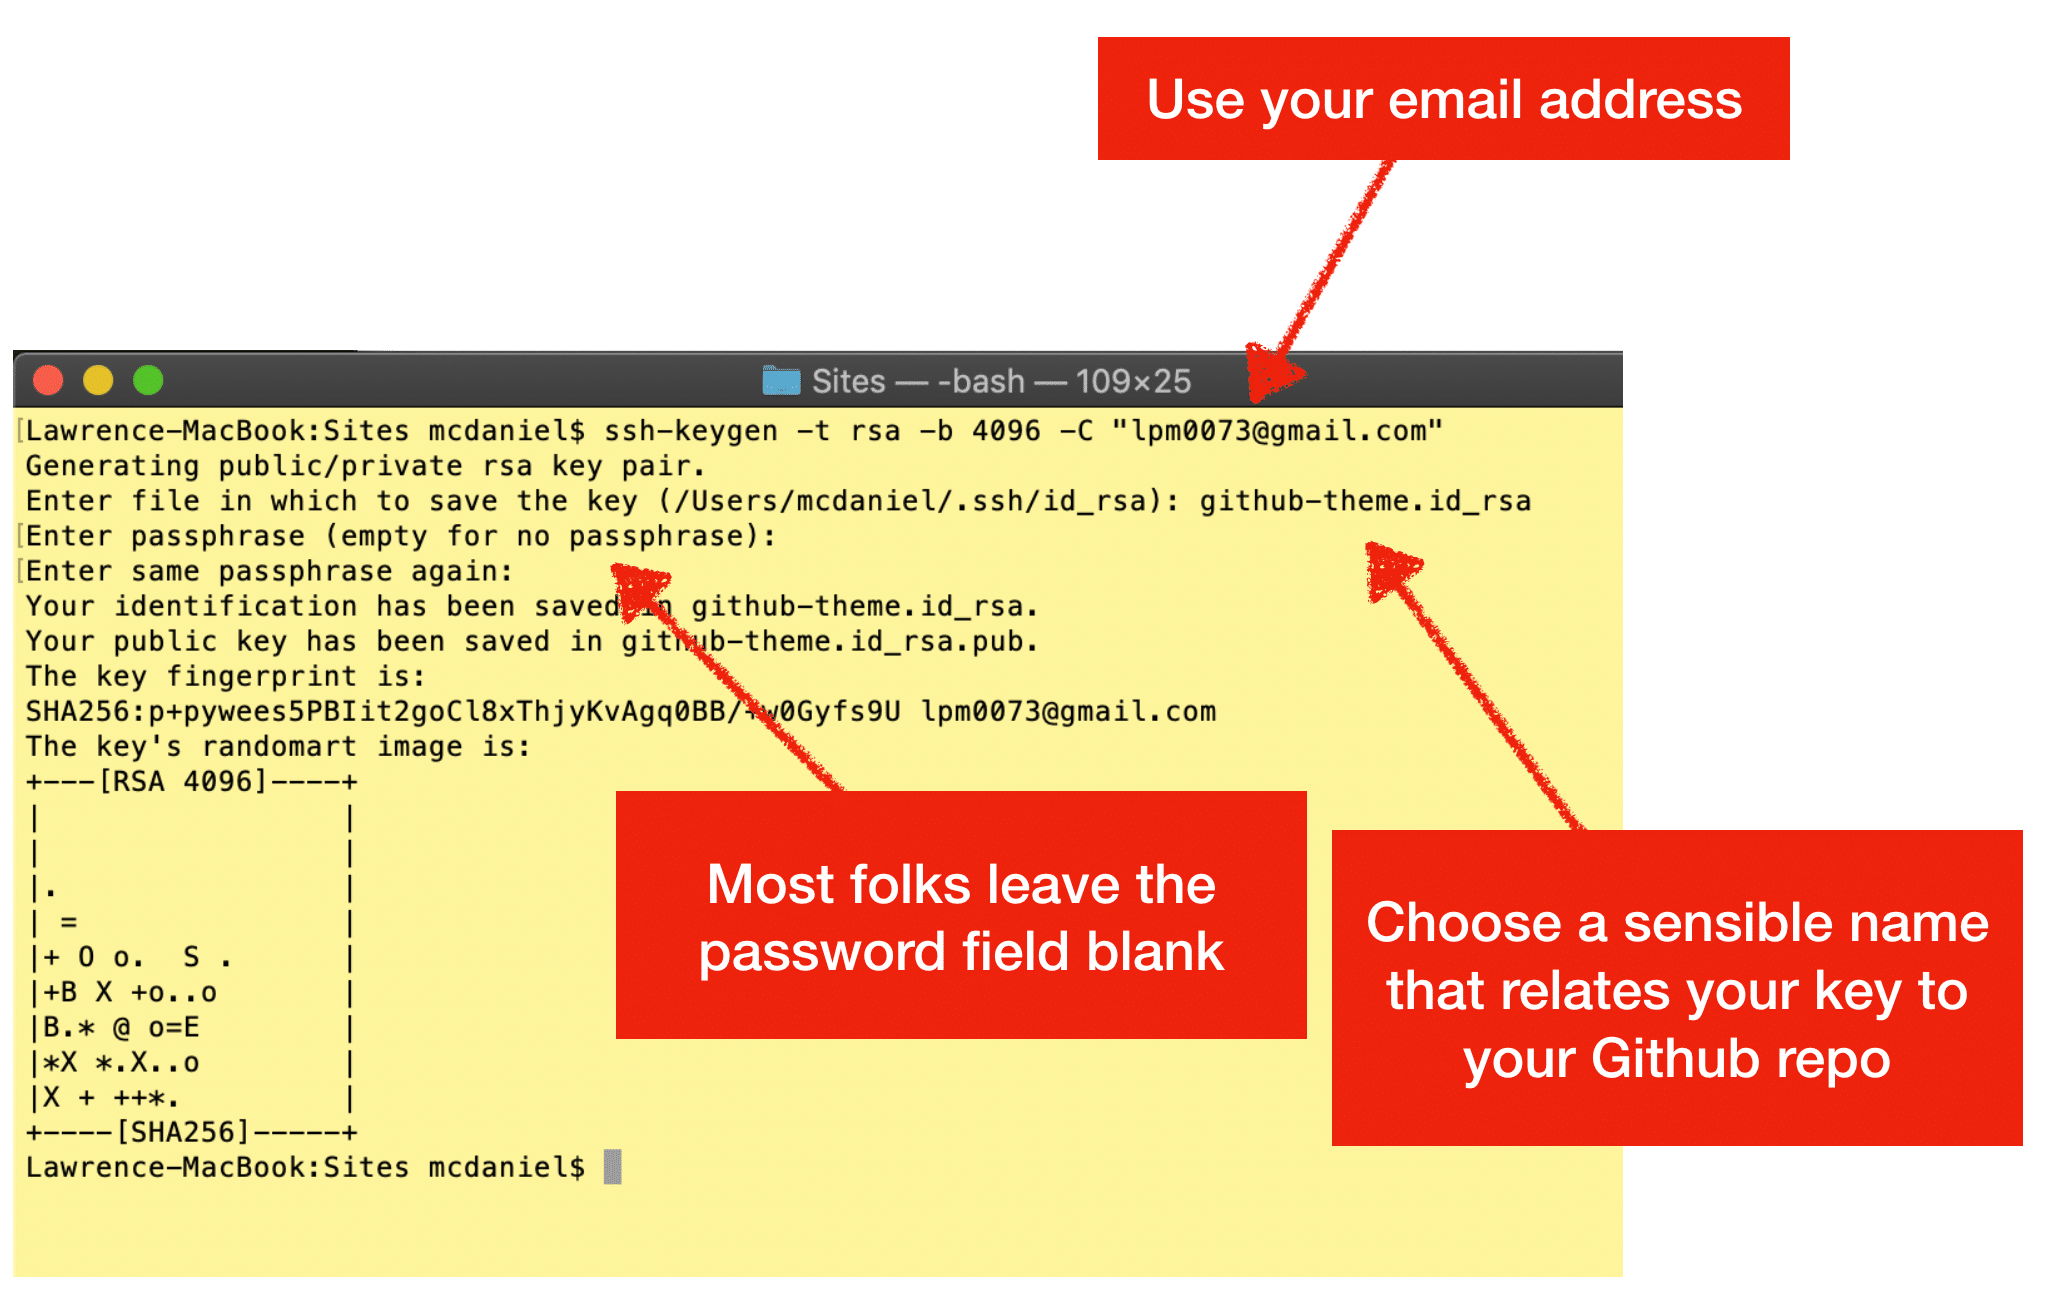
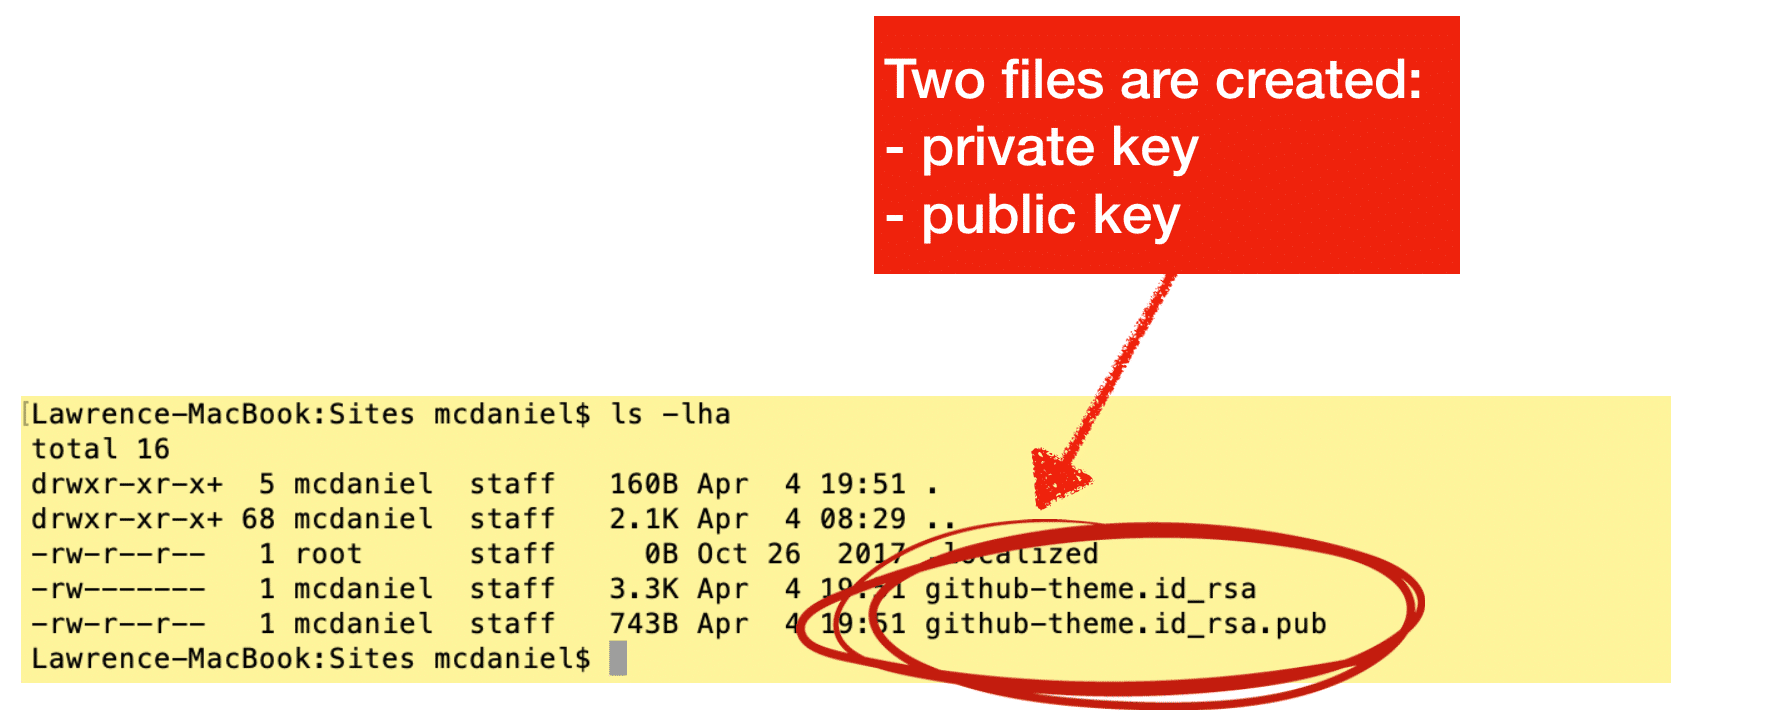
We’ll do this with a command-line utility named ssh-keygen that comes pre-installed on most operating systems. Ssh-keygen asks you a couple of questions then creates two files: a private key, and a public key. Incidentally, you can name these files anything you want, and you can also use any file extension you want including no file extension at all.
GitHub actually provides very good documentation on how to use this tool to create the SSH key pair that you’ll need in order to create a deployment key.
I’m republishing their exact instructions, along with my own annotations, for your convenience.
- Open Terminal.
- Paste the text below, substituting in your GitHub email address.
$ ssh-keygen -t rsa -b 4096 -C "<em>your_email@example.com</em>"This creates a new ssh key, using the provided email as a label.
> Generating public/private rsa key pair. - When you’re prompted to “Enter a file in which to save the key,” press Enter. This accepts the default file location.
-
> Enter a file in which to save the key (/Users/<em>you</em>/.ssh/id_rsa): <em>[Press enter]</em> - At the prompt, type a secure passphrase. For more information, see “Working with SSH key passphrases”.
> Enter passphrase (empty for no passphrase): <em>[Type a passphrase]</em>
> Enter same passphrase again: <em>[Type passphrase again]</em>
- Open Terminal.
- Paste the text below, substituting in your GitHub email address.
$ ssh-keygen -t rsa -b 4096 -C "<em>your_email@example.com</em>"This creates a new ssh key, using the provided email as a label.
> Generating public/private rsa key pair. - When you’re prompted to “Enter a file in which to save the key,” press Enter. This accepts the default file location.
> Enter a file in which to save the key (/Users/<em>you</em>/.ssh/id_rsa): <em>[Press enter]</em> - At the prompt, type a secure passphrase. For more information, see “Working with SSH key passphrases”.
> Enter passphrase (empty for no passphrase): <em>[Type a passphrase]</em>
> Enter same passphrase again: <em>[Type passphrase again]</em>
- Open Git Bash.
- Paste the text below, substituting in your GitHub email address.
$ ssh-keygen -t rsa -b 4096 -C "<em>your_email@example.com</em>"This creates a new ssh key, using the provided email as a label.
> Generating public/private rsa key pair. - When you’re prompted to “Enter a file in which to save the key,” press Enter. This accepts the default file location.
> Enter a file in which to save the key (/c/Users/<em>you</em>/.ssh/id_rsa):<em>[Press enter]</em> - At the prompt, type a secure passphrase. For more information, see “Working with SSH key passphrases”.
> Enter passphrase (empty for no passphrase): <em>[Type a passphrase]</em>
> Enter same passphrase again: <em>[Type passphrase again]</em>
Example Public Key

Example Private Key

2. Create a GitHub deployment key
GitHub also provides good documentation on creating Deployment Keys for a private repo. At least, their documentation makes sense for anyone who already has experience creating said keys. You should definitely refer to their documentation. The short story is that you need to copy/paste the complete contents of the public key file from the previous step into the large text box below. You will break your key if you alter the text from the file in any way including, for example, removing carriage returns or omitting the “ssh-rsa” title text.

3. Create a .ssh/config file on your deployment server
 We’re ready to setup your deployment server. But first, if you’re new to this then some additional background will be helpful. The Git command line utility preinstalled on your computer uses SSH to connect to GitHub private repos. All rules of SSH apply. For example, the file permissions are important. GitHub requires that the file permissions of private keys be either 600 or 400. See the example keys above. In this example, the private keys are set to 400 whereas the public keys are set to 600. I’ve never found online documentation from Git nor GitHub to this effect, so the explanations that follow are from my own personal experience.
Following is a generalized explanation of the git command line syntax to connect to a private repo:

The config should be located in ~/.ssh/, noting however that you’ll probably have to create this file yourself using the following command:
vim ~/.ssh/config
You’ll have to manually add a new host to ~/.ssh/config describing the authentication parameters for connecting to your private GitHub repo. The SSH config file stores data about, among other things, which private key to associate with your private repo. Following is an example Host:

On a side note, the SSH config file can be a powerful tool, and this is but one of its many uses. You can read more about how to setup config files from this great article by nixCraft as well as from the official Git online documentation. Now then, imagining for a moment that the private repo above in Step 2 were named “top-secret-invention” and were located in my personal GitHub account “lpm0073”, then we could reference the Host above to access my imaginary private repo using the following syntax:
git clone git@my-amazing-private-repo:lpm0073/top-secret-invention.git
I hope you found this helpful. Please help me improve this article by leaving a comment below. Thank you!


Please allow copy paste of SSH config instead of using an image. I had a typo which would have been easily avoided via copy/paste. Also my SSH config needed the permission changed which I missed in your article.
Otherwise, this page helped.. TY