Learn how to create a production-ready Django web platform using cookiecutter-django, deployed to AWS Ubuntu 18.04 with Nginx, Gunicorn, Redis and MySQL. I’ve refined the following “best practice” comprehensive setup procedure to ensure that I get each project setup consistently, the right way, the first time.

Summary
Django is a high-level Python Web framework that encourages rapid development and clean, pragmatic design. Built by experienced developers, it takes care of much of the hassle of Web development, so you can focus on writing your app without needing to reinvent the wheel. It’s free and open source. As humbly claimed by its authors, it is “Ridiculously fast, Reassuringly secure, and Exceedingly scalable”. I’ve consistently found all three claims to be true.
This article will take you step by step thru creating a Continuous Integration loop for a commercial-grade Django site from which you can begin to iterate and develop your web project. Continuous Integration (CI) is the practice of merging all developers’ working copies to a shared mainline several times a day. To facilitate this, we will set up an efficient development environment, push our code to Github, and then create a way to automatically deploy code updates to our production environment.
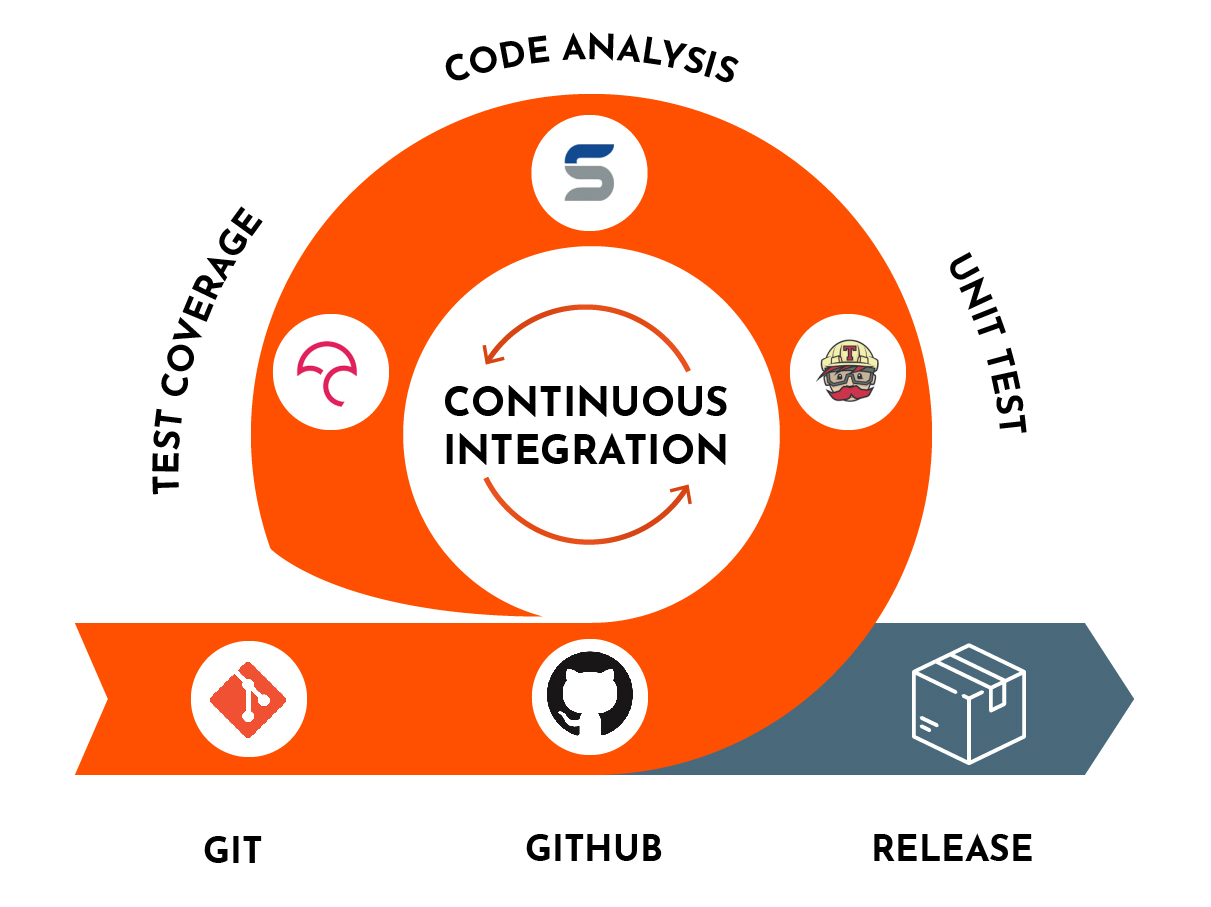
For this article I am using a Macbook Pro running OS X 11, and I’ll be deploying to an AWS Ubuntu 18.04 EC2 instance configured with Nginx, Gunicorn, Redis and MySQL. Keep in mind however that none of these decisions has any material impact on the procedure that I’m presenting in this article.
1. Install Python
As of this writing there are two completely different and co-existing versions of Python: Python 2.7 and Python 3.x. The former will reach “end of life” in April-2020 and thus, we’ll be using Python 3.x for this article. It can be tricky to get your project setup with the correct version of Python depending on whether your development environment is on Windows, OS X or Linux, and also depending on whether or not a version of Python is already installed globally on your computer. I’ll point out how we check and double-check this, each stop along the way.
I use a Mac, and as it happens, recent versions of OS X ship with Python 2.7 pre-installed; not the version we want to use. Nonetheless, you can safely install multiple versions of Python on the same machine. I have both Python 2.7.16 and Python 3.7.1 on my Macbook Pro.

If you do not yet have Python version 3.x installed on your computer then you should take care of that now by referring to these instructions from The Hitchhiker’s Guide to Python.
2. Install PIP (Python Install Package)
Our journey begins with Pip (Python Install Package), the standard package manager for Python. Pip allows you to install and manage additional packages that are not part of the Python standard library. Pip provides a simple, clean means of adding (or removing) high-quality third party code libraries to your Django project. Django itself is installed with pip, which is why we have to begin by installing pip.
Your first step is to check to see if pip is already installed, and if so, what version are your running? In my case this is what I see:
$ pip --version
pip 19.3.1 from /Users/mcdaniel/.local/share/virtualenvs/openstax-integrator-WBtBbSHL/lib/python2.7/site-packages/pip (python 2.7)
Here you can see once again that pip is running on Python 2.7, but this is perfectly ok because we’re only going to use the older version of Python to install a new virtual environment for our new Django project, within which we will install a newer version, Python 3.7. Sounds weird, I know!
If pip is not installed on your computer then you’ll need to install it now. If you’re using a Mac then you can easily install pip from the command line in a terminal window as follows:
sudo easy_install pip
3. Create a Python Virtual Environment
It may not be readily obvious, but it’s really important to manage each of your Django projects from within a virtual environment. A virtual environment is a lightweight, safe means of isolating all of the Python code packages associated with your project. Even the versions of Python and Django that you choose for your project are locally installed into a virtual environment; or at least, they should be. Without virtual environments it would be impossible to manage more than one individual development project at a time on your computer because of version conflicts between like packages across different projects.
pip (Python Install Package) is the easiest and most common way to download packages for your project, and it works out of the box with all types of Python virtual environments.
I’ve used Virtualenv as well as venv and find both to be easy to setup and use. We’ll use venv for this article, as follows:
# execute the following from inside a newly-created project folder on your local computer
python3 -m venv venv
source venv/bin/activate
Your command prompt will change slightly when the virtual environment is running. You’ll notice the name of your virtual environment, “venv”, placed at the far-left of your command prompt. Your computer will otherwise behave normally. Checking the Python version from within your virtual environment should result in screen output similar to the following:
(venv) mcdaniel@Lawrence-MacBook tmp % python --version
Python 3.7.1
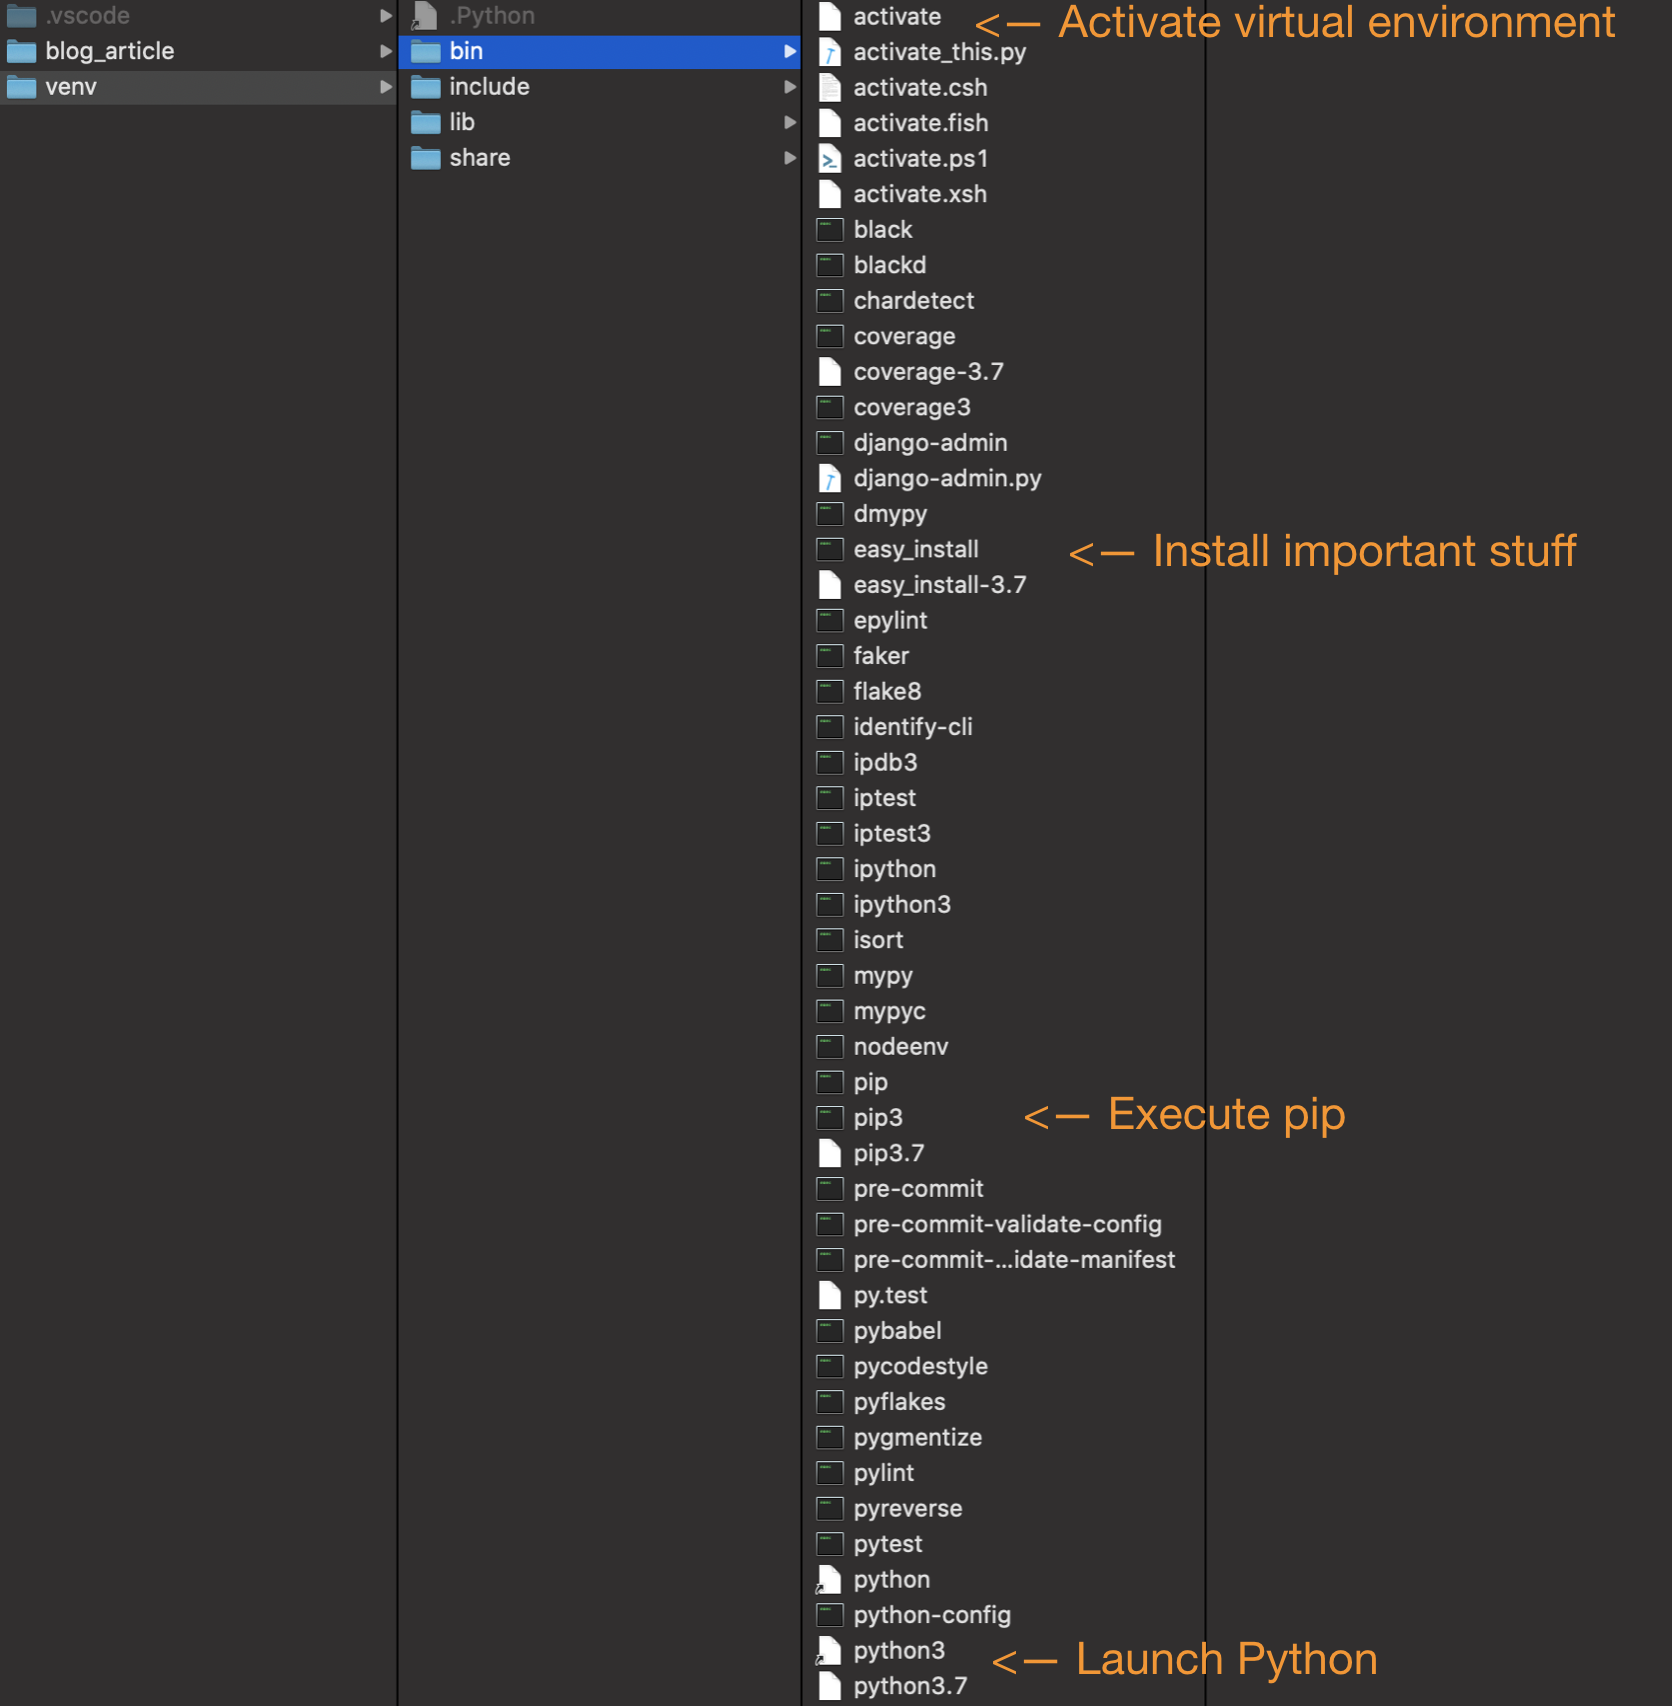
To hopefully shed some light on how the virtual environment works, here’s a screen shot of the folder and files that were added to our project folder after running the command python3 -m venv venv. Notice how you can trace the path for the command source venv/bin/activate. Also, take particular note that local copies of (or symlinks to) the principal system executables — pip, and Python — are present in the bin folder.
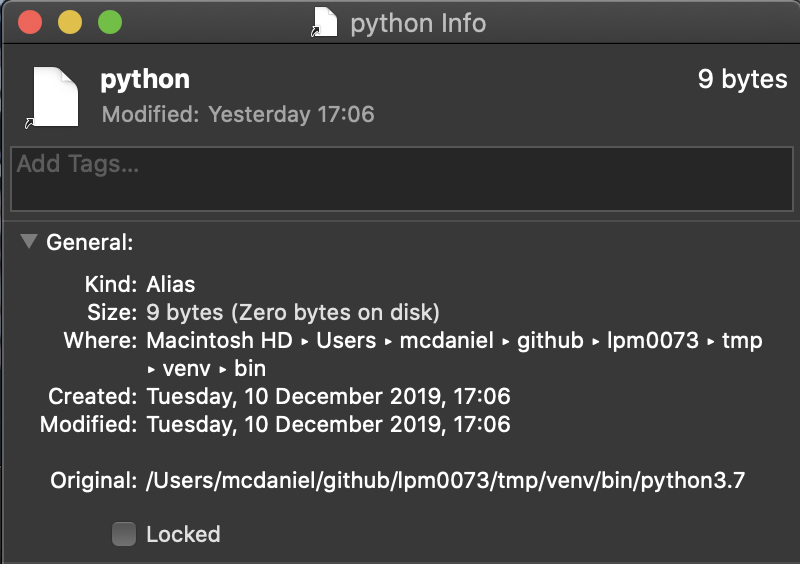
And for the last of the theory, lets look at why typing python --version from within the virtual environment returned “Python 3.7.1” rather than “Python 2.7.16”. Examining the file “venv/bin/python” we can see that it’s a symlink pointing to “/Users/ … /tmp/venv/bin/python3.7”, an executable file that was automatically downloaded for us when we created the virtual environment with the command “python3 -m venv venv”.
4. Install Cookie Cutter
We’re going to initialize our Django project by using an incredible scaffolding solution for Python projects named Cookie Cutter. Cookie Cutter is a command-line utility that creates projects from cookiecutters (project templates), e.g. creating a Python package project from a Python package project template. Cookie Cutter was originally written by Audrey Roy Greenfeld, also a co-author of the Django coding bible, “Two Scoops of Django.”
By creating our Django project with Cookie Cutter we’ll afford ourselves the opportunity to think through some important low-level assumptions and requirements about our project and its dependencies. Plus, we’ll ensure that our project is setup in the most Pythonic way possible.
We’ll use pip to install Cookie Cutter, and then afterwards we’ll use Cookie Cutter to load a Django Cookie Cutter template from Github:
# from within your virtual environment, execute the following
pip install "cookiecutter>=1.4.0"
cookiecutter https://github.com/pydanny/cookiecutter-django
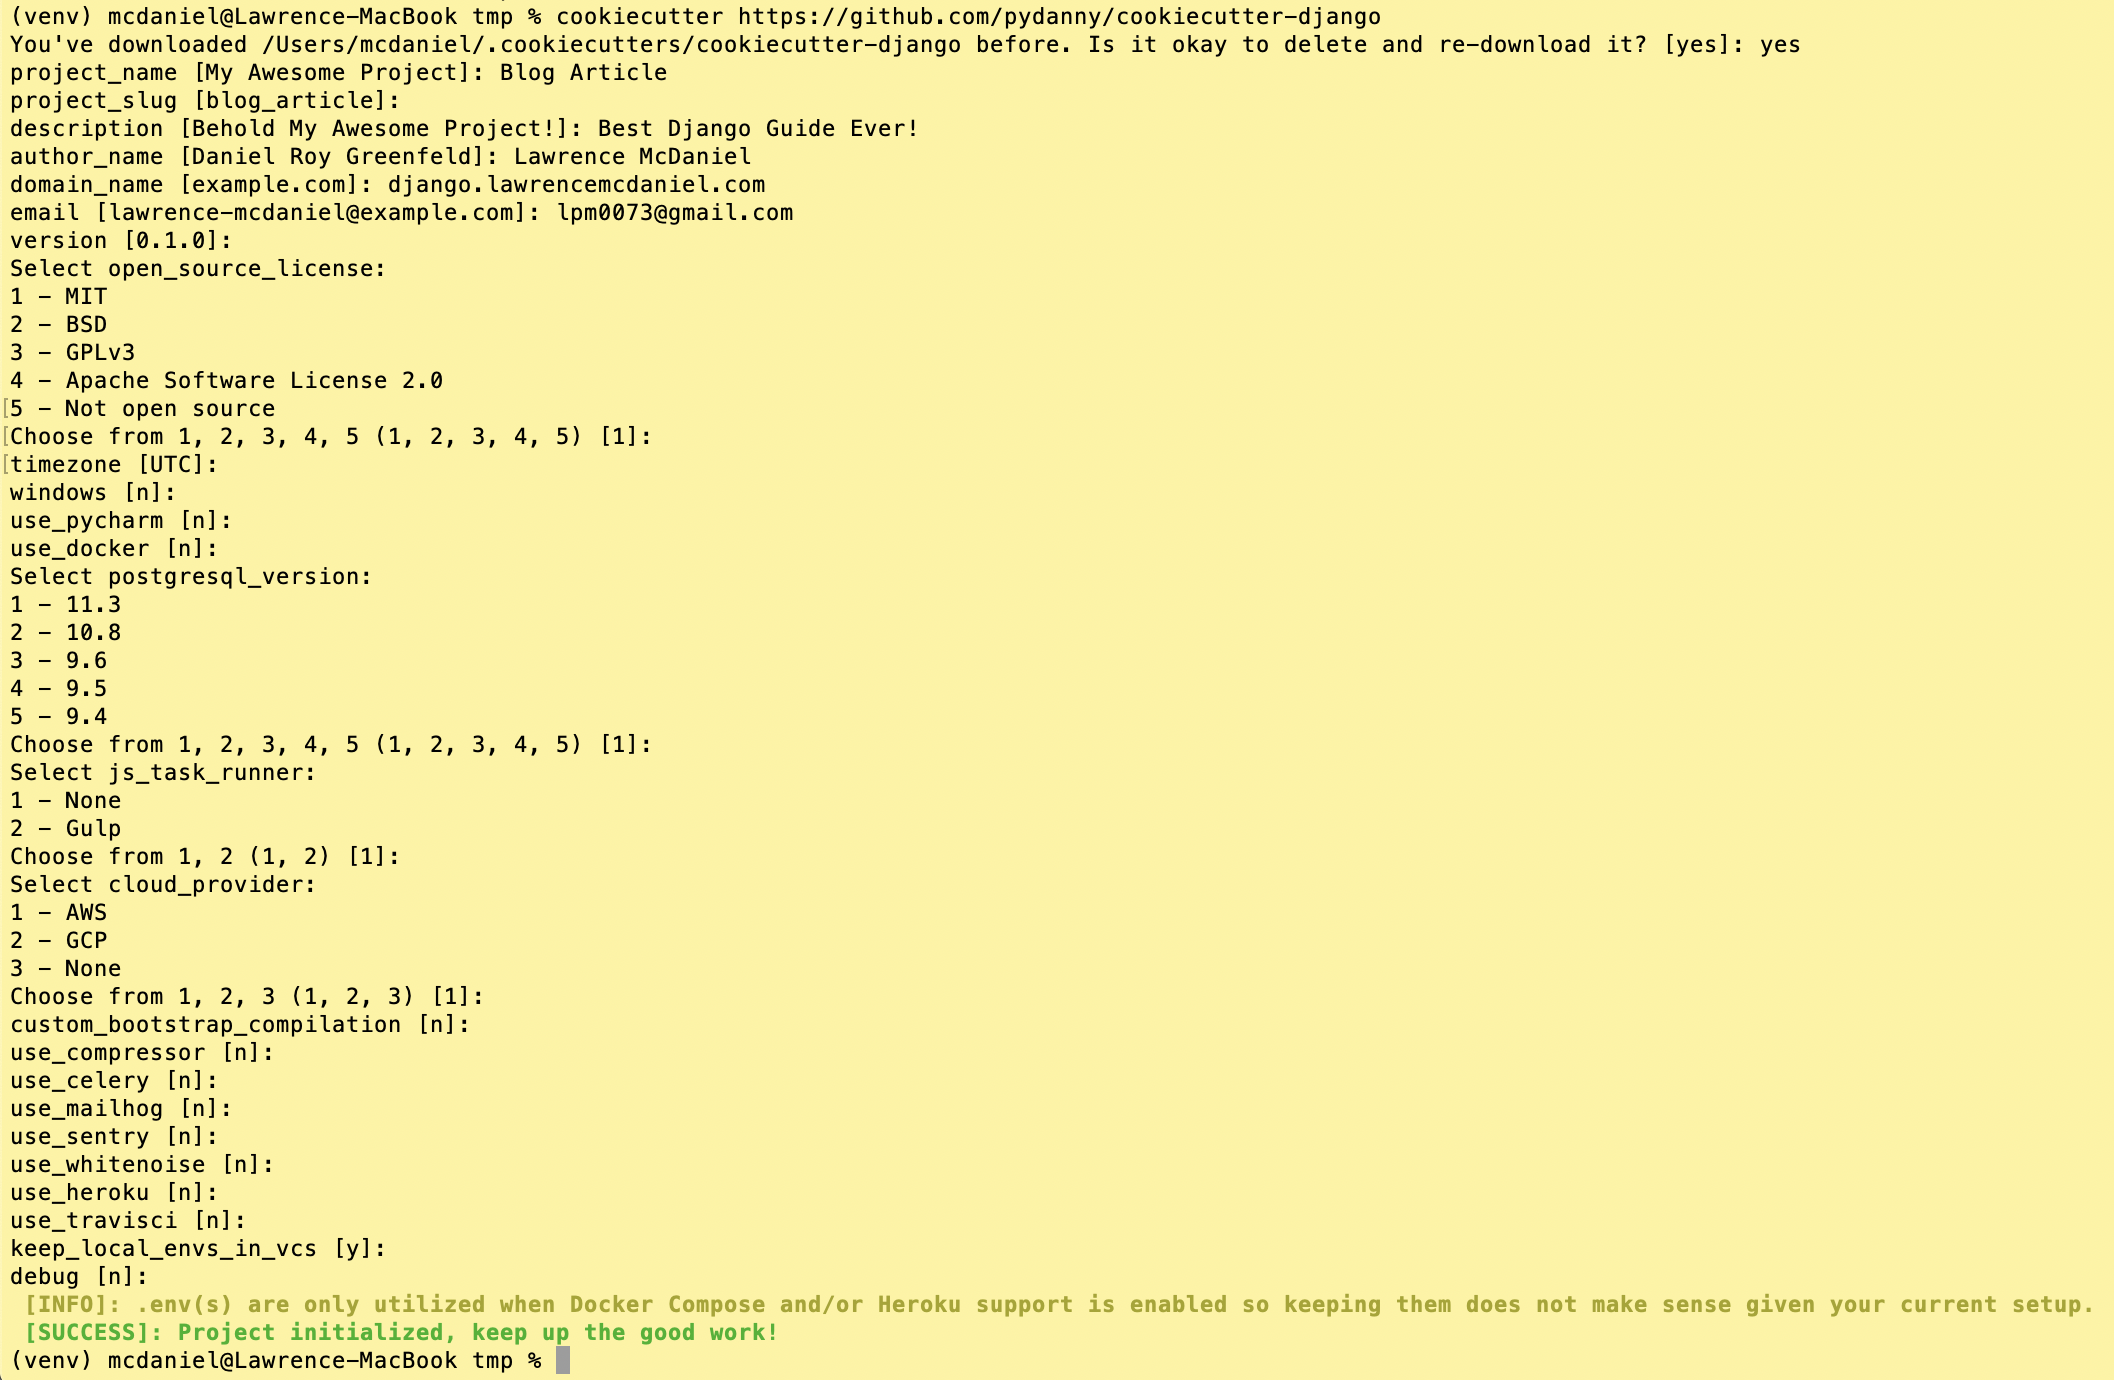
Running Cookie Cutter with the Django template will initiate a command-line questionnaire that gathers the basic meta data and attributes of your project. It will also gather information about your projects additional support and infrastructure requirements, and it will automatically add the necessary code to your project to install and configure these additional requirements. Following is my Cookie Cutter questionnaire for the project I created for this article.
5. Get Your Project Working Locally
It is important to immediately get your freshly-minted Django project to run in your development environment. This ensures that your basic stack — operating system, Python, virtual environment, pip, pip packages, and your Django project — are all working together as intended. It’s equally important that, until your project is confirmed to work locally, you avoid tinkering with your project files, and that you do not yet begin any real programming work in your project. Otherwise, these activities might impede your ability to trouble shoot any configuration problems that might exist.
Install Django Project Dependencies
Pip is able to read specially formatted text files, typically called “requirements” files, that describe the pip packages on which your project depends. Cookie Cutter created a requirements folder for you that follows the best practice of maintaining separate files for local versus production dependencies. Our local.txt contains the following
-r ./base.txt

Werkzeug==0.16.0 # https://github.com/pallets/werkzeug
ipdb==0.12.3  # https://github.com/gotcha/ipdb
Sphinx==2.2.2  # https://github.com/sphinx-doc/sphinx
psycopg2-binary==2.8.4  # https://github.com/psycopg/psycopg2

# Testing
# ------------------------------------------------------------------------------
mypy==0.750  # https://github.com/python/mypy
pytest==5.3.1  # https://github.com/pytest-dev/pytest
pytest-sugar==0.9.2  # https://github.com/Frozenball/pytest-sugar

# Code quality
# ------------------------------------------------------------------------------
flake8==3.7.9  # https://github.com/PyCQA/flake8
coverage==4.5.4  # https://github.com/nedbat/coveragepy
black==19.10b0  # https://github.com/ambv/black
pylint-django==2.0.13  # https://github.com/PyCQA/pylint-django
pre-commit==1.20.0  # https://github.com/pre-commit/pre-commit

# Django
# ------------------------------------------------------------------------------
factory-boy==2.12.0  # https://github.com/FactoryBoy/factory_boy

django-debug-toolbar==2.1  # https://github.com/jazzband/django-debug-toolbar
django-extensions==2.2.5  # https://github.com/django-extensions/django-extensions
django-coverage-plugin==1.6.0  # https://github.com/nedbat/django_coverage_plugin
pytest-django==3.7.0  # https://github.com/pytest-dev/pytest-django
We’ll install our local dependencies now, noting that these files will be installed into our project’s virtual environment.
(venv) mcdaniel@Lawrence-MacBook tmp % pip install -r blog_article/requirements/local.txt
Note: this takes a couple of minutes to run on my Macbook Pro.
After this finishes we can take a look at venv/lib/python3.7/sites-packages/ for a first-hand look at what packages pip installed. Importantly, for each package listed in the requirements/local.txt file, pip installs the package and any packages on which it depends. Thus, pip installed a total of 236 packages into our virtual environment!
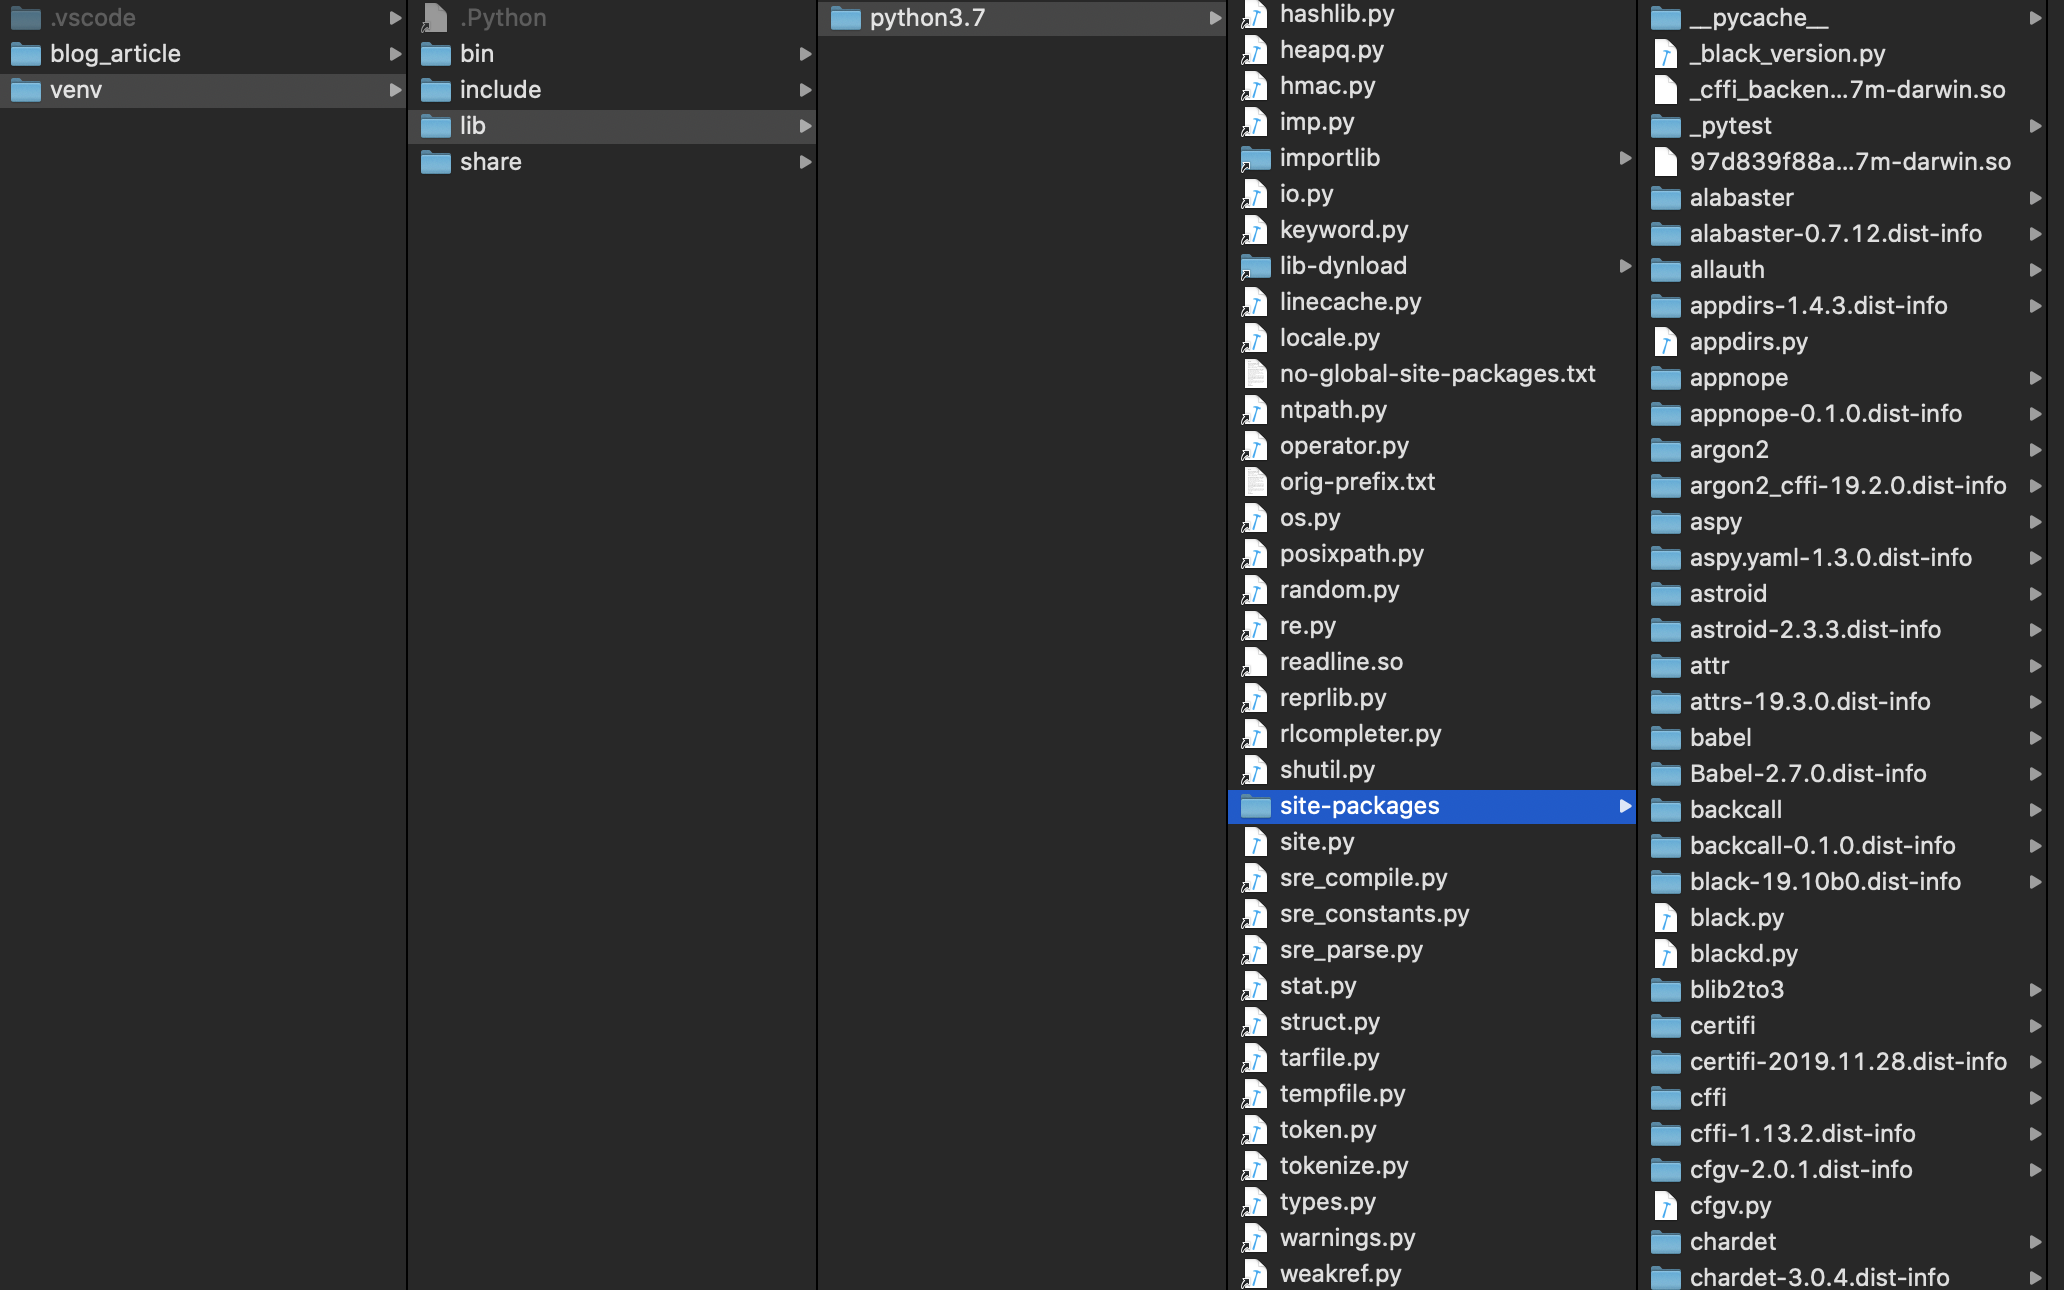
You can also see the complete list of installed packages by running
(venv) mcdaniel@Lawrence-MacBook tmp % pip list
Setup Database Backend
You need a database engine for your development environment, like PostgreSQL or MySQL. Your Django backend stores both dynamic site configuration data as well as data that your users save on your site, such as their user profile settings. One of Django’s most powerful features is its loose coupling to various popular relational and nosql persistent data stores. I like to use Postgres for development because it’s lightweight and easy to install. I almost always choose MySQL for my production backend. Upon inspection of your Django project’s settings files located in [project]/config/settings you’ll see that Cookie Cutter automatically created separate settings for “development” and “production”, enabling you to maintain completely different, far more practical environments based on your needs and constraints.
Regardless of the backend that you choose, getting it setup for your project involves the same steps:
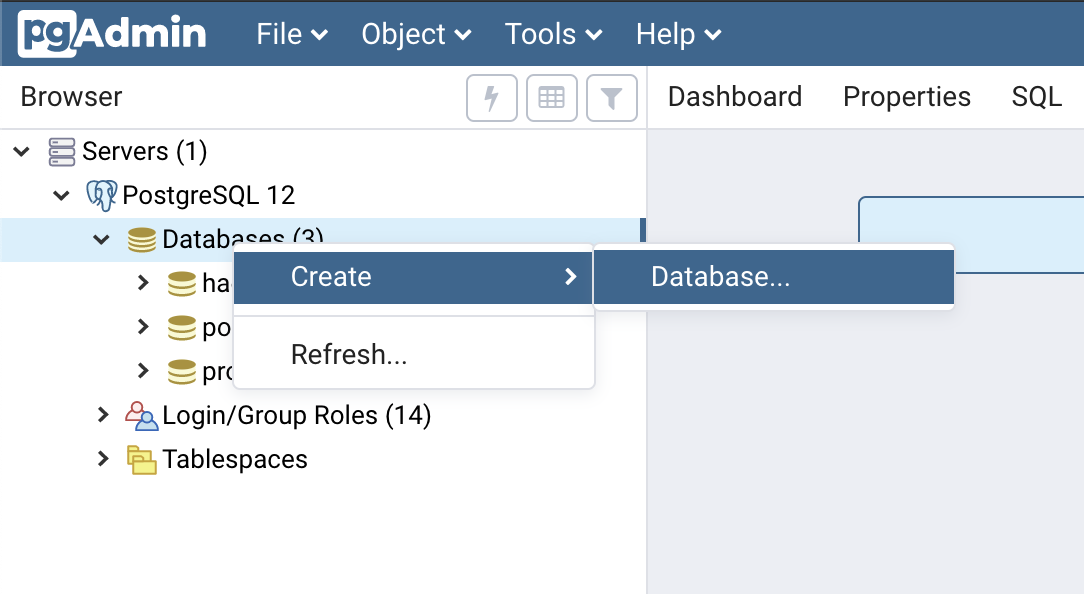
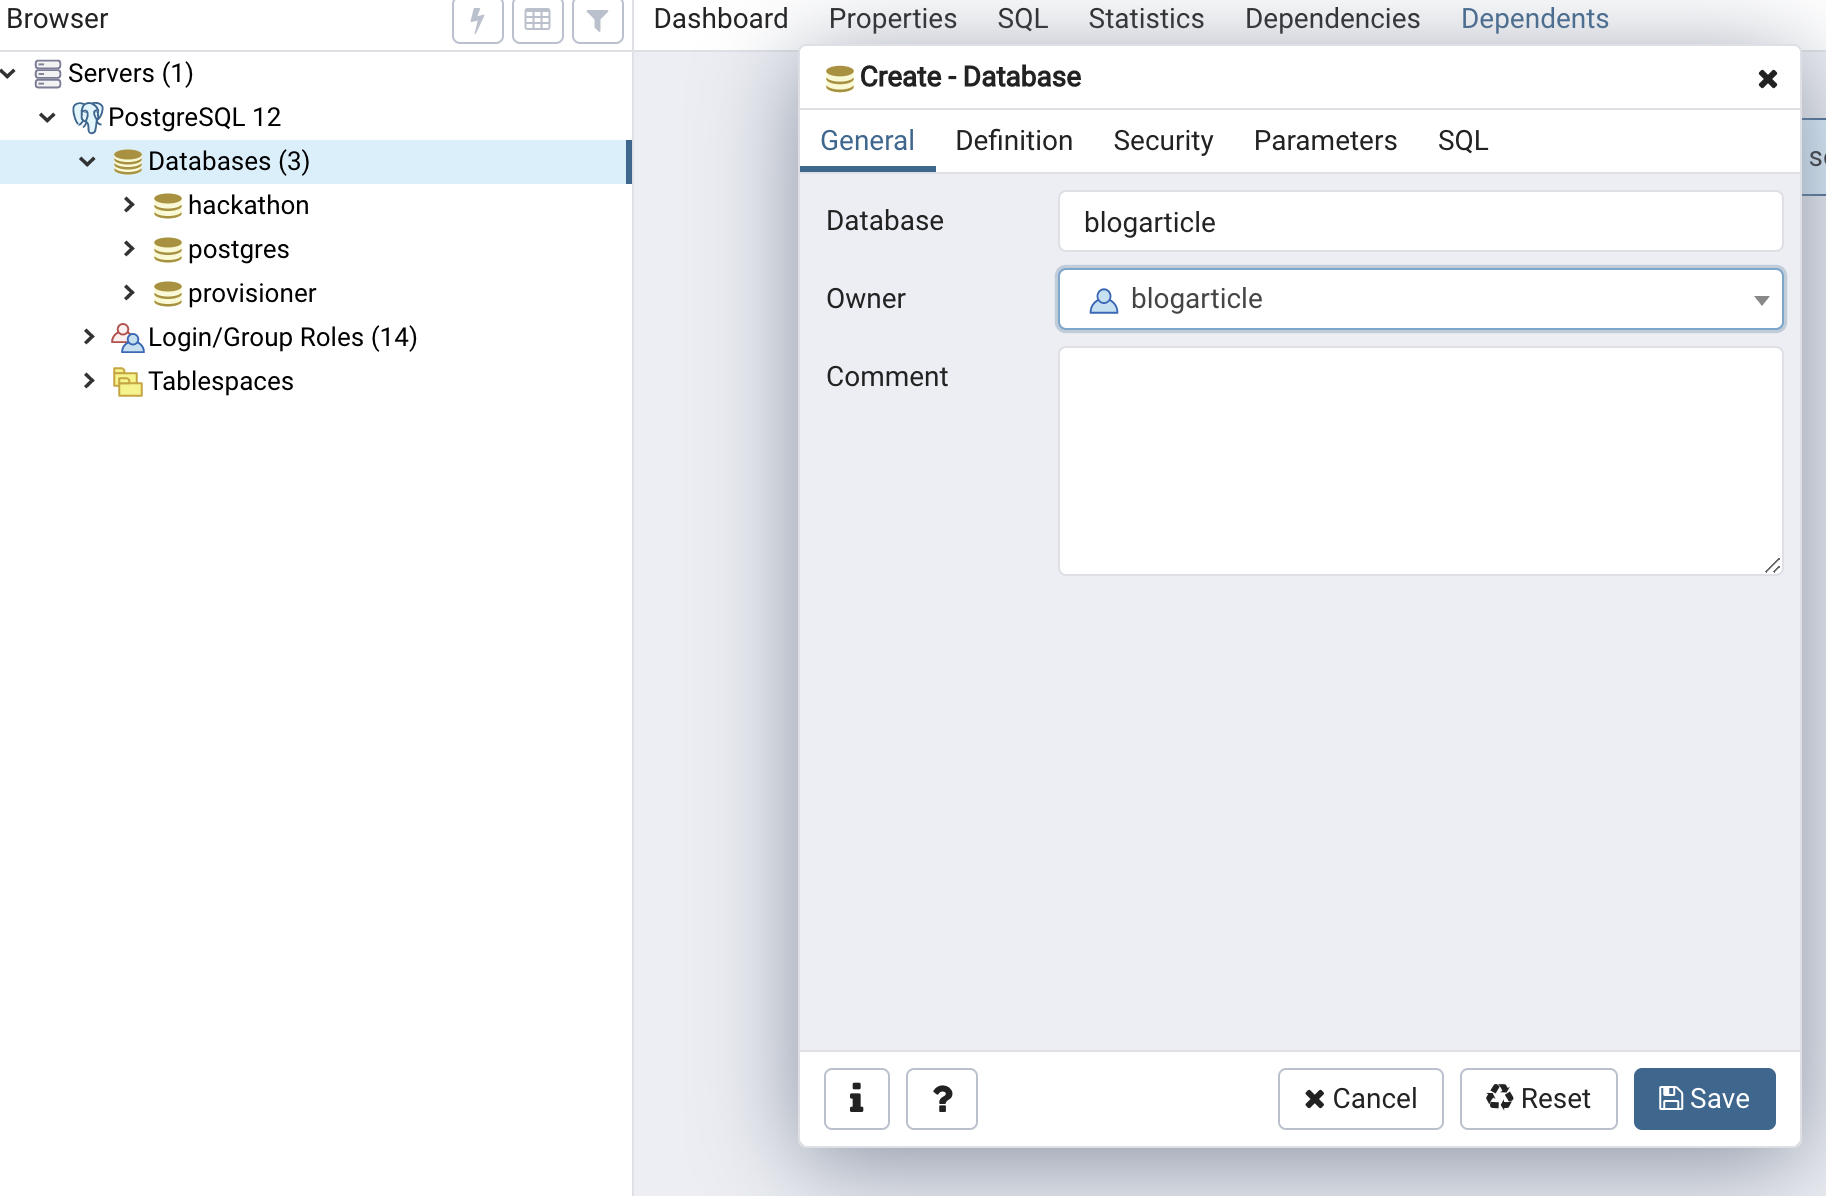
Create a new local database, user and password for your project
I use pgAdmin because it includes a simple web interface for creating your database and user.
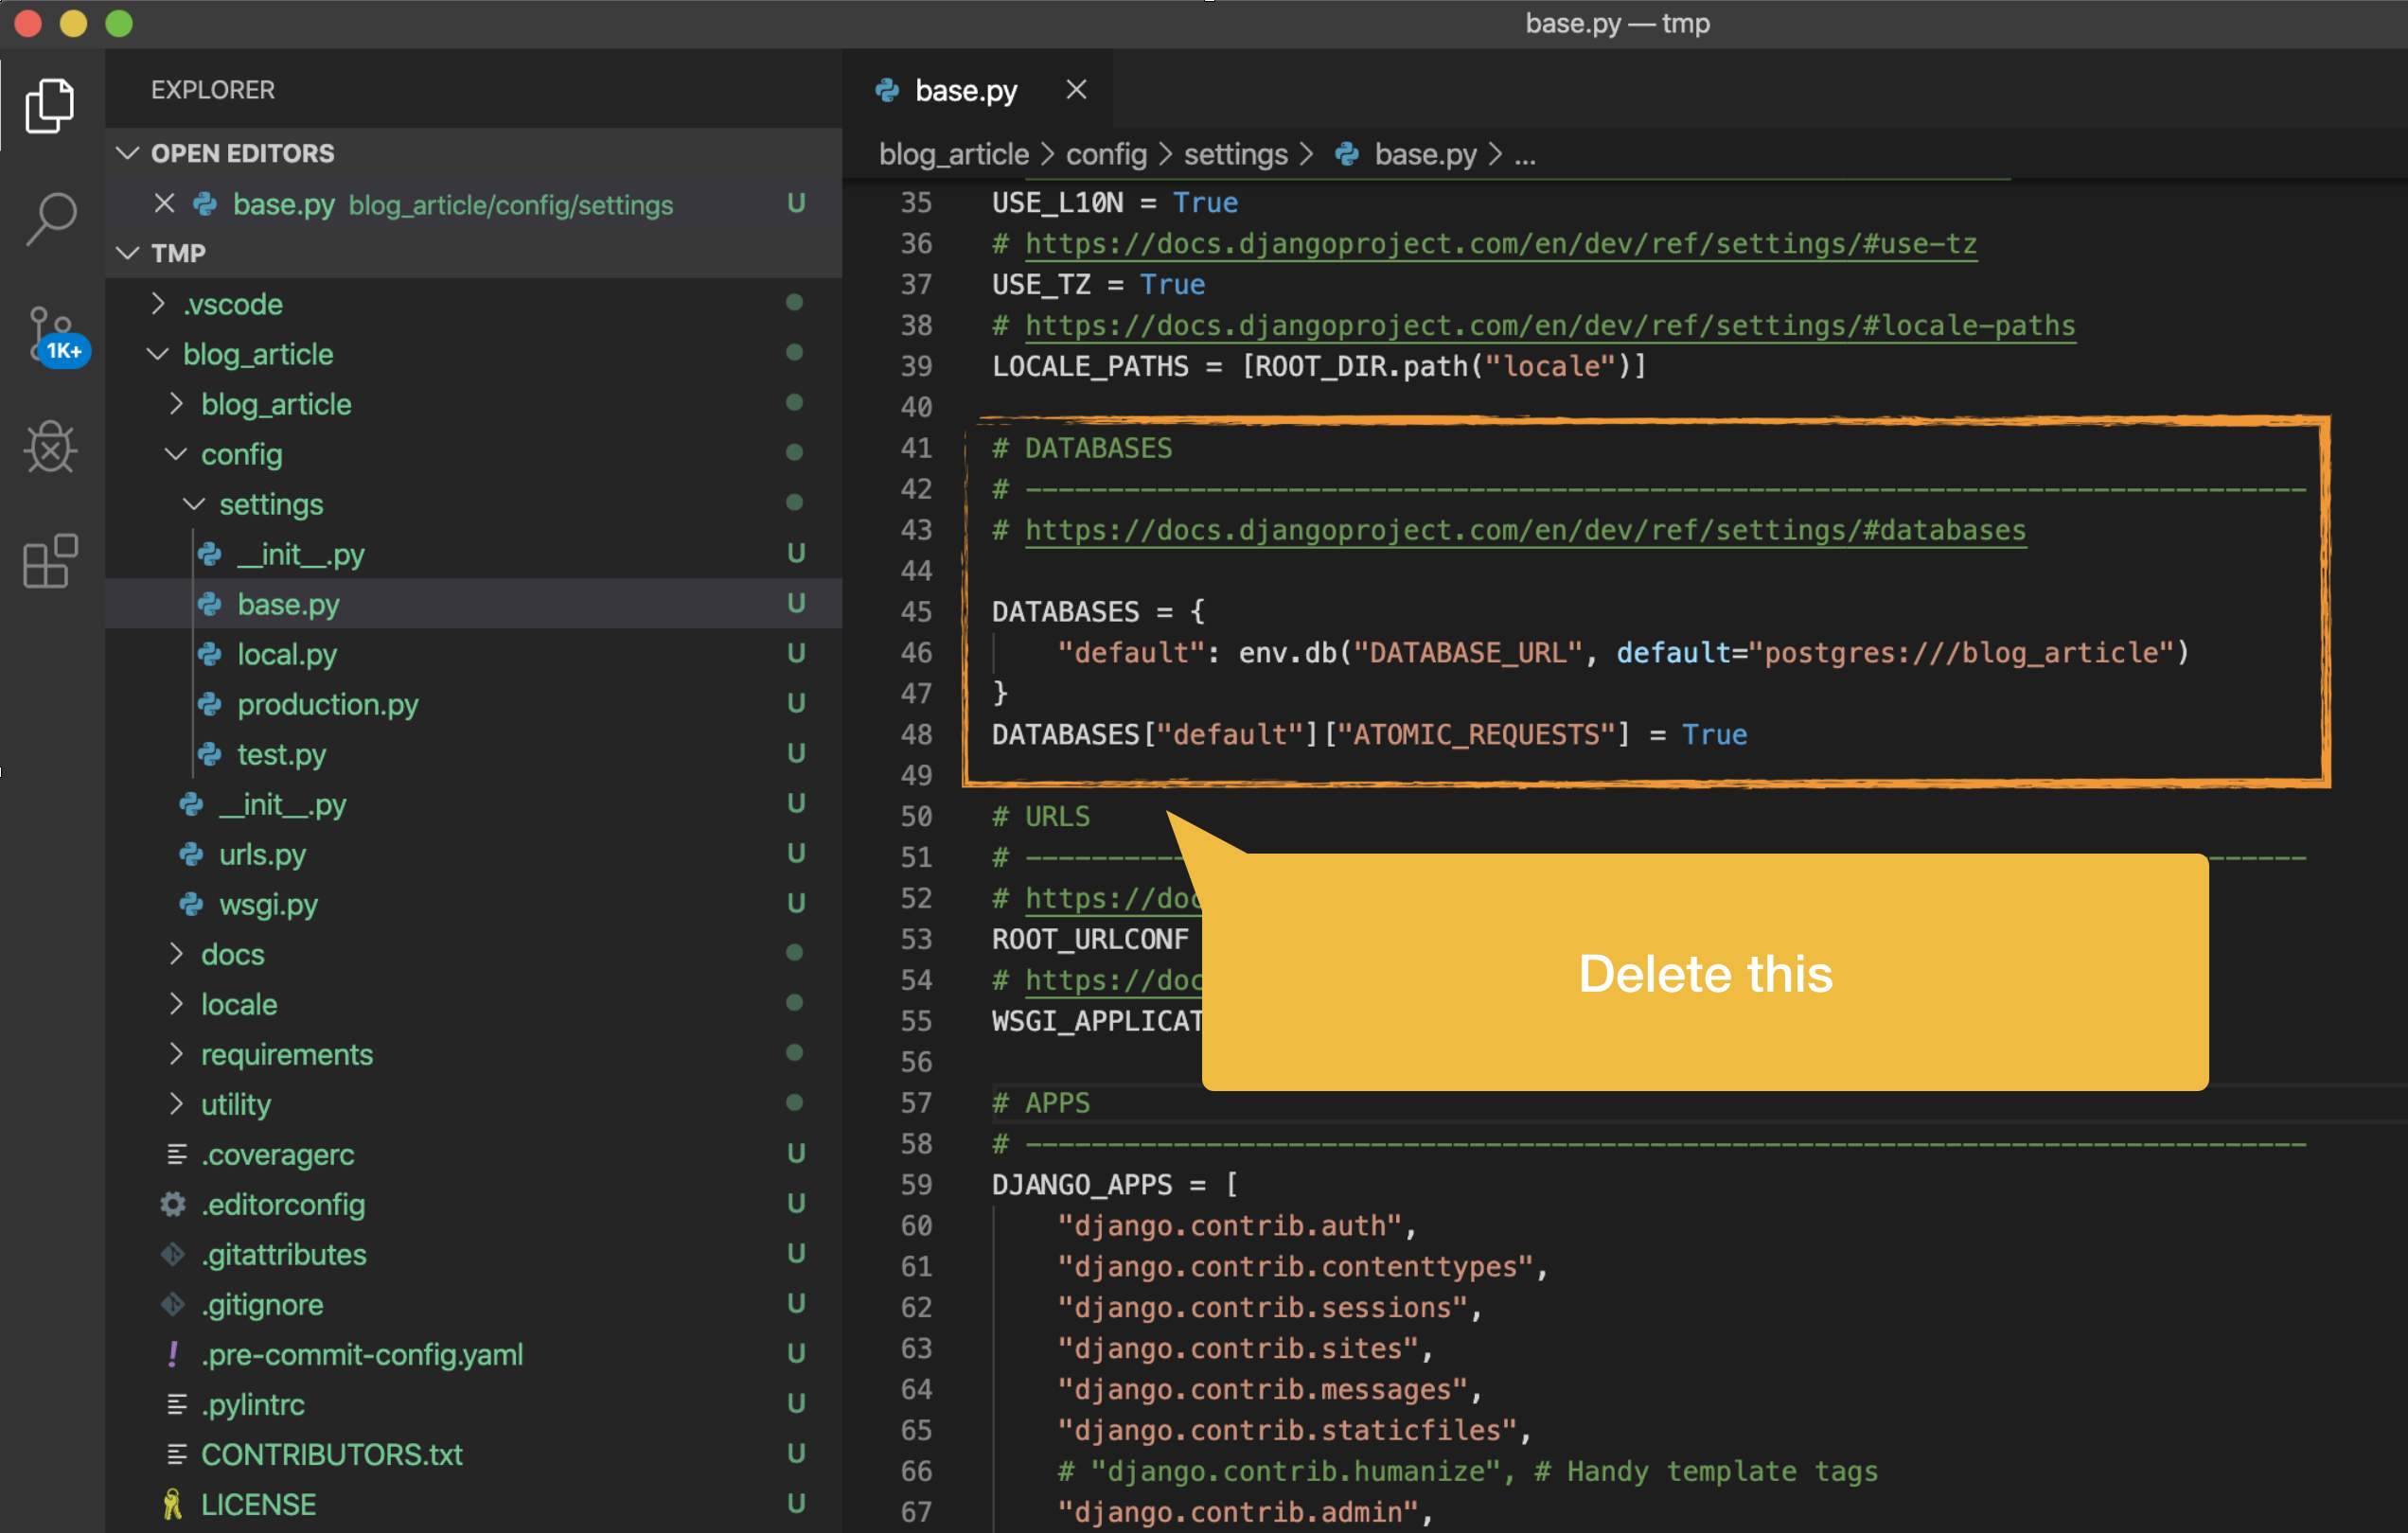
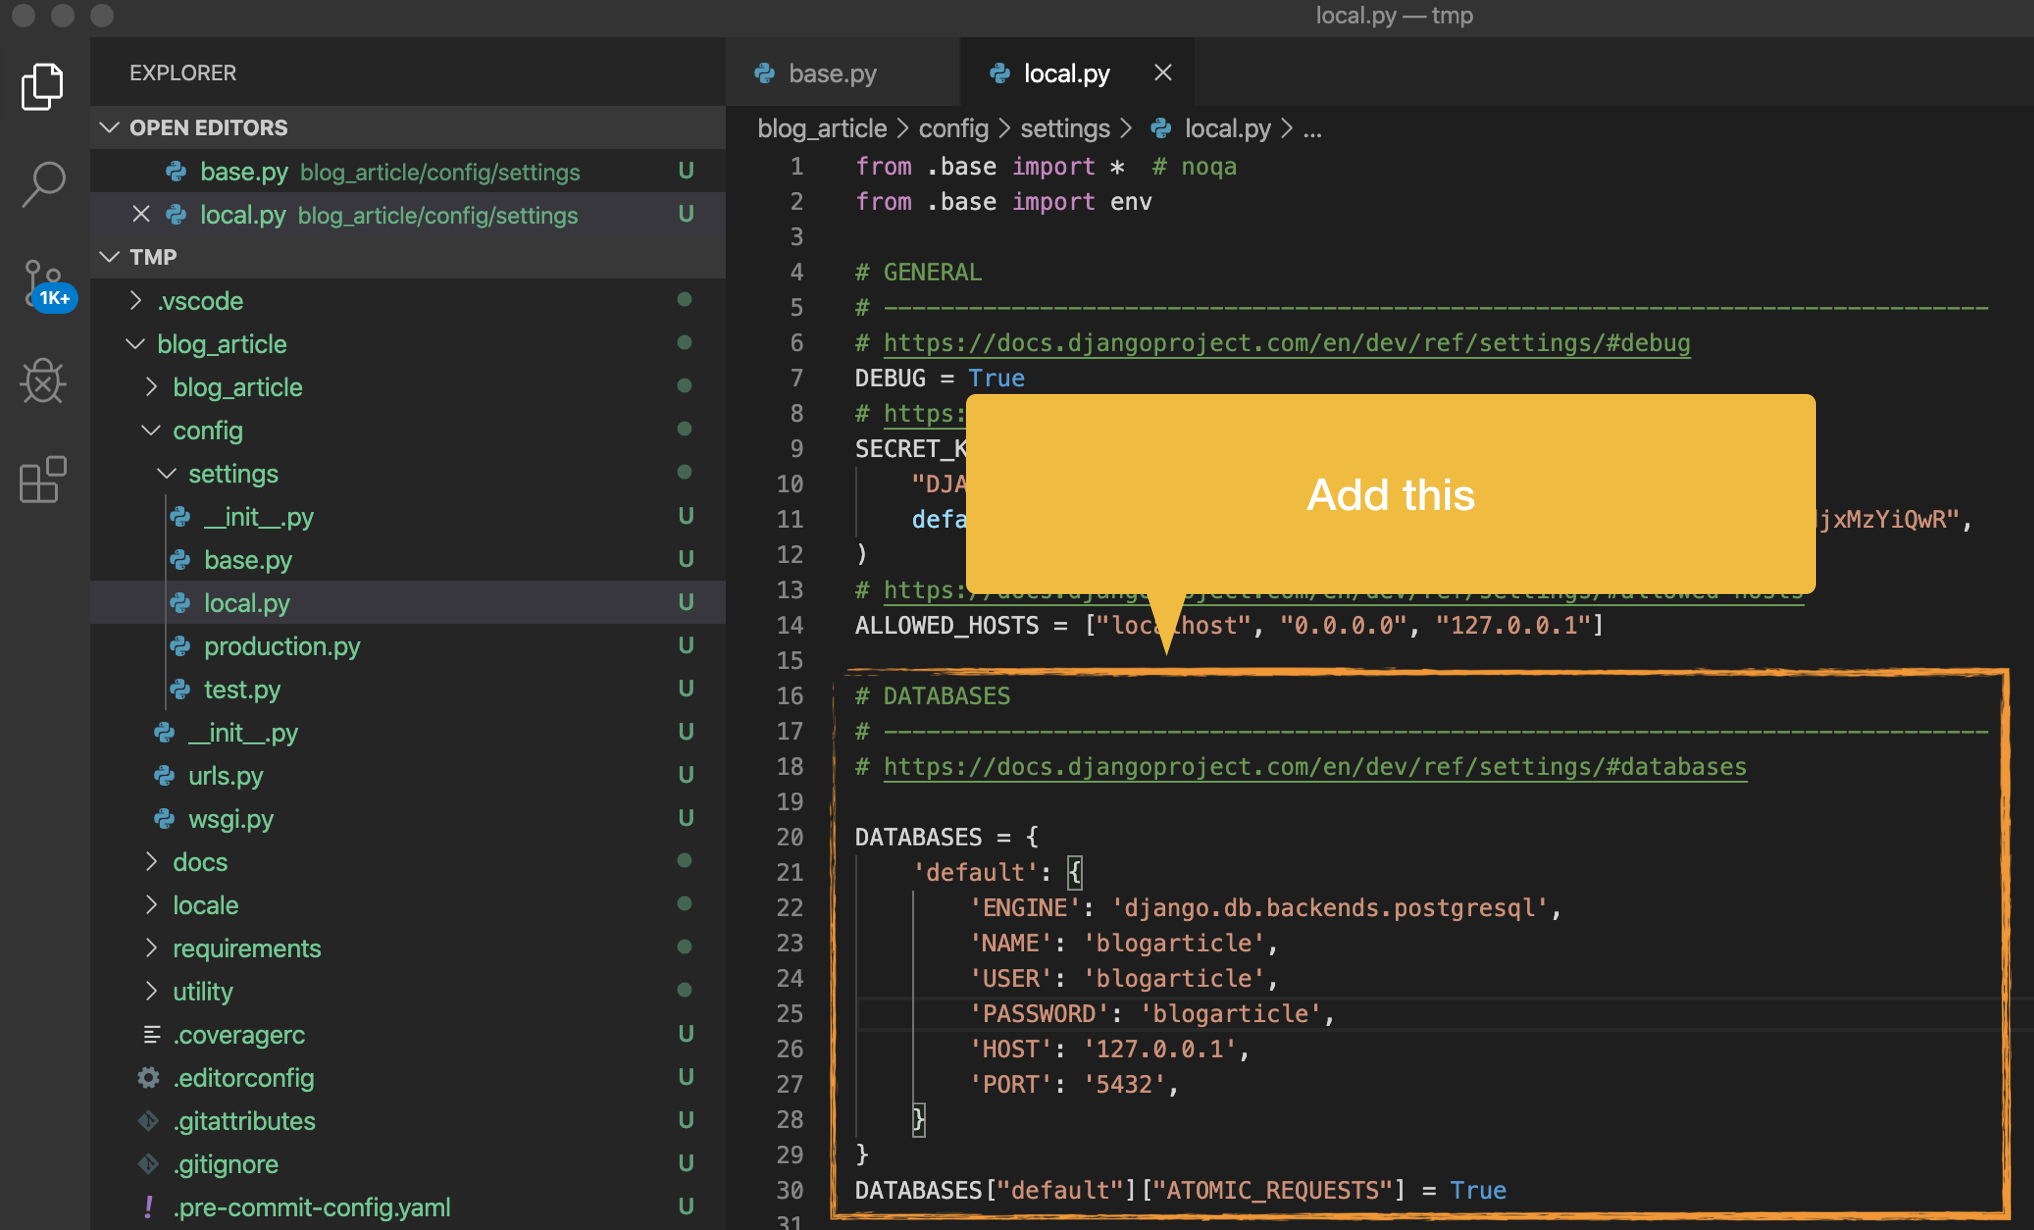
Add your configuration settings to [project]/[project]/config/settings/local.py
# DATABASES
# ------------------------------------------------------------------------------
# https://docs.djangoproject.com/en/dev/ref/settings/#databases

DATABASES = {
    'default': {
        'ENGINE': 'django.db.backends.postgresql',
        'NAME': 'blogarticle',
        'USER': 'blogarticle',
        'PASSWORD': 'blogarticle',
        'HOST': '127.0.0.1',
        'PORT': '5432',
    }
}
DATABASES["default"]["ATOMIC_REQUESTS"] = True
# Create database migrations by running the following code
python manage.py makemigrations

#Run database migrations by running the following code
python manage.py migrate
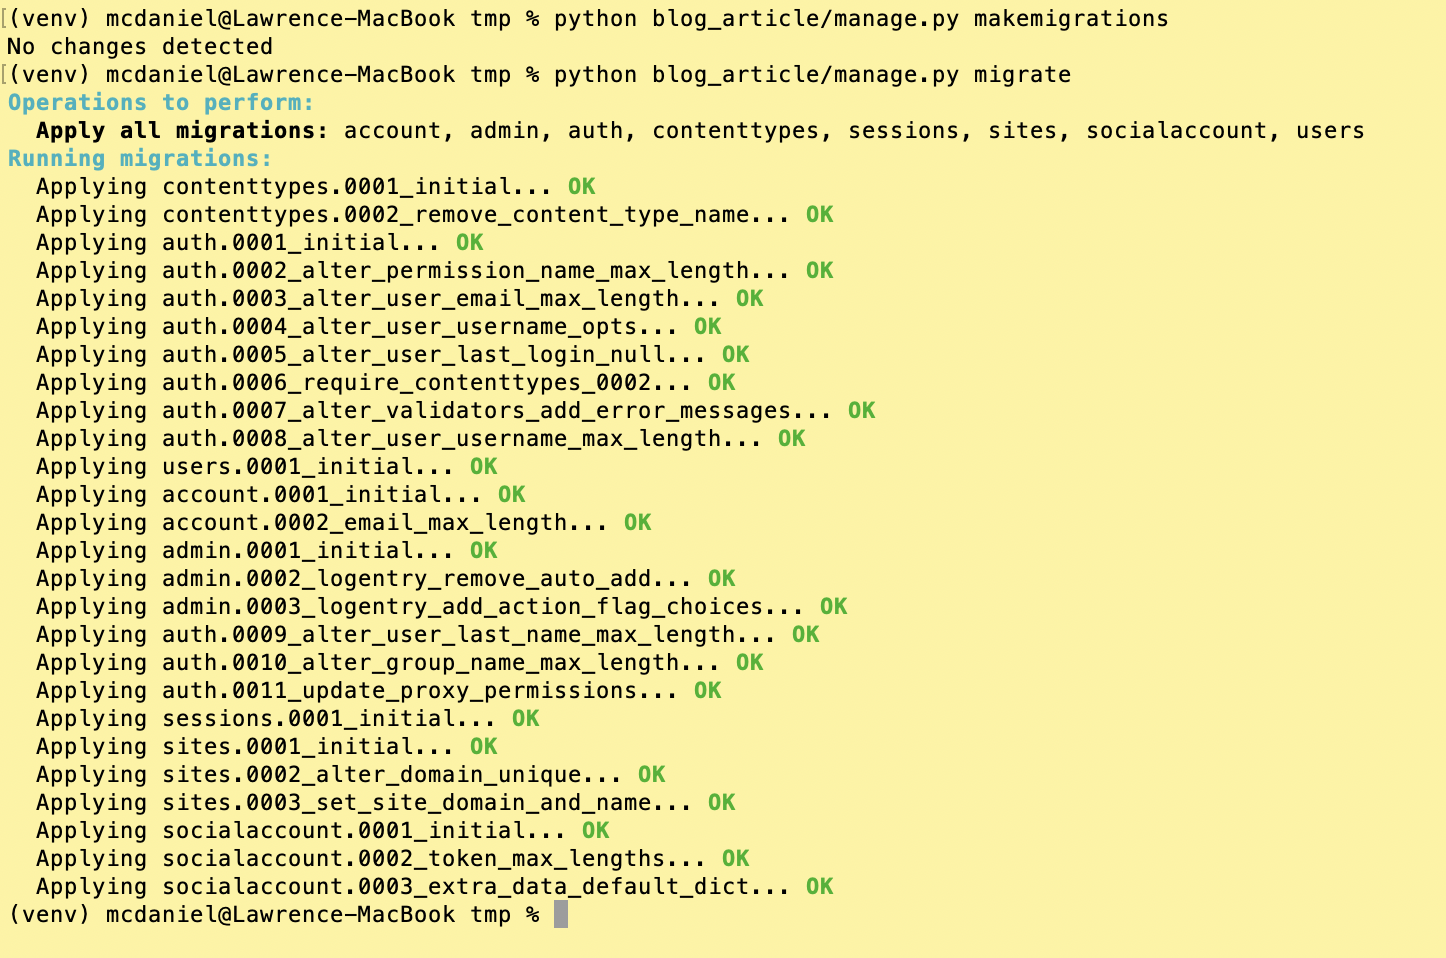
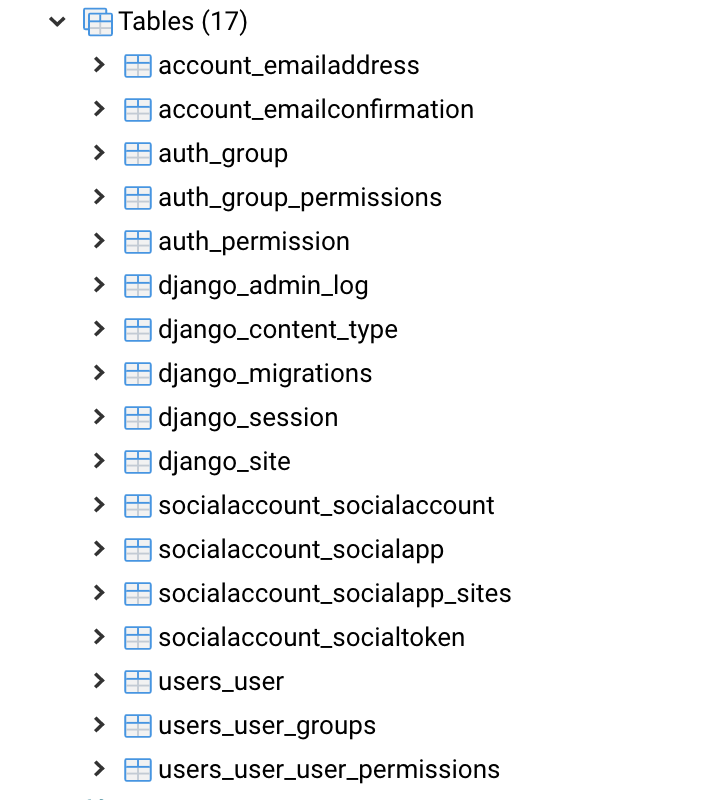
Your screen output should look similar to the screen shot on the left, and if you inspect your PostgreSQL database schema, then you should find the following new tables as per the screen shot on the right.
Create a admin/superuser account
To fully test whether your project is running completely you’ll need to login from the home page that’s running from your local Django web server. Thus, we need to immediately create a user and password, and you’ll want this user to be an admin so that you can access restricted parts of your site. Django provides a utility that creates a superuser for you with a single command on the command line:
python manage.py createsuperuser

Collect Static Assets
Django takes a pretty sophisticated approach to managing the miscellaneous front-end files associated with your site like for example the images, CSS and javascript files. For development purposes these are stored within a single common folder, but the individual “static assets” are then transpiled to a different location to be served to users’ browsers. While this might sound unnecessarily complicated, in fact there are a number of smart improvements and optimizations that can be made to these files during the static asset compilation process; all configurable from the settings folder.
For now, you just want to ensure that nothing is preventing the asset compiler from working correctly by executing the following:
python manage.py collectstatic

Start the Django development web server
Django ships with a lightweight web server that you can use to test your project in your development environment. The site will only be available to you, on your development environment, but it will otherwise behave the same as it would in your production environment. To start the Django development web server:
python manage.py runserver


Login to your site
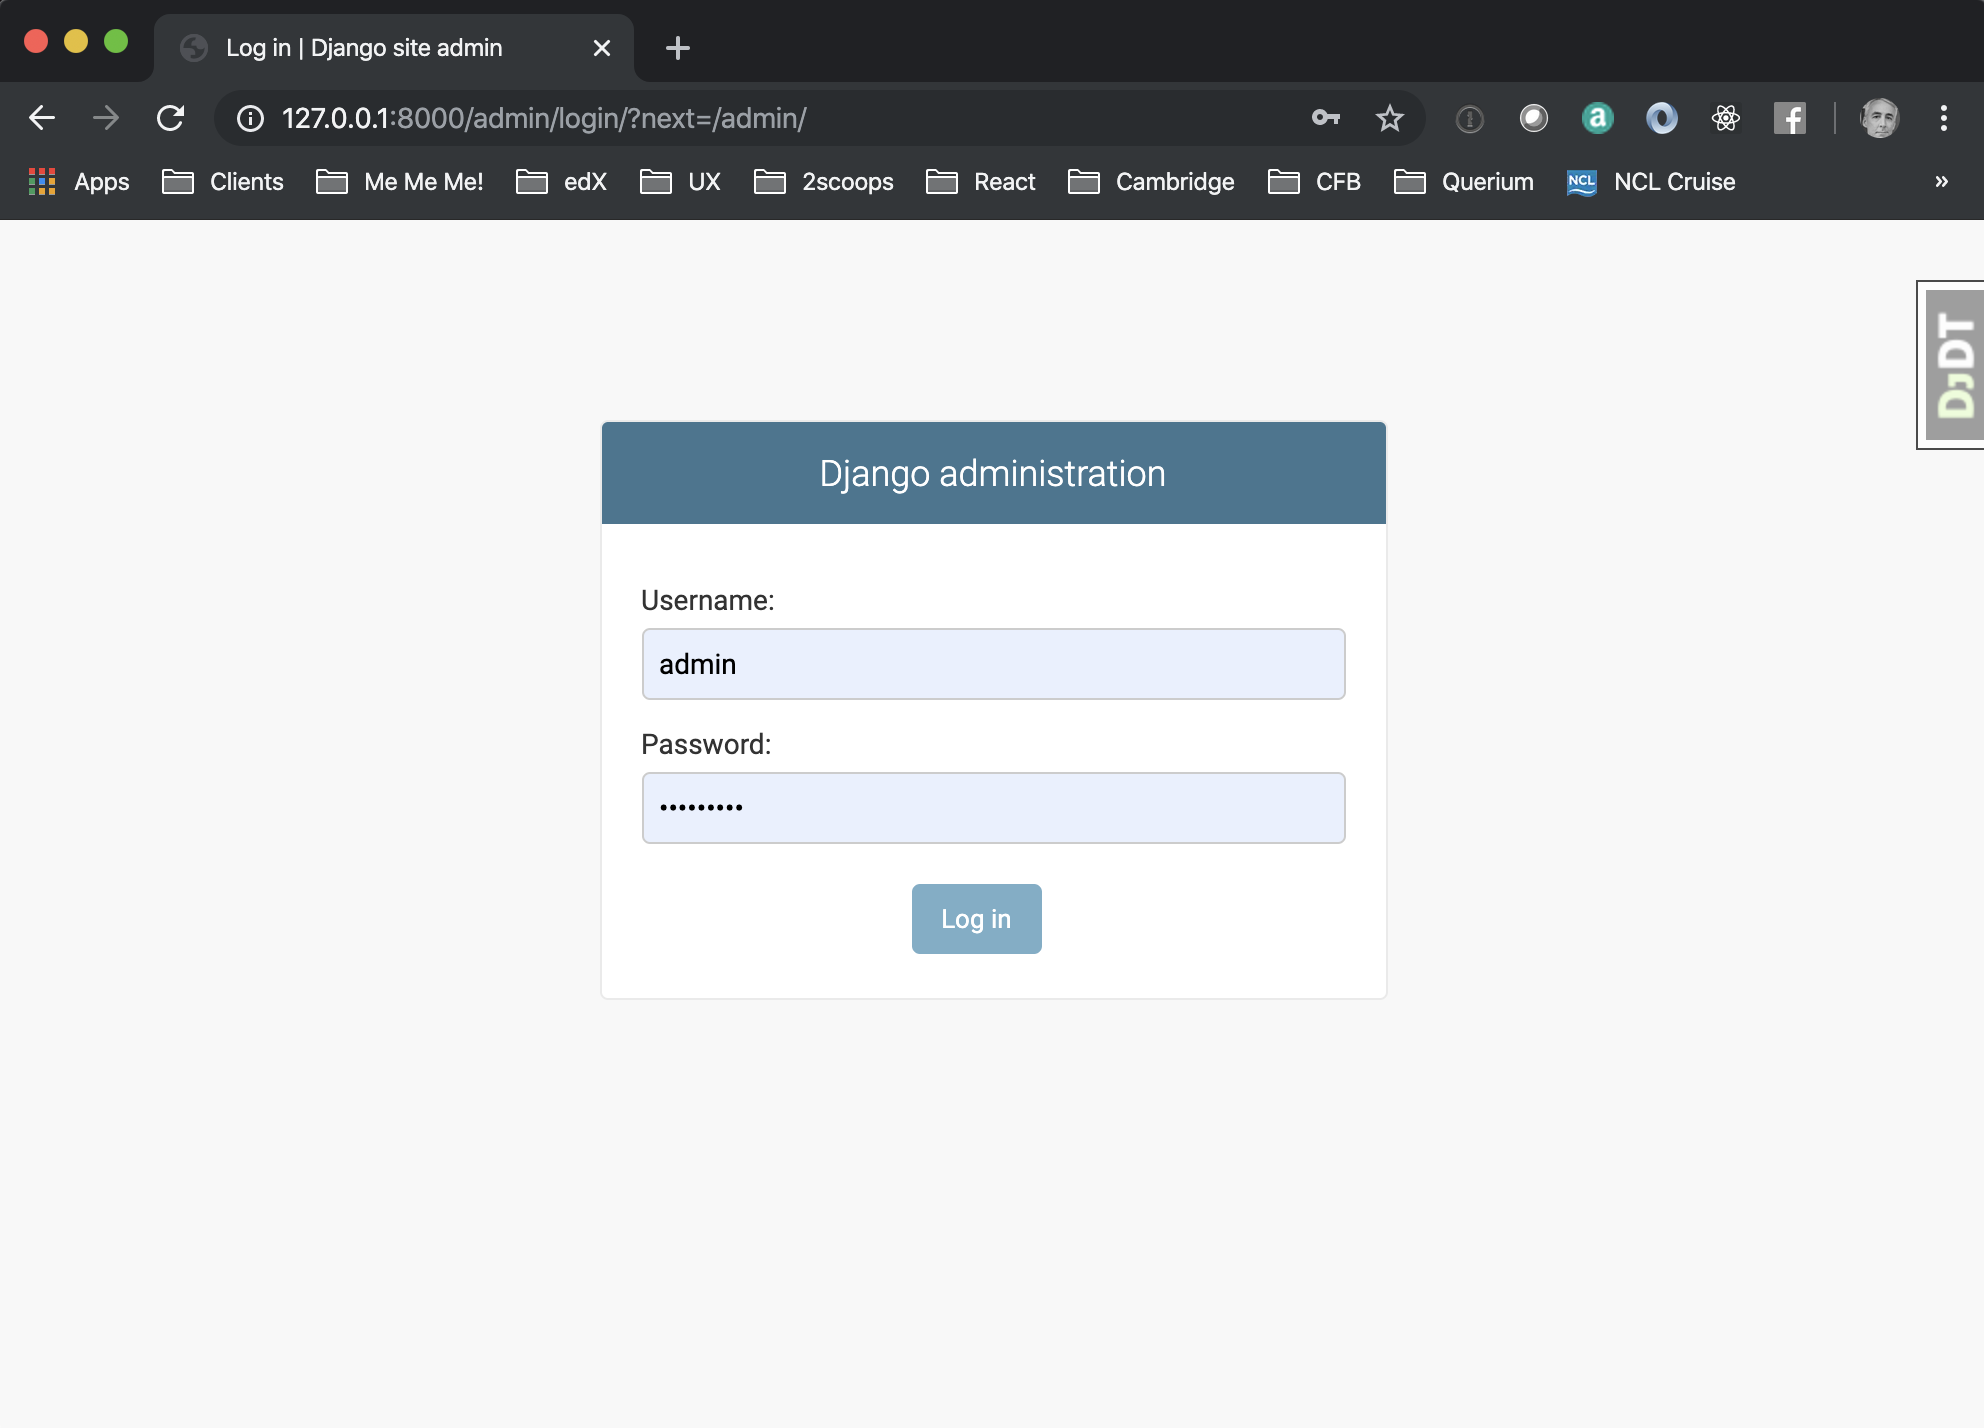
The final step of confirming that your development environment is working is to login to the Django admin console. If you can login and navigate to the console page then this confirms that most/all of the project compiles, the web server runs, the database is working and your settings are correct.
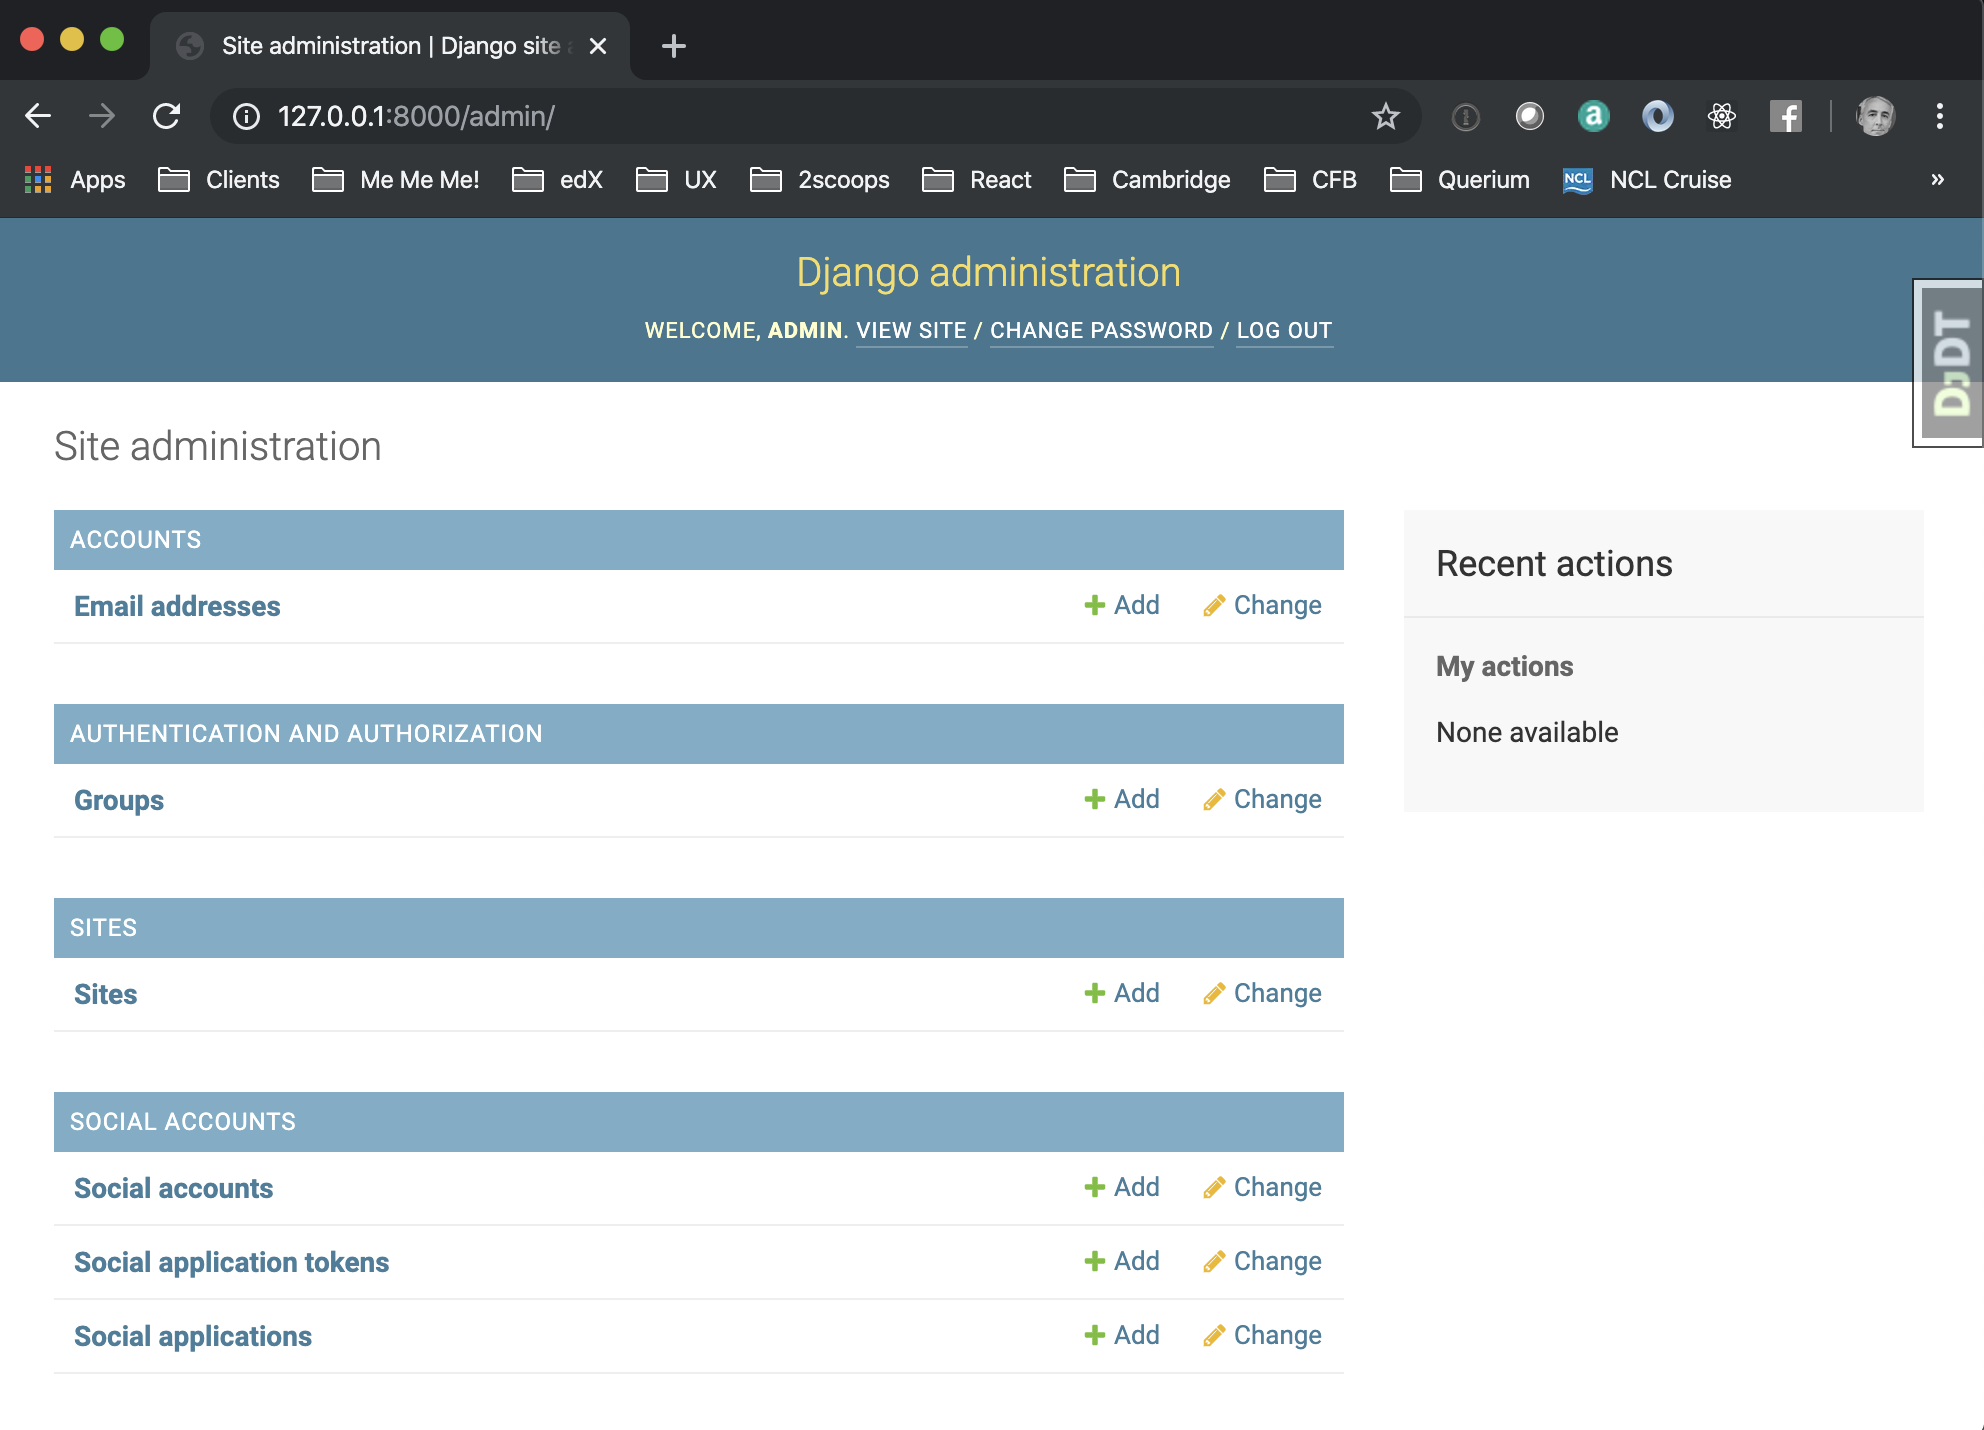
Success!
Ok, excellent progress so far. In part II of this article we will setup Github and then prepare our production environment.




This was informative, but unfortunately it says nothing about how to deploy it to production. We are waiting for part ii
Excellent article. Appreciate it very much.
When is Part II coming out?