Learn how to setup Google Mod_Pagespeed to optimize delivery of your WordPress site running on Apache Web Server on Amazon Linux.

Summary
In 2012 Google Developers published their beta version of a curated collection of tools that can be placed inside popular web server environments to optimize the delivery of web content. In most cases the individual underlying tools are not actually developed by Google, but rather, represent part of a collection of third party utilities that Google believes would improve the delivery of your content. Broadly speaking, these utilities intercept and manipulate your html, css, js and media content so as to minimize size and reduce the overall number of http requests that are required to render each page. In the case of Apache web server Google provides this collection in the form of Mod_Pagespeed, an Apache module that you can freely download and install using yum. Installation takes as little as a couple of minutes, providing instant tangible performance improvements.
It behooves you to seriously consider installing Mod_Pagespeed for a few reasons. First, to make decisions on what utilities to include in Mod_Pagespeed Google has followed a methodical discovery process involving unvarnished feedback from hundreds of thousands of web sites. This provides a high level of assurance that each utility really provides improvement to the end use experience in every possible use case. Second, Google has at least indirectly taken into consideration its own page ranking factors, thus, including Mod_Pagespeed in your architecture helps to ensure that you’re at least competing on a level playing field in terms of SEO. Lastly, Mod_Pagespeed is virtually guaranteed to identify a noticeable set of content delivery improvements in every case, so if you’re not currently using it then your sites visitors’ experience is not as optimal as it could be.
Getting The Most from Mod_Pagespeed
The single most important success factor to leveraging Mod_Pagespeed is having a clear understanding of what it is doing to your content, and why. If you currently use a WordPress performance plugin like W3 Total Cache then you’ll definitely want to review your settings to ensure that anything that can be done by Mod_Pagespeed is not being done repetitively by your plugin.
Additionally, the Mod_Pagespeed Apache module includes a set of admin and analytics pages that you can and should periodically review to keep a clear understanding of the extent to which Mod_Pagespeed is manipulating your content, and why. Often, the best way to manage contents is inconsistent with the best way to deliver it. This is especially true with image data, and Mod_Pagespeed provides an excellent suite of tools for optimizing, reformatting and resizing images based on real-time information that it gleans from http request headers.
Assumptions
- Your WordPress server is generally configured following AWS’ guidelines: Tutorial: Hosting a WordPress Blog with Amazon Linux
- Your LAMP server is generally configured following AWS’ guidelines: Tutorial: Install a LAMP Web Server with the Amazon Linux AMI
- Apache is running on your server. The specifics of your configuration are probably not important.
- You have SSH access to your EC2 instance and sudo capability
- You are at least an active novice at Linux commands
- You are generally familiar with installing packages using yum
1. Install Mod_Pagespeed on Amazon Linux
This entire process takes less than a minute to complete.
sudo yum install mod-pagespeed-stable
sudo service httpd restart
2. Configure Mod_Pagespeed
Mod_Pagespeed works well and with immediate effect using the default settings, so you very likely will not need to change anything. Nonetheless, it’s a great idea to learn more about what you just installed and what’s its going to be doing to your web content.
You’ll find a couple of new files in your Apache virtual hosting folder /etc/httpd/conf.d: pagespeed.conf and pagespeed_libraries.conf. Frankly, most of these settings are pretty benign. You’ll find parameters to modify the locations of files and caches as well as parameters to specify shared resources like memcached. More interestingly, you’ll find tuning parameters for the 40+ utilities included in the Mod_Pagespeed. Again, you probably do not need to modify any of these.
Mod_Pagespeed is highly configurable at a granular level, even if doing so might be a bad idea. You can read more detail here: https://www.modpagespeed.com/doc/configuration
3. Setup The Admin Pages
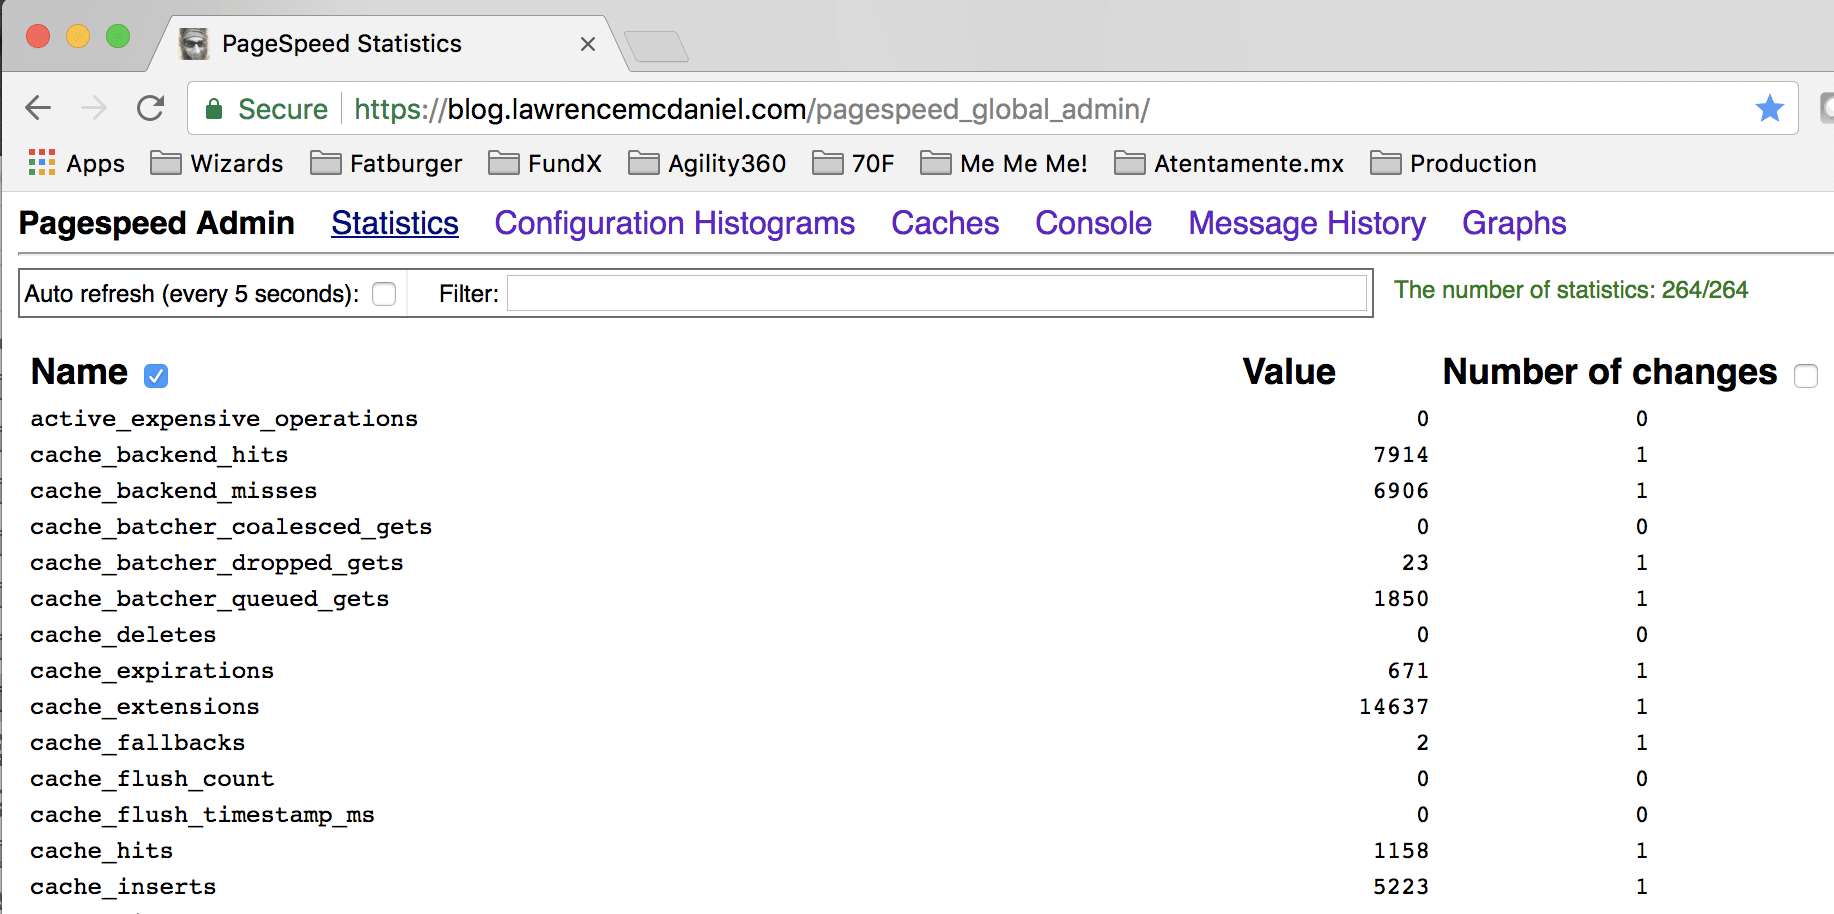
Mod_Pagespeed comes with a user interface packaged in the form of an admin console that’s sort of like phpMyAdmin or CPanel. Oddly, this is only sparsely mentioned in Google’s own documentation and virtually non-existent anywhere else in the web. So before we get to work on setting up the admin page, we should probably take a quick look at what you’ll have after completing this step.
So, behold the Mod_Pagespeed admin console!

Getting the admin console to appear in your web browser is simply a matter of including some additional configuration lines in your Apache virtual site configuration file. You’ll find a complete set of installation instructions here: https://www.modpagespeed.com/doc/admin
I’m providing a working configuration here in case you find Google’s documentation less than intuitive.
[sourcecode language=”plain”] <IfModule pagespeed_module>
ModPagespeedInheritVHostConfig on
ModPagespeedEnableFilters add_instrumentation
ModPagespeedStatistics on
ModPagespeedStatisticsLogging on
ModPagespeedLogDir /var/log/pagespeed
<Location /mod_pagespeed_console>
<IfModule mod_rewrite.c>
RewriteEngine Off
</IfModule>
Order allow,deny
Allow from localhost
Allow from 127.0.0.1
Allow from all
SetHandler mod_pagespeed_console
</Location>
<Location /mod_pagespeed_beacon>
<IfModule mod_rewrite.c>
RewriteEngine Off
</IfModule>
SetHandler mod_pagespeed_beacon
</Location>
<Location /mod_pagespeed_statistics>
<IfModule mod_rewrite.c>
RewriteEngine Off
</IfModule>
Order allow,deny
Allow from localhost
Allow from all
SetHandler mod_pagespeed_statistics
</Location>
<Location /pagespeed_admin>
<IfModule mod_rewrite.c>
RewriteEngine Off
</IfModule>
Order allow,deny
Allow from localhost
Allow from 127.0.0.1
Allow from all
SetHandler pagespeed_admin
</Location>
<Location /pagespeed_global_admin>
<IfModule mod_rewrite.c>
RewriteEngine Off
</IfModule>
Order allow,deny
Allow from localhost
Allow from 127.0.0.1
Allow from all
SetHandler pagespeed_global_admin
</Location>
</IfModule>[/sourcecode]
I hope you found this helpful. Please help me improve this article by leaving a comment below. Thank you!


Leave A Comment