Learn how to get Varnish Cache running as a reverse proxy in front of the most common stack on the Internet: WordPress + Apache Web Server on Amazon Linux. Let’s get started!

Summary
Varnish Cache is a web application accelerator also known as a caching HTTP reverse proxy. You install it in front of Apache web server and configure it to cache the contents. Varnish Cache is really, really fast. It typically speeds up delivery with a factor of 300 – 1000x, depending on the specifics of your architecture.
Installation on Amazon Linux takes no more than a few minutes because a package is already available via yum. However, I was bothered by the fact that Amazon’s repository for Varnish is version 3.x, meanwhile Varnish 6.0 was just released. Being the obsessive-compulsive person that I am, I was unenthusiastic about installing a package that is knowingly three full versions behind the curve. While I never got to the bottom of why this is the case, and further, I opened a can of Linux worms trying to create a more up-to-date local repository. Since the however, I’ve concluded that the version 3.x package works just fine inside a standard Apache web server environment.
Incidentally, I was also spooked by the “reverse proxy” nomenclature as I wasn’t entirely sure what this meant. In hindsight, I now know that it means a page cache that sits in front of Apache. Varnish is especially effective because it resides in front of Apache. Varnish is superior to localized plugin-based caching solutions because with php-based applications like WordPress, a lot happens inside php and in the file system; even in cases when you get a page hit with a plugin-based caching solution. By contrast, Varnish is intended to listen on your main traffic port (probably 80 and/or 443), intercepting and intervening on behalf of both Apache and WordPress. For highly dynamic environments like for example, Woo Commerce sites, the performance increase is absolutely stunning. Note that this blog runs behind a Varnish cache.
A final observation before we go to work: this tutorial is derived from an excellent article from Aaron Kili at Tecmint, “Install Varnish Cache 5.2 to Boost Apache Performance on CentOS 7”. I adjusted for the various nuances in the default file storage locations in Amazon Linux, and importantly, this article recommends a different (older) version of Varnish that seems to be the path of least resistance for Amazon Linux. And lastly, I’ve supplemented Aaron’s original guide with some specifics recommendations on how to get WordPress to work well.
1. Assumptions
- The primary purpose of your server is hosting a PHP-based application like WordPress, Drupal, or Magento
- Your server runs Amazon Linux on an EC2 instance in AWS
- Your LAMP server is generally configured following AWS’ guidelines: Tutorial: Install a LAMP Web Server with the Amazon Linux AMI
- Apache is running on your server. The specifics of your configuration are probably not important.
- You have SSH access to your EC2 instance and sudo capability
- You are at least an active novice at Linux commands
- You are generally familiar with installing packages using yum
2. Install Varnish on Amazon Linux
This entire process takes less than a minute to complete. Varnish is a small package of less than 5 megabytes. I learned a couple of things that are probably worth sharing. First, installing Varnish has absolutely no effect on your Apache environment until you configure it and launch the daemon. Furthermore, it is equally simple to uninstall in the event that need to reverse course for any reason.
Let’s install Varnish Cache
sudo yum install -y epel-release     #these are prerequisites. also, epel-release is a pretty common package
sudo yum install pygpgme yum-utils     #more prerequisites. these are also commonly-installed packages
sudo yum install varnish
sudo chkconfig varnishd on #this makes Varnish launch automatically whenever your reboot your server.
And now, let’s launch Varnish. Remember: you will not see any effects until after your configure Varnish in the next section.
sudo service varnishd start
Let’s also check the version
varishd -V
3. Configure Varnish For WordPress + Apache
Lets set Varnish to listen on port 80 so that all inbound http requests go to Varnish instead of going to Apache.
sudo vim /etc/sysconfig/varnish
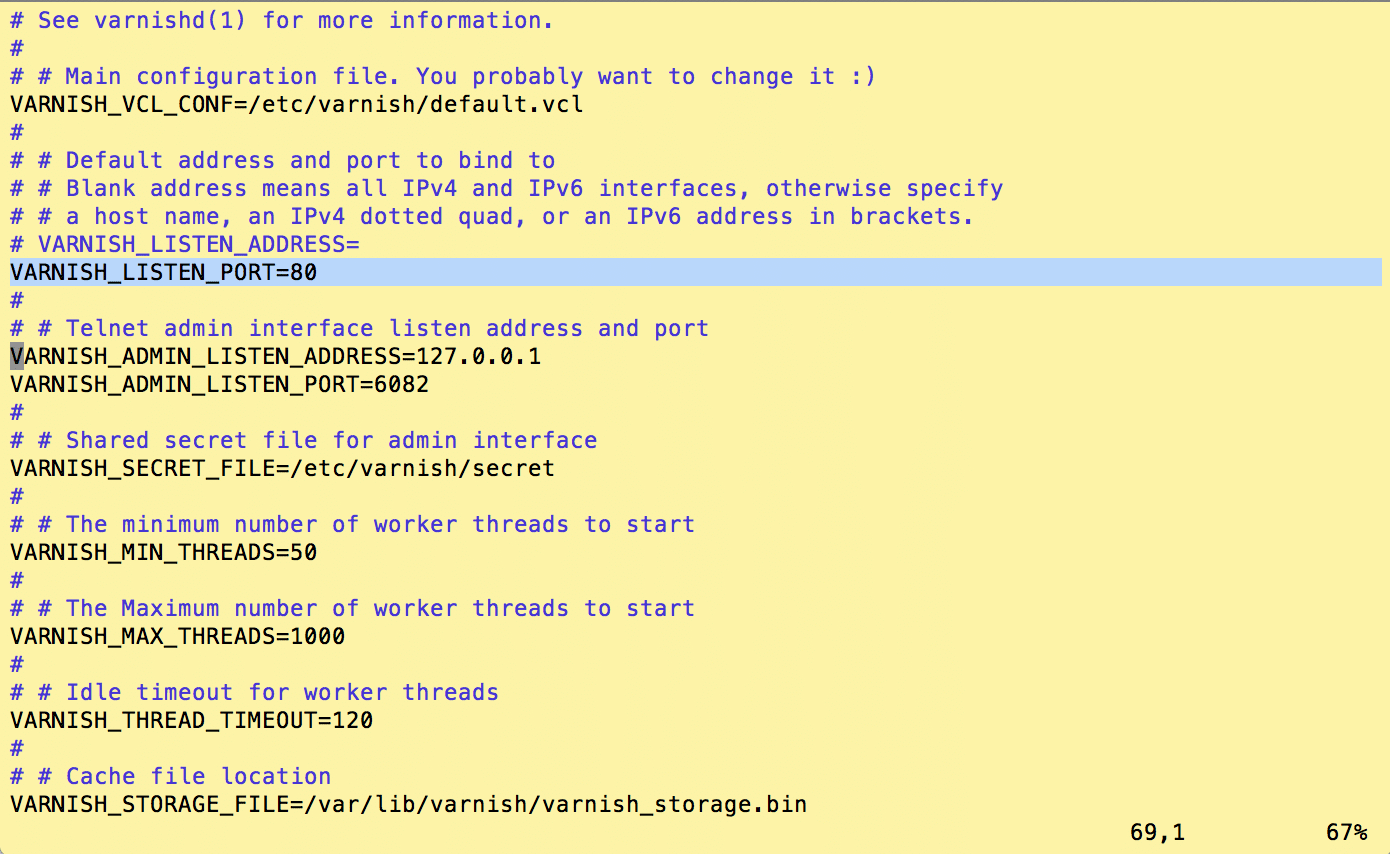
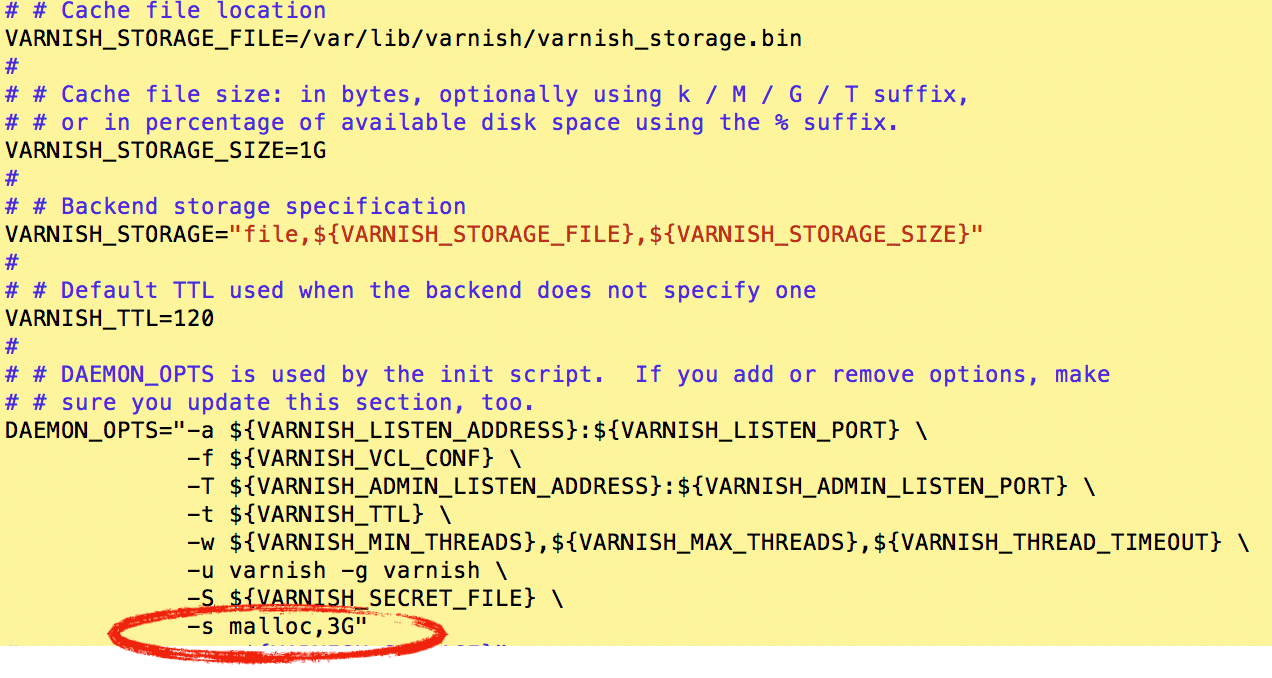
While you’re in this file you should also consider changing a couple of the default settings; namely, the size of the varnish cache and it’s location. For best performance you should change the storage location from a file-based to an in-memory store. You’ll also want to experiment with the size in order to interpolate into the ideal size range so as to prevent thrashing while avoiding inefficient memory allocation. To switch to an in-memory store look for the last parameter in the DEAMON-OPTS string -s ${VARNISH_STORAGE}” and replace this with -s malloc,3G”
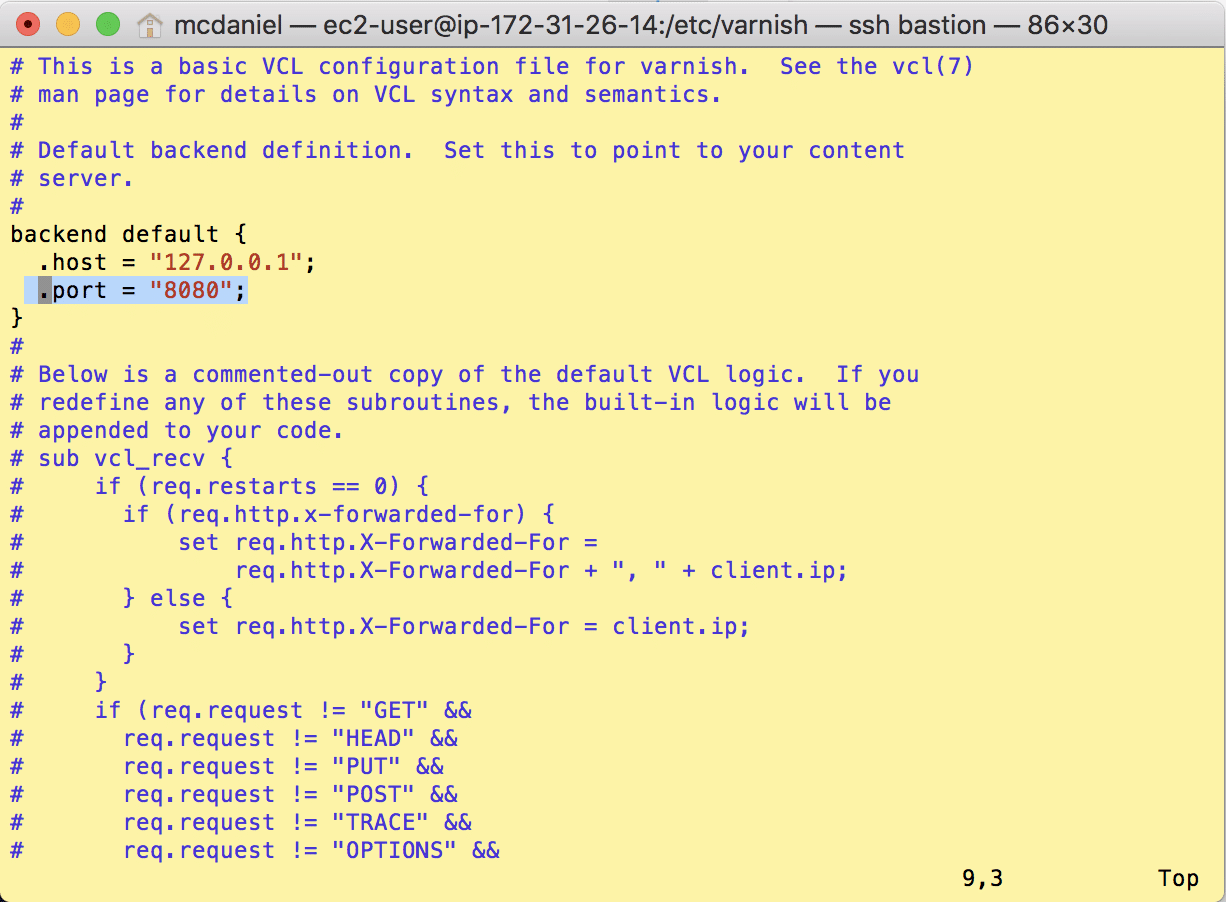
Now, we need to configure Varnishe’s “backend” (a misleading name btw) so that outbound traffic flows to Apache. We’re going to proclaim 8080 to be the new port on which Apache listens. Additionally you’ll see a host setting in this same config file. We’ve installed Varnish locally and so the default value of 127.0.0.1 is correct unless you’ve tinkered with the host table.
sudo vim /etc/varnish/default.vcl
Incidentally, varnish is highly configurable, but a word of caution: it comes with a learning curve. You can follow this link to a plug-and-play Varnish vcf file for WordPress: github.com/lawrencemcdaniel-dot-com/varnish
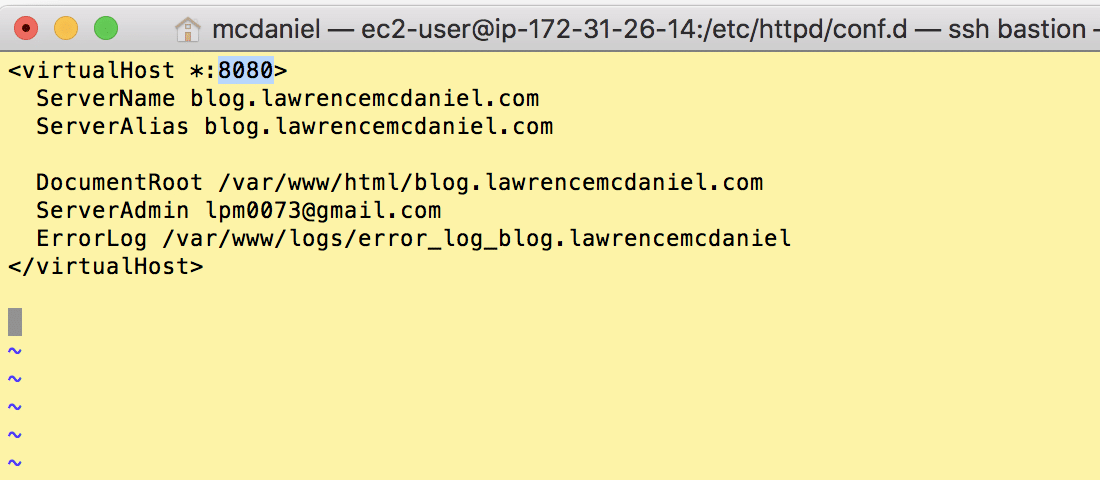
Now we’ll change the port upon which your site listens from 80 to 8080. This will effectively move Apache behind Varnish, which is now receiving all inbound http traffic. Apache will only receive traffic in cases where Varnish experienced a cache “miss”. Otherwise, in most cases Varnish will process the inbound http request and return the response page, leaving Apache and WordPress with nothing to do. Very Cool!!!
sudo vim /etc/httpd/conf.d/[THE-NAME-OF-YOUR-CONFIG-FILE].conf
We need to restart Apache and Varnish for these configuration changes to take effect
sudo service httpd restart
sudo service varnishd restart
4. Test Varnish Cache On Apache
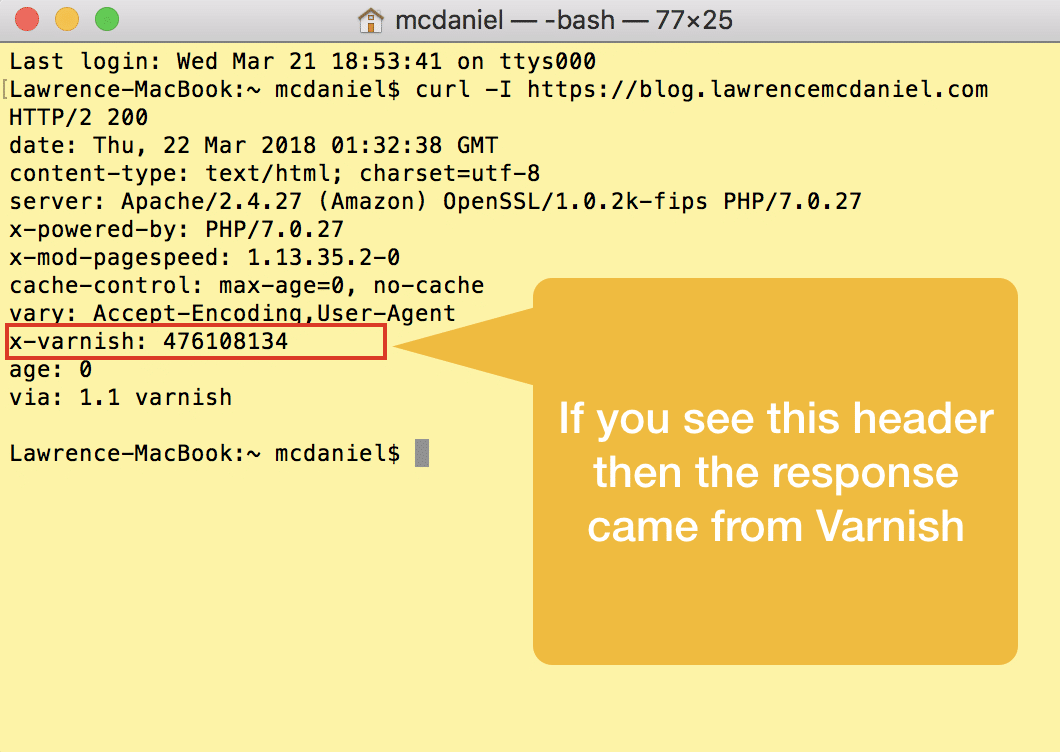
Lets use curl (which means, “see URL”) with a special argument that will show us the http response header received from the server. It’s important that you run this test from outside of your server environment.
curl -I https://blog.lawrencemcdaniel.com
5. WordPress Integration
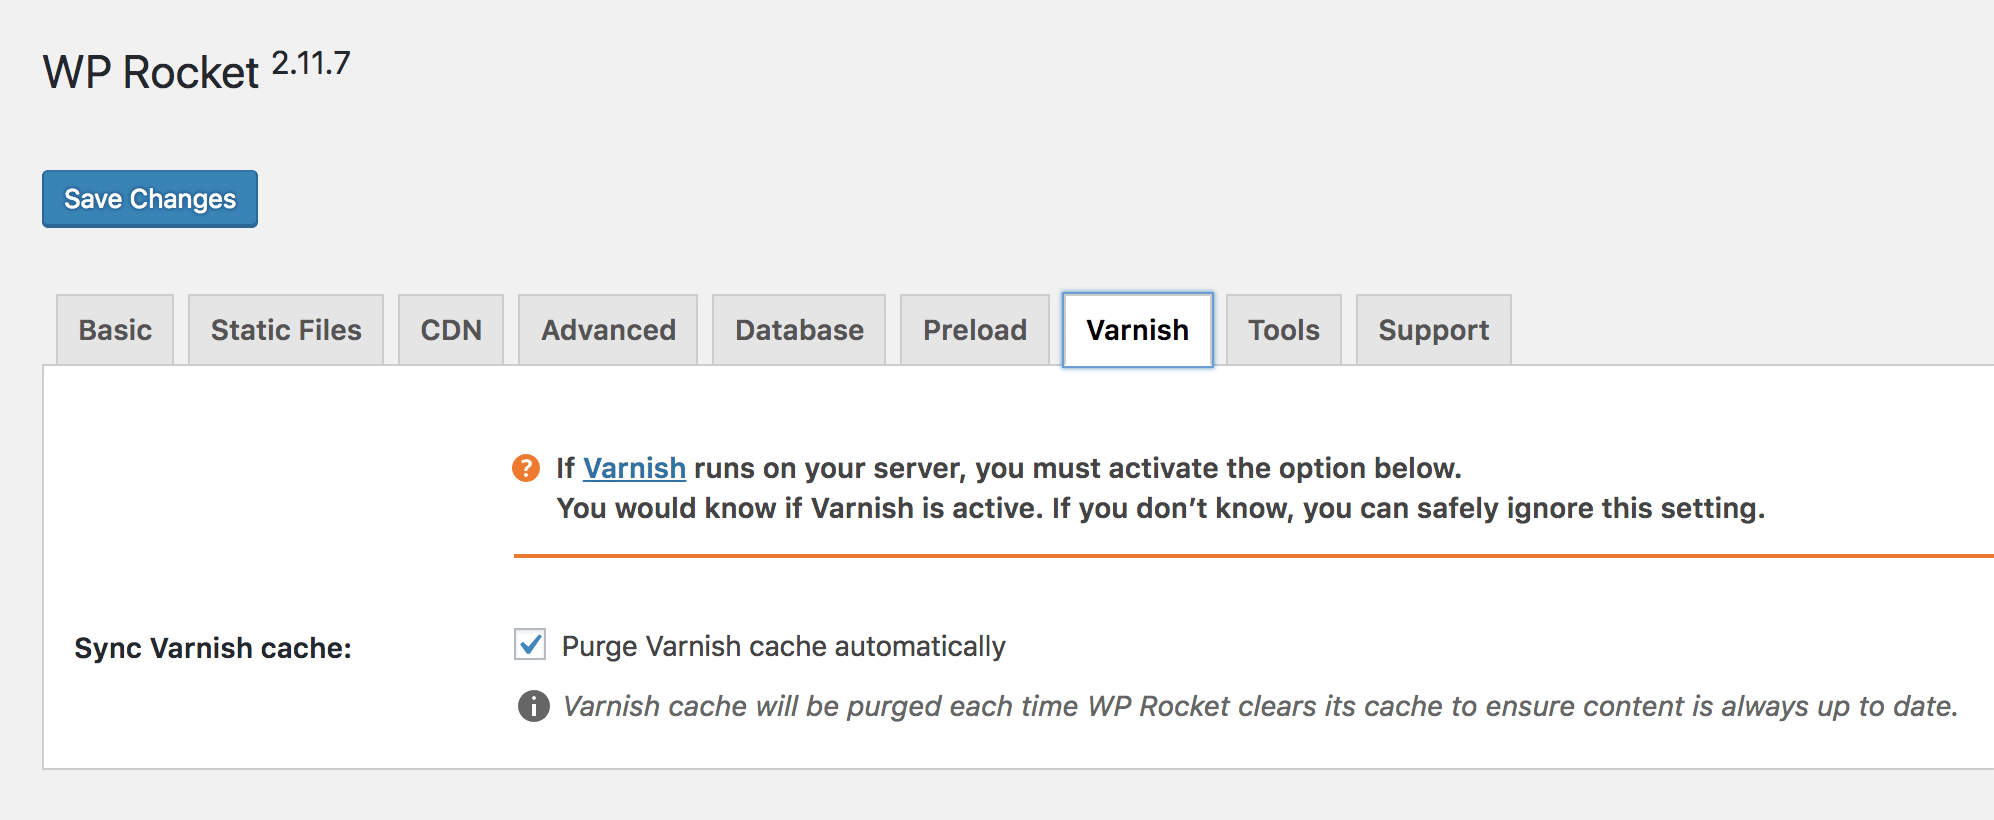
A conundrum with using reverse proxy caching solution like Varnish is that it has absolutely no knowledge of what’s behind it, and thus, no means of coordinating with a source system like WordPress for purposes of invalidating objects in the cache as newer updates comes available. After considerable research and testing I decided on a premium WordPress plugin named WP Rocket that, among other impressive features, provides seamless synchronization to a Varnish cache. WP Rocket sells for around $39 US dollars as of the time of this writing, and they offer quantity discounts that are attractive. It’s not cheap, but as they say, you tend to get what you pay for. Anyway, I recommend it.
6. Monitor Your Varnish Cache
Once you get Varnish running there’s no better self gratification that monitoring cache hits to see how much more efficient your pages are being served. Fortunately, Varnish comes with a robust set of command line dashboard reporting tools that will show you everything you’ll ever need to know. These are powerful not only for monitoring performance but also for trouble-shooting weird situations where content does not cache as you’d anticipated, or worse, cached content doesn’t invalidate when it’s supposed to.
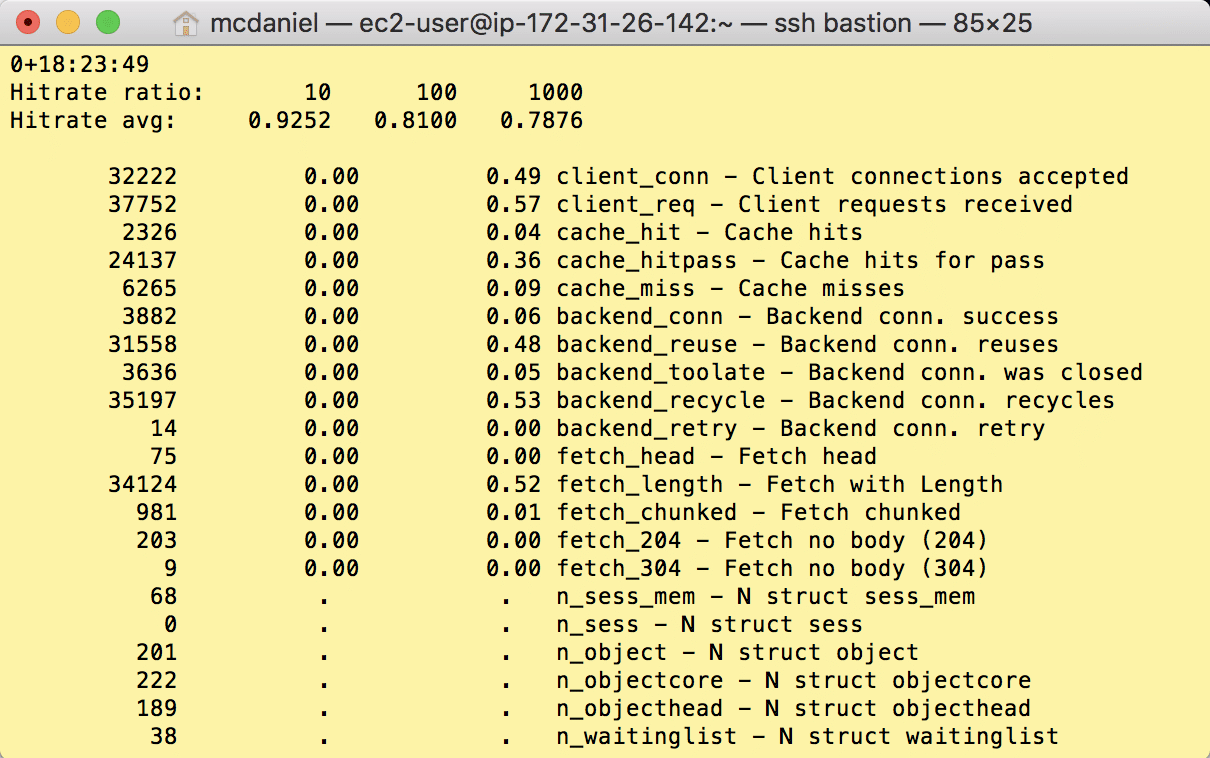
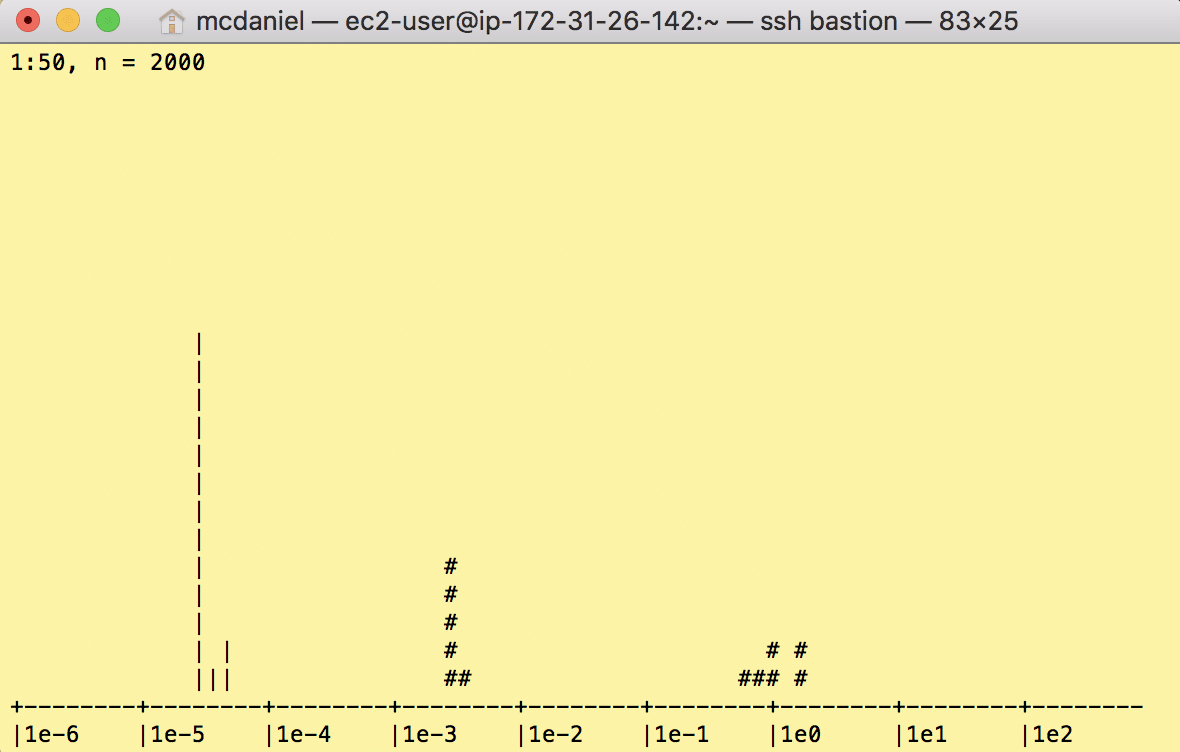
First, there’s varnishstat which provides you with a real-time dashboard of your hit ratio, presented over 10-second, 100-second and 1,000-second intervals. Immediately below these performance metrics are real-time updates to other key performance and health indicators. With this one powerful tool you can glean considerable insight into happening with your Varnish cache.
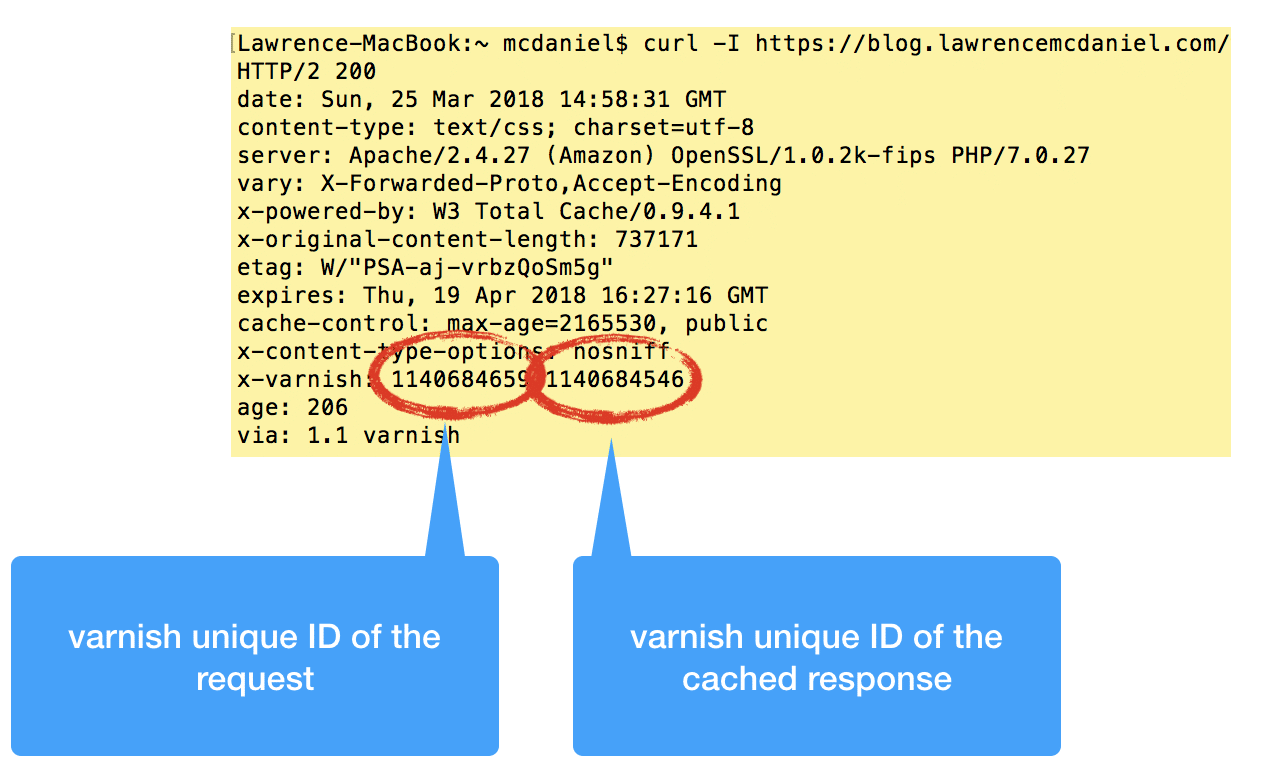
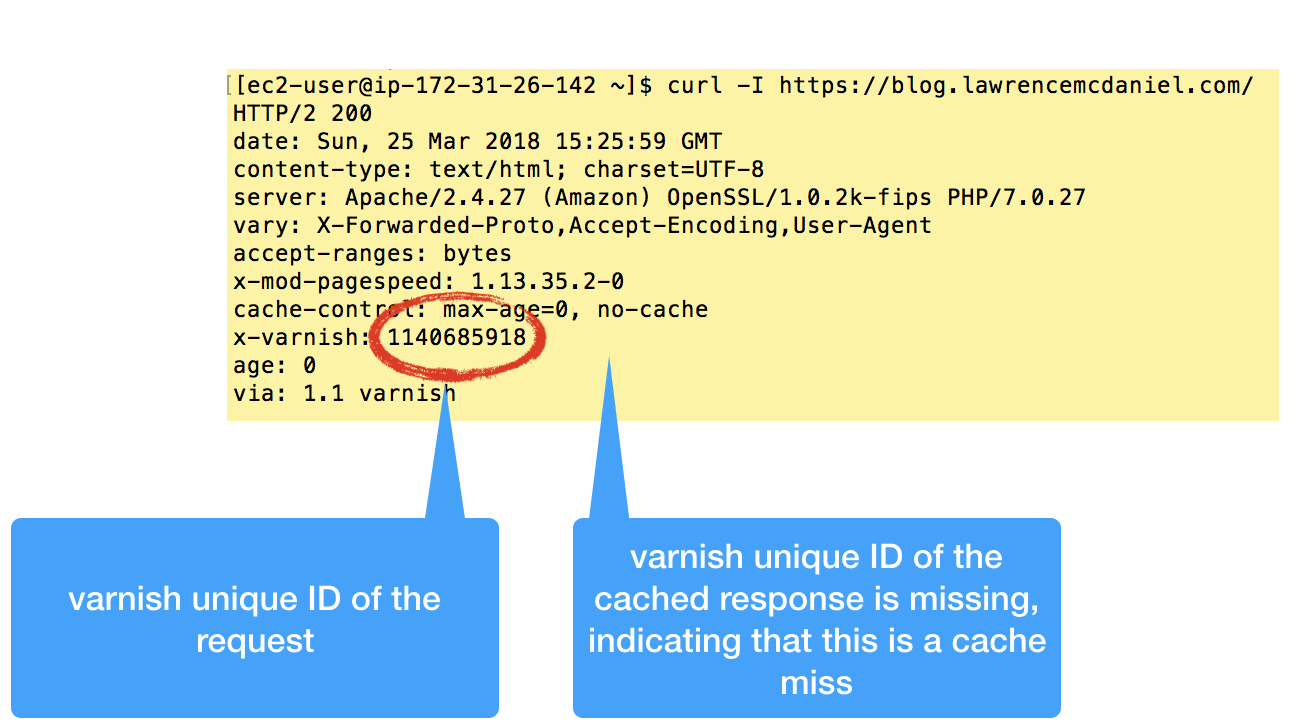
For trouble-shooting I find curl helpful.
curl -I https://blog.lawrencemcdaniel.com/
Curl is good because response headers often vary depending on circumstances that are internal to the application from which the http request was received. WordPress for example, when using a performance optimization plugin like W3 Total Cache will add, remove and manipulate response headers based on optimization settings in the plugin. Therefore, it’s often necessary to curl a URL several times in order to visualize the complete set of possible behaviors.
There’s also varnishhist which generates an ASCII-art style histogram of cache hits and misses. It doesn’t necessarily provide any additional actionable information, but it looks really cool!
Performance measurement and monitoring is a rabbit hole into which many web operators joyfully dive. If you want to read and learn more then I suggest these excellent and detailed articles:
I hope you found this helpful. Please help me improve this article by leaving a comment below. Thank you!


hi
i got some problem what file name shuld i use to execute
sudo vim /etc/httpd/conf.d/[THE-NAME-OF-YOUR-CONFIG-FILE].conf
sudo yum install varnish
Doesn’t seem to install the varnish latest version 6.0
I have been using it for the past 4 years which is hosted with Cloudways, https://www.cloudways.com/en/amazon-cloud-hosting.php, It’s fully secured and they keep a daily backup just to stay away from these type of security issues. Using Varnish, SSL , CDN and more.